Making a Loading Spinner with tkinter

By Matt Vollrath
March 5, 2024
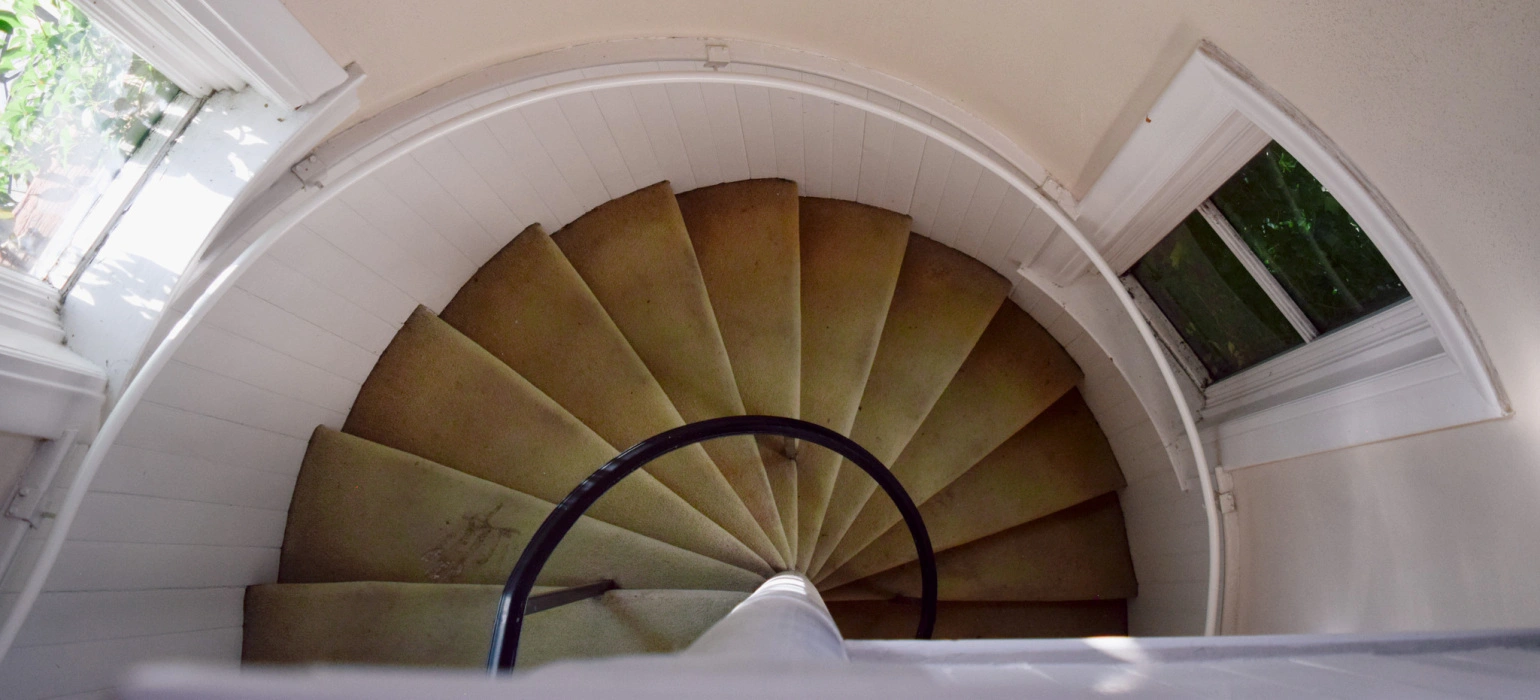
When you need a loading spinner, you really need a loading spinner. Interested in putting something on the screen without installing a pile of dependencies, I reached deep into the toolbox of the Python standard library, dug around a bit, and pulled out the tkinter module.
The tkinter module is an interface to the venerable Tcl/Tk GUI toolkit, a cross-platform suite for creating user interfaces in the style of whatever operating system you run it on. It’s the only built-in GUI toolkit in Python, but there are many worthy alternatives available (see the end of the post for a list).
Here I’ll demonstrate how to make a loading spinnner with tkinter on Ubuntu 22.04. It should work on any platform that runs Python, with some variations when setting up the system for it.
Prerequisites
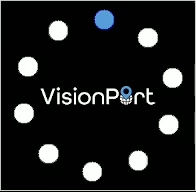
My vision for the loading spinner is some spinning dots and a logo, since this is such a convenient branding opportunity. To accomplish this we’ll be extending tkinter with Pillow’s ImageTk capability, which can load a PNG with transparency.
To produce that PNG with transparency, first we may need to rasterize an SVG file, because wise designers work in vectors. This is made trivial by Inkscape, a free and complete vector graphics tool:
$ inkscape logo.svg -o logo.pngWith the logo in hand, we can move on to setting up our dependencies. Ubuntu’s python3 distribution doesn’t include tkinter by default, so we’ll need to install it explicitly, along with Pillow’s separate ImageTk support:
$ sudo apt install python3-tk python3-pil.imagetkThis may occupy up to 75MB, if Python was already installed. This was still the smallest apt footprint of all of the Python GUI libraries in consideration. Pygame was also a strong contender.
Code
Let’s start with something simple: putting the logo on the screen.
#!/usr/bin/env python3

from PIL import Image, ImageTk
from tkinter import BOTH, Canvas, Tk


# Desired dimensions of our window.
WIDTH, HEIGHT = 500, 500

if __name__ == "__main__":
    # Create the root window object.
    root = Tk()
    # Create a canvas for drawing our graphics.
    canvas = Canvas(root, width=WIDTH, height=HEIGHT, background="black")
    # Fill the entire window with the canvas.
    canvas.pack(fill=BOTH, expand=1)

    # Load the logo PNG with regular PIL.
    logo_img = Image.open("logo.png")
    # Convert the logo to an ImageTk PhotoImage.
    logo_pi = ImageTk.PhotoImage(logo_img)
    # Add our logo image to the canvas.
    canvas.create_image(
        WIDTH / 2,
        HEIGHT / 2,
        image=logo_pi,
    )

    # Run the tkinter main loop.
    root.mainloop()
This puts the logo in the center of a window, but the logo may be too large or small. Let’s scale it according to the window dimensions, let’s say to about ⅔ of the width so we have some room for spinning dots:
#!/usr/bin/env python3

from PIL import Image, ImageTk
from tkinter import BOTH, Canvas, Tk


# Desired dimensions of our window.
WIDTH, HEIGHT = 500, 500

if __name__ == "__main__":
    # Create the root window object.
    root = Tk()
    # Create a canvas for drawing our graphics.
    canvas = Canvas(root, width=WIDTH, height=HEIGHT, background="black")
    # Fill the entire window with the canvas.
    canvas.pack(fill=BOTH, expand=1)

    # Load the logo PNG with regular PIL.
    logo_img = Image.open("logo.png")
    # Resize the logo to about 2/3 the window width.
    scaled_w = round(WIDTH * 0.6)
    scaled_h = round(scaled_w / (logo_img.width / logo_img.height))
    logo_img = logo_img.resize((scaled_w, scaled_h), Image.LANCZOS)
    # Convert the logo to an ImageTk PhotoImage.
    logo_pi = ImageTk.PhotoImage(logo_img)
    # Add our logo image to the canvas.
    canvas.create_image(
        WIDTH / 2,
        HEIGHT / 2,
        image=logo_pi,
    )

    # Run the tkinter main loop.
    root.mainloop()
That’s better. Now let’s add the promised spinning dots. We’ll draw some ovals on the canvas and modify our main loop to animate them:
#!/usr/bin/env python3

import math
import time

from PIL import Image, ImageTk
from tkinter import BOTH, Canvas, Tk


# Desired dimensions of our window.
WIDTH, HEIGHT = 500, 500
# Coordinates of the center.
CENTER_X, CENTER_Y = WIDTH / 2, HEIGHT / 2
# How many spinning dots we want.
NUM_DOTS = 8

if __name__ == "__main__":
    # Create the root window object.
    root = Tk()
    # Create a canvas for drawing our graphics.
    canvas = Canvas(root, width=WIDTH, height=HEIGHT, background="black")
    # Fill the entire window with the canvas.
    canvas.pack(fill=BOTH, expand=1)

    # Load the logo PNG with regular PIL.
    logo_img = Image.open("logo.png")
    # Resize the logo to about 2/3 the window width.
    scaled_w = round(WIDTH * 0.6)
    scaled_h = round(scaled_w / (logo_img.width / logo_img.height))
    logo_img = logo_img.resize((scaled_w, scaled_h), Image.LANCZOS)
    # Convert the logo to an ImageTk PhotoImage.
    logo_pi = ImageTk.PhotoImage(logo_img)
    # Add our logo image to the canvas.
    canvas.create_image(
        CENTER_X,
        CENTER_Y,
        image=logo_pi,
    )

    # Radius in pixels of a single dot.
    dot_radius = WIDTH * 0.05
    # Radius of the ring of dots from the center of the window.
    dots_radius = WIDTH / 2 - dot_radius * 2

    # Helper function to calculate dot position on each update.
    def get_dot_coords(n: int, t: float):
        """Get the x0, y0, x1, y1 coords of dot at index 'n' at time 't'."""
        angle = (n / NUM_DOTS) * math.pi * 2 + t
        x = math.cos(angle) * dots_radius + CENTER_X
        y = math.sin(angle) * dots_radius + CENTER_Y
        return x - dot_radius, y - dot_radius, x + dot_radius, y + dot_radius

    # Create all the dots.
    t0 = time.monotonic()
    for n in range(NUM_DOTS):
        coords = get_dot_coords(n, t0)
        canvas.create_oval(
            *coords,
            fill="#888888",
            width=0,  # Border width.
            tags=f"dot_{n}",
        )

    # Set up a custom main loop to animate the moving dots.
    while True:
        # Check the time of this update.
        t = time.monotonic()
        for n in range(NUM_DOTS):
            # Get the desired coords for this dot at this time.
            coords = get_dot_coords(n, t)
            # Move the dot on the canvas, finding it by its tag.
            canvas.coords(
                f"dot_{n}",
                *coords,
            )
        # Call the required tkinter update function.
        root.update()
        # Attempt to stabilize the timing of this loop by targeting 60Hz.
        while t0 < t:
            t0 += 1 / 60
        time.sleep(t0 - t)
You may notice that the dots don’t look all that great. There’s no anti-aliasing when drawing shape primitives in tkinter, so the edges look jagged compared to our well-scaled logo image. One hack is to layer slightly larger and dimmer shapes under each object, which you might do like so:
#!/usr/bin/env python3

import math
import time

from PIL import Image, ImageTk
from tkinter import BOTH, Canvas, Tk


# Desired dimensions of our window.
WIDTH, HEIGHT = 500, 500
# Coordinates of the center.
CENTER_X, CENTER_Y = WIDTH / 2, HEIGHT / 2
# How many spinning dots we want.
NUM_DOTS = 8
# Colors for each layer of fake anti-aliasing around each dot.
# Must be in order from back to front.
COLORS = ["#888888", "#BBBBBB", "#FFFFFF"]

if __name__ == "__main__":
    # Create the root window object.
    root = Tk()
    # Create a canvas for drawing our graphics.
    canvas = Canvas(root, width=WIDTH, height=HEIGHT, background="black")
    # Fill the entire window with the canvas.
    canvas.pack(fill=BOTH, expand=1)

    # Load the logo PNG with regular PIL.
    logo_img = Image.open("logo.png")
    # Resize the logo to about 2/3 the window width.
    scaled_w = round(WIDTH * 0.6)
    scaled_h = round(scaled_w / (logo_img.width / logo_img.height))
    logo_img = logo_img.resize((scaled_w, scaled_h), Image.LANCZOS)
    # Convert the logo to an ImageTk PhotoImage.
    logo_pi = ImageTk.PhotoImage(logo_img)
    # Add our logo image to the canvas.
    canvas.create_image(
        CENTER_X,
        CENTER_Y,
        image=logo_pi,
    )

    # Radius in pixels of a single dot.
    dot_radius = WIDTH * 0.05
    # Radius of the ring of dots from the center of the window.
    dots_radius = WIDTH / 2 - dot_radius * 2

    # Helper function to calculate dot position on each update.
    def get_dot_coords(n: int, t: float, c: int):
        """Get the x0, y0, x1, y1 coords of dot at index 'n' at time 't'.
        Inflate the radius by color index 'c'."""
        angle = (n / NUM_DOTS) * math.pi * 2 + t
        x = math.cos(angle) * dots_radius + CENTER_X
        y = math.sin(angle) * dots_radius + CENTER_Y
        # Invert the color index and add to the radius.
        radius = dot_radius + (len(COLORS) - c) * 0.75
        #radius = dot_radius + c
        return x - radius, y - radius, x + radius, y + radius

    # Create all the dots.
    t0 = time.monotonic()
    for c, color in enumerate(COLORS):
        for n in range(NUM_DOTS):
            coords = get_dot_coords(n, t0, c)
            canvas.create_oval(
                *coords,
                fill=color,
                width=0,  # Border width.
                tags=f"dot_{c}_{n}",
            )

    # Set up a custom main loop to animate the moving dots.
    while True:
        # Check the time of this update.
        t = time.monotonic()
        for c, color in enumerate(COLORS):
            for n in range(NUM_DOTS):
                # Get the desired coords for this dot at this time.
                coords = get_dot_coords(n, t, c)
                # Move the dot on the canvas, finding it by its tag.
                canvas.coords(
                    f"dot_{c}_{n}",
                    *coords,
                )
        # Call the required tkinter update function.
        root.update()
        # Attempt to stabilize the timing of this loop by targeting 60Hz.
        while t0 < t:
            t0 += 1 / 60
        time.sleep(t0 - t)
The fake anti-aliasing was a fun exercise, but for this use case you’ll probably get better-looking results out of scaling a PNG asset like we did the logo.
Resources
If you’re interested in learning more about tkinter, see also:
Other Python GUI/graphics toolkits you might consider:
linux graphics python ubuntu user-interface visionport
Comments