How to deploy a Django App with Aurora Serverless and AWS Copilot

By Jeffry Johar
June 26, 2022

Photo by Виктор Куликов
AWS Copilot has the capability to provision an external database for its containerized work load. The database options are DynamoDB (NoSQL), Aurora Serverless (SQL), and S3 Buckets. For this blog we are going to provision and use Aurora Serverless with a containerized Django app. Aurora Serverless comes with 2 options for its engine: MySQL or PostgreSQL.
Watch Amazon’s 2-minute introduction video to get the basic idea of Aurora Serverless.
We are going to work with the same Django application from my last article on AWS Copilot.
In my last article, the Django application was deployed with SQLite as the database. The application’s data is stored in SQLite which resides internally inside the container. The problem with this setup is the data is not persistent. Whenever we redeploy the application, the container will get a new filesystem. Thus all old data will be removed automatically.
Now we are moving away the application’s data externally so that the life of the data does not depend on the container. We are going to put the data on the Aurora Serverless with PostgreSQL as the engine.
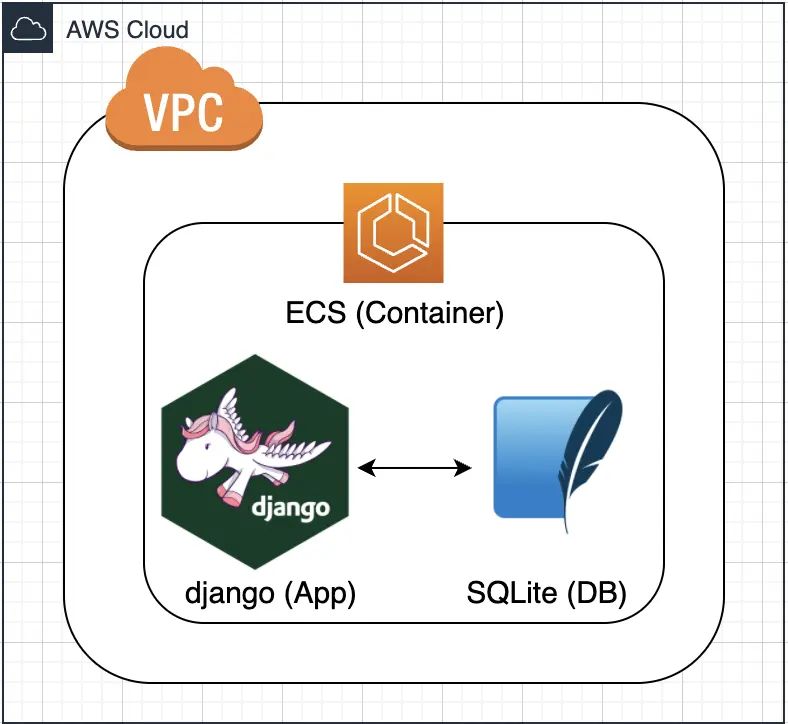
Django with SQLite as the internal database
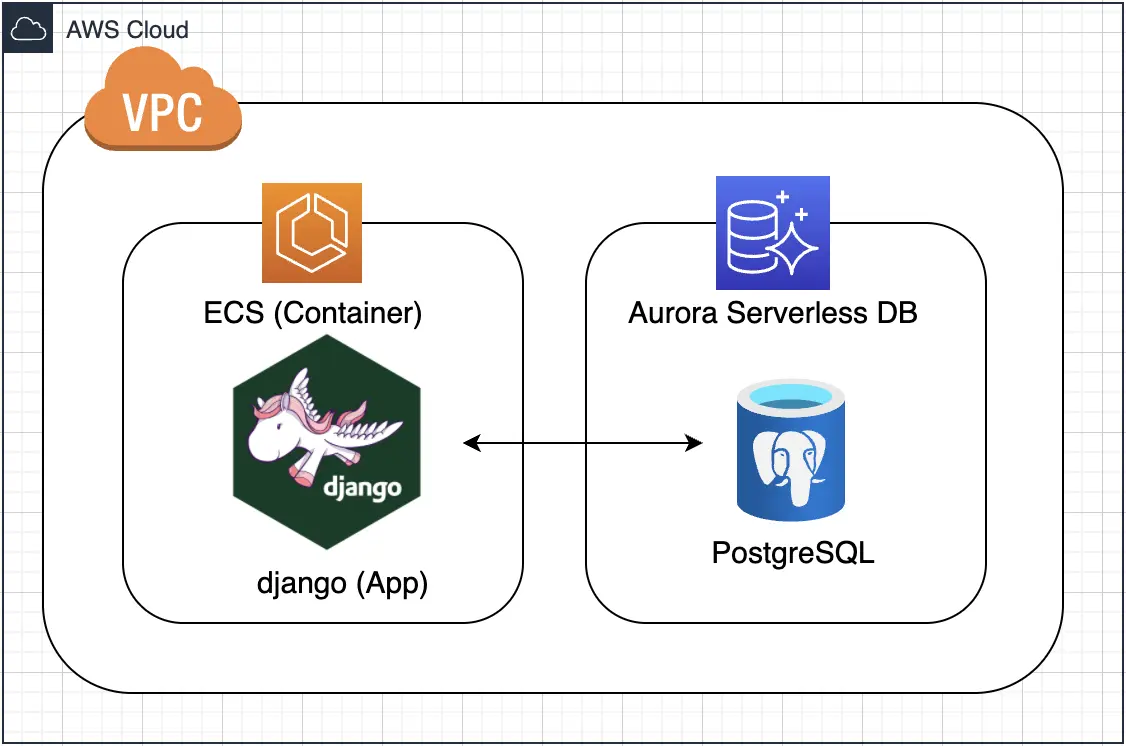
Django with Aurora Serverless as the external database
The Prerequisites
Docker, AWS CLI, and AWS Copilot CLI are required. Please refer to my last article for how to install them.
The Django Project
Create a Django project by using a Python Docker Image. You can clone my Git project to get the Dockerfile, docker-compose.yaml and requirements.txt that I’m using:
$ git clone https://github.com/aburayyanjeffry/django-copilot.git django-auroraGo to the django-aurora directory and execute docker-compose to create a Django project named “mydjango”.
$ cd django-aurora
$ docker-compose run web django-admin startproject mydjango
The Deployment with AWS Copilot
Execute the following command to create a AWS Copilot application with the name of “mydjango”, a load balancer container with the service name “django-web” which is made from the Dockerfile in the current directory.
$ copilot init \
-a mydjango \
-t "Load Balanced Web Service" -n django-web \
-d ./Dockerfile
Answer N to the following question. We want to defer the deployment until we have set up the database.
All right, you're all set for local development.

 Would you like to deploy a test environment? [? for help] (y/N) N
We need to create an environment for our application. Execute the following to create an environment named test for the “mydjango” application with the default configuration.
$ copilot env init \
--name test \
--profile default \
--app mydjango \
--default-config
Now we are going to generate a config for our Aurora Serverless database. Basically this is the CloudFormation template that will be used for Aurora Serverless.
Execute the following to generate the configuration for an Aurora cluster named “mydjango-db” that we will use for the “django-web” application. The Aurora cluster will be using the PostgreSQL engine and the database name will be “mydb”.
$ copilot storage init \
-n mydjango-db \
-t Aurora -w \
django-web \
--engine PostgreSQL \
--initial-db mydb
Take note of the injected environment variable name. This is where the database info and credentials are stored, and we will use this variable in later steps.
✔ Wrote CloudFormation template at copilot/django-web/addons/mydjango-db.yml

Recommended follow-up actions:
 - Update django-web's code to leverage the injected environment variable MYDJANGODB_SECRET.
Edit mydjango/settings.py to include the following. We will pass the injected environment variable we got previously to the function for getting the DBINFO variables.
from pathlib import Path
import os
import json
...
ALLOWED_HOSTS = ['*']
...
DBINFO = json.loads(os.environ.get('MYDJANGODB_SECRET', '{}'))
DATABASES = {
   'default': {
       'ENGINE': 'django.db.backends.postgresql',
       'HOST': DBINFO['host'],
       'PORT': DBINFO['port'],
       'NAME': DBINFO['dbname'],
       'USER': DBINFO['username'],
       'PASSWORD': DBINFO['password'],
   }
}
Deploy the application:
$ copilot deploy --name django-webOpen the terminal of the service:
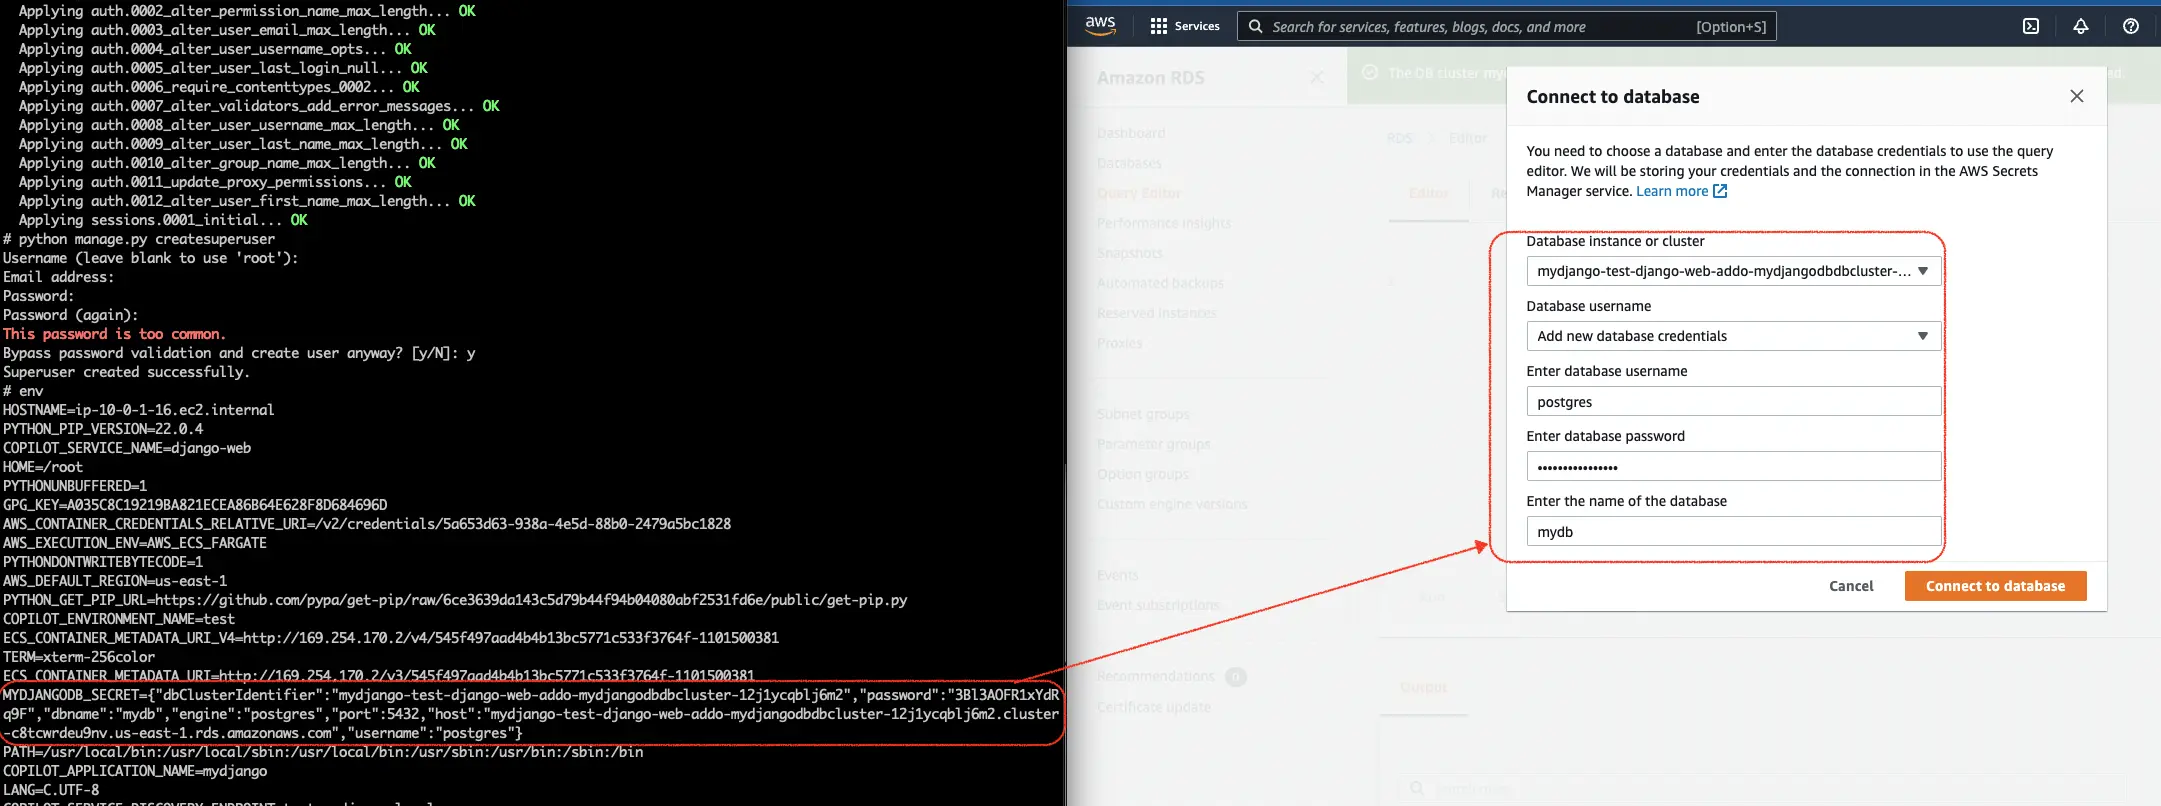
$ copilot svc execExecute the following commands to migrate the initial database and to create a superuser account:
$ python manage.py migrate
$ python manage.py createsuperuser
Execute the following command to check on the environment variable. Take note of the MYDJANGODB_SECRET variable. It is the variable that holds the database information.
$ env | grep MYDJANGODB_SECRETHow to query Aurora Serverless
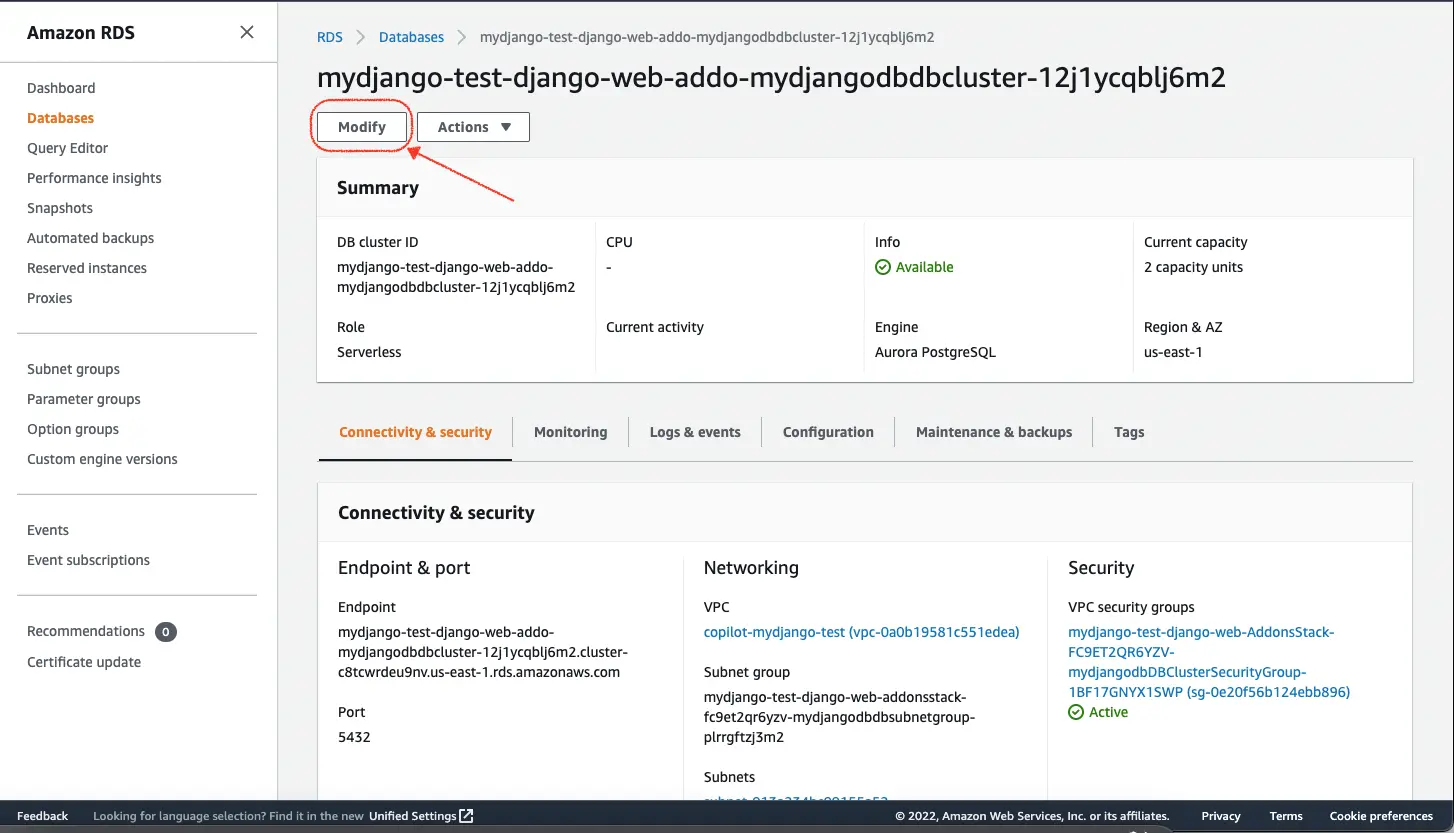
We can use the Query Editor at AWS Console for RDS to query Aurora Serverless.
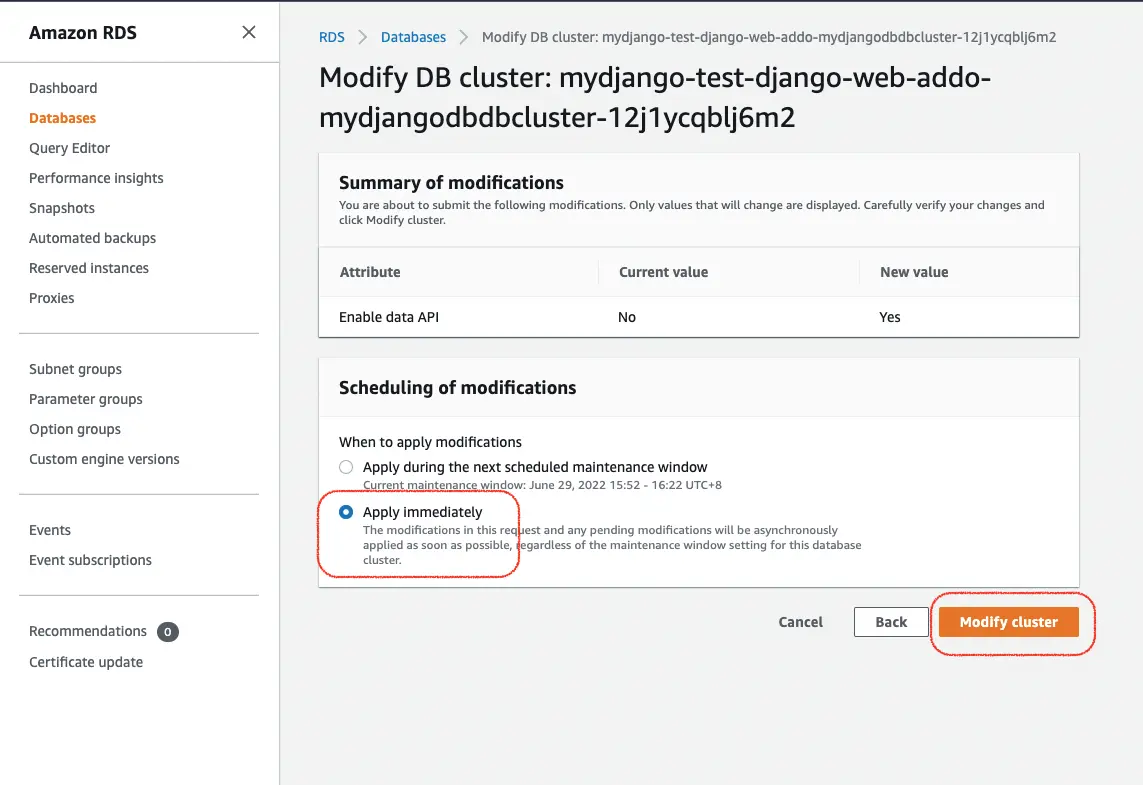
Click the DB base on the DB identifier from the injected environment variable and click Modify.
Click the check box for Data API.
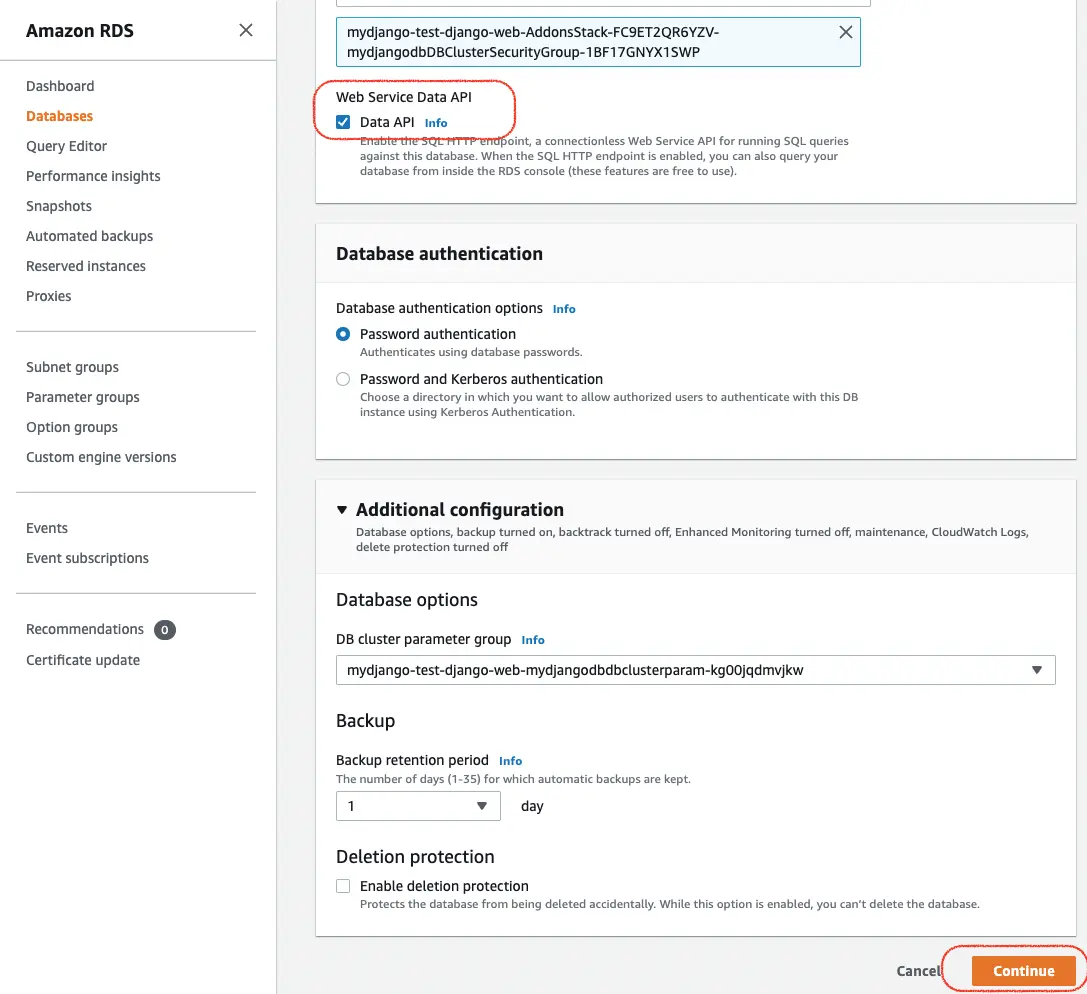
Select Apply Immediately.
Click Query Editor and fill in the Database information from the injected environment variable.
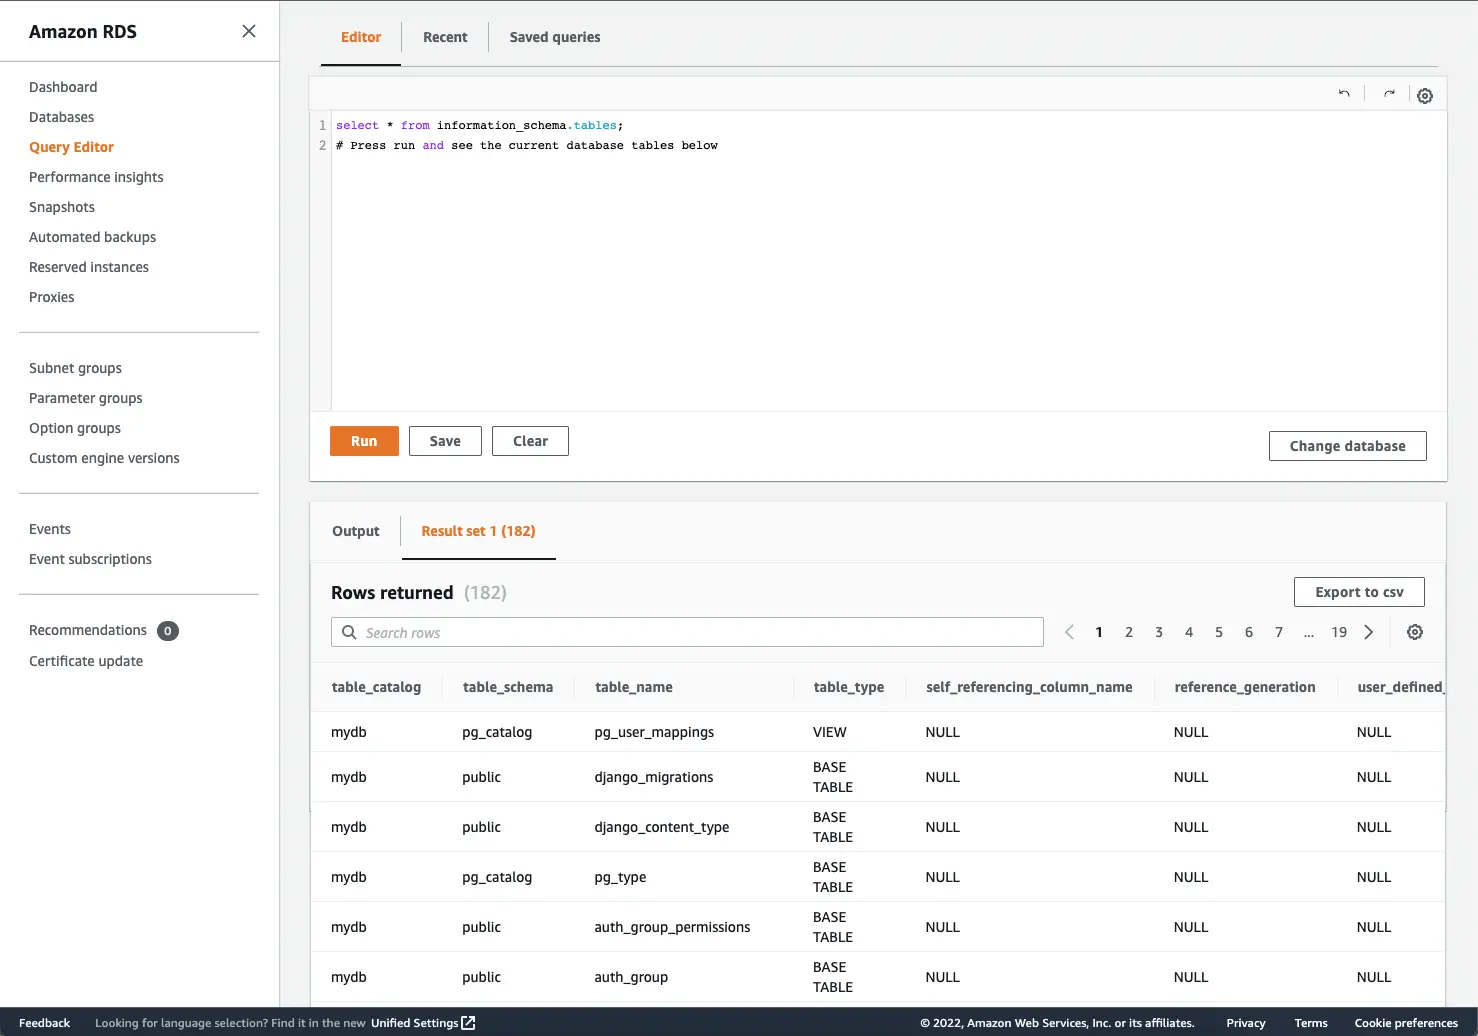
Now you may use the Query Editor to query the database. Execute the following query to list all tables in the database:
The End
That’s all, folks. We have deployed a containerized Django application and an Aurora Serverless with AWS Copilot. For further info on AWS Copilot visit its website.
docker containers aws postgres
Comments