Svelte: A compiled JavaScript front-end framework

By Kevin Campusano
December 2, 2020

It seems like JavaScript frameworks are a dime a dozen these days. In the JavaScript world, there are frameworks and libraries for almost every task that you can imagine, and there is much overlap. In the front-end web development area though, there are three who reign supreme: Angular, React, and Vue.js. Whether you’re building single-page apps or traditional web apps with some front-end zest, you can’t go wrong with any of these three.
Recently though, I discovered a new player in this field that promises to offer a similar developer experience to existing frameworks with great performance gains. Its name is Svelte, and it achieves this promise in a very interesting way: it’s a compiler.
This is a novel approach to the front-end web development problem. While traditional front-end frameworks are libraries with runtime components that get loaded and executed in the browser, Svelte itself only runs at development/build time, on your development machine. Svelte takes the JavaScript components that we write, compiles them into pure, lean JavaScript and emits only that to the browser. No big library, or runtime, or interpretation of components ever happens in the browser. It doesn’t do any of this, and yet still offers a robust component framework with all the features that you might expect like reactivity, templating capabilities, scoped CSS, data binding, etc.
If we can truly get much better performance while maintaining a familiar developer experience when compared to more traditional frameworks (or improving it in some cases), that sounds like we get to have our cake and eat it too.
After learning all that, I decided to take a closer look at Svelte and see how it works, how it’s similar to and different from other frameworks, and what new features it brings to the table. In this blog post, I’ll discuss some of my most interesting findings.
Simple components
In Svelte, the concept and mechanics of components are similar to those of other frameworks. Components encapsulate the HTML, CSS, and JavaScript of a given portion of our applications in a reusable manner. Svelte components look very similar to plain old HTML files, minimal fluff. Here’s what a “hello world” example could look like as a Svelte component:
<h1>{ message }!</h1>
<p>{ author }</a>

<script>
  export let author;
  let message = "Hello World";
</script>

<style>
  h1 {
    color: royalblue;
  }
</style>
Very simple, refreshing even. This content would live inside a *.svelte file which is what Svelte components should be named. As you can see, the <style> and <script> tags contain just plain old CSS and JavaScript, respectively. export let author is how we declare component props. That is, values that are supplied as parameters by the component that’s parent to this one, or, if this was the top most component, by the client code that initializes the Svelte application.
The rest of the file, the view template, is also plain HTML with some curly brace goodness injected by Svelte that allows us to render the results from JavaScript expressions. In this case, we are just rendering the message and author variable that we defined in the <script> portion of our component.
Now, Svelte has a lot of features, so it does add some syntax to spice up HTML templates and it also uses some unconventional JavaScript to express some constructs. Nothing too revolutionary though, as we’ll see later.
It’s easy to set up
In front-end web development, we spend most of the time authoring components like these, so we’ll talk more about them later. In order for the components to do anything, though, we need that compilation step that I mentioned earlier. That means setting up a new Svelte project in our development environment. Luckily for us, Svelte makes this easy.
All you need is to install Node.js so that you have npm and npx available and can run this:
npx degit sveltejs/template my-svelte-projectThis will use the Svelte project template hosted here to get you up and running quickly with a working application and build pipeline.
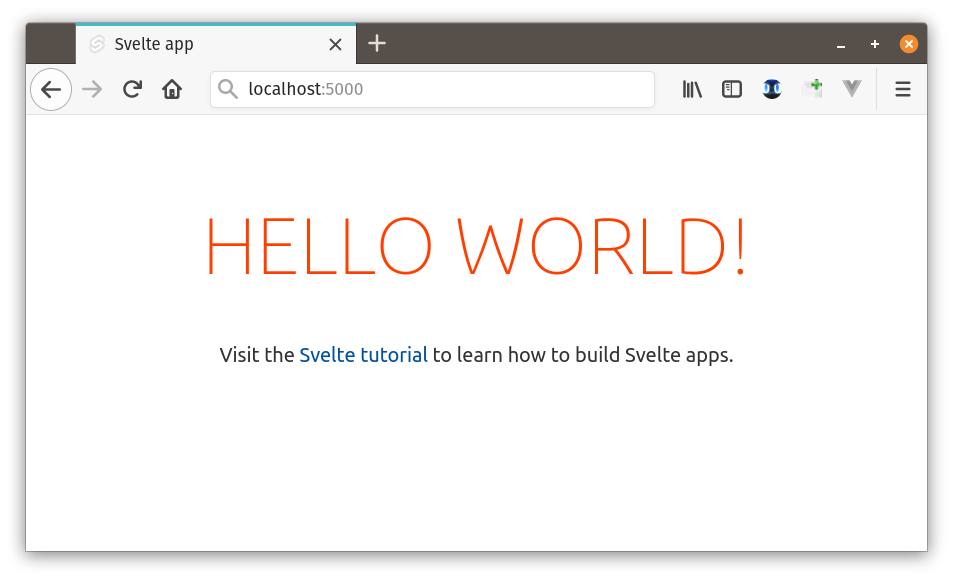
cd into the my-svelte-project directory that was just created and run npm install to install all dependencies needed by the app. Then, run npm run dev and that should start a development web server that you can reach with your browser via “localhost:5000”. You’ll be greeted by this:
Feel free to explore the app files. You’ll see there’s an App.svelte file that has our sole app component. It contains some HTML, CSS, and JS. main.js is particularly interesting for us at this point because it shows us how a Svelte app is initiated.
import App from './App.svelte';

const app = new App({
  target: document.body,
  props: {
    name: 'world'
  }
});

export default app;
This should be very familiar if you’re used to the likes of Vue. Here, we import the App.svelte file and instantiate the JavaScript component contained within by passing it its target (that is, where in the DOM it is going to be mounted) and some props.
Notice how we import the component file directly and no Svelte library. We don’t need it because our app does not need Svelte to run. It only needs Svelte to build. Svelte, after all, is a compiler. It’s not a runtime dependency, but rather, a build time one.
You can learn more about the parameters that Svelte components expect in the official documentation.
Another interesting aspect of setting up a Svelte app is that it uses Rollup as a module bundler by default. You can confirm this by looking at the my-svelte-project/rollup.config.js file that was created. If you prefer Webpack, Svelte also supports it. All you need to do to build with Webpack instead of Rollup is use this command when creating your app:
npx degit sveltejs/template-webpack svelte-appThis is just using the project template hosted on GitHub and it will build out a Webpack-based application functionally identical to the one we’ve just created. You will see that such projects include a webpack.config.js file instead of rollup.config.js.
The templating capabilities are powerful
When it comes to templating, Svelte has everything that you would expect from a modern JavaScript front-end framework and then some. You’ve got your basics like interpolation and flow control, but there are also some more advanced features that look to be very useful. Here’s an example component that demonstrate some of the most common capabilities:
<script>
  let title = 'Trying out some Svelte features';
  let itsAllJustJavaScript = "It's all just JavaScript";
  let youCanAlsoUseHtml = 'You can also use <b><em>HTML</em></b>';
  let showThis = true;
  let things = ['a thing', 'another thing', 'a thingy'];
  let complicatedThings = [
    {id: 1, what: 'car', why: 'it can go fast'},
    {id: 2, what: 'plane', why: 'it can fly'},
    {id: 3, what: 'submarine', why: 'it can go underwater'}
  ];
</script>

<main>
  <!-- We can use any variable that's declared in <script> -->
  <h1>{title}</h1>

  <!-- We can use any valid JavaScript expression and its return value will be
    rendered.-->
  <p>{itsAllJustJavaScript.toUpperCase()}</p>

  <!-- Svelte will make sure to sanitize text so that no HTML is rendered by
    mistake... -->
  <p>{youCanAlsoUseHtml}</p>

  <!-- ...unless you explicitly tell it not to by using @html -->
  <p>{@html youCanAlsoUseHtml}</p>

  <!-- Conditional logic works as you would expect. -->
  {#if showThis}
    <p>Showing this</p>
  <!-- There's also {:else if ...} if you need it. -->
  {:else}
    <p>And not that</p>
  {/if}

  <!-- It can iterate over an array. -->
  <h2>Things</h2>
  <ul>
    {#each things as thing}
      <li>{thing}</li>
    {/each}
  </ul>

  <!-- It can also iterate over an array of objects and use their fields. -->
  <h2>Complicated things</h2>
  <ul>
    {#each complicatedThings as thing}
      <li>{thing.id}: a {thing.what} is complicated because {thing.why}</li>
    {/each}
  </ul>
</main>
There’s a more advanced feature that I think can prove very useful. Svelte supports rendering of templates based on promises. Here’s an example demonstrating how easy it is to implement a very common pattern on front-end development: displaying a loading message while we fetch some information via an HTTP request:
<script>
  // First, we define our promise and capture it in a variable.
  let url = 'https://vpic.nhtsa.dot.gov/api/vehicles/getmodelsformake/subaru?format=json'
  let promiseToGetSubarus = fetch(url).then(response => {
    if (response.ok) {
      return response.json();
    } else {
      throw new Error("Something went wrong ☹️");
    }
  });
</script>

<main>
  <!-- Then, in the template, we await the promise and show a loading message
    in the meantime. -->
  {#await promiseToGetSubarus}
    <p>loading Subarus...</p>
  <!-- When the promise resolves, we can render the result. The "data"
    variable here captures what our promise resolves with, in this case,
    it's "response.json()", like we defined in our JavaScript code. -->
  {:then data}
    <p>Message: {data['Message']}</p>

    <h2>Subaru Models</h2>
    <ul>
      {#each data['Results'] as model}
        <li>{model['Model_Name']}</li>
      {/each}
    </ul>
  <!-- We can also do some error handling in case our request fails. -->
  {:catch error}
    <p style="color: red">{error.message}</p>
  {/await}
</main>
This is a pretty neat feature. It embraces the modern JavaScript concept of promises and has the potential of reducing a good amount of boilerplate and, as a consequence, make our components easier to read.
Reactivity is built in, and leverages a quirky JavaScript feature
Svelte also checks the reactivity box, and it does so in some interesting ways.
First of all, any value that you include in a template is fully reactive. So, to take an example from Svelte’s own documentation, this works as you’d expect:
<script>
  // Here's our variable.
  let count = 0;

  // Here's a function that updates our "count" variable.
  function handleClick() {
    count += 1;
  }
</script>

<!-- This is how we tell Svelte to respond to the click event on this button by
  calling the handleClick function. -->
<button on:click={handleClick}>
  <!-- We use the count variable to render some markup here. It is reactive by
    default. That means that the view will be updated automatically
    every time the value changes. That is, every time the button is clicked. -->
  Clicked {count} {count === 1 ? 'time' : 'times'}
</button>
Try it out in Svelte’s official tutorial.
There’s also support for computed values. That is, values that are derived from other values and reactively change whenever the values they depend on are changed. Svelte solves this problem with so called reactive declarations. They look like this:
$: evenness = count % 2 == 0 ? 'even' : 'odd';In the context of our count example, we could use it with something like this:
<script>
  let count = 0;

  // Here's a reactive declaration. It gets recalculated every time "count"
  // changes. That is, every time the button is clicked.
  $: evenness = count % 2 == 0 ? 'even' : 'odd';

  function handleClick() {
    count += 1;
  }
</script>

<button on:click={handleClick}>
  Clicked {count} {count === 1 ? 'time' : 'times'}
</button>

<!-- And as expected, this portion of the view also gets updated when "evenness"
  changes. -->
<p>
  Evenness of count: {evenness}
</p>
The fist time I saw this $: syntax I thought it was weird, and it kind of is. However, it’s actually valid JavaScript. This is just a label (as explained in MDN). The Svelte magic comes into play when it finds a label like this one. The compiler looks at the statement to the right of the label and does what it needs to do in order to make it reactive.
Svelte can also reactively run arbitrary code. Pretty much any statement can be run reactively. For example, all of these work:
// This gets executed every time "evenness" changes.
$: console.log("The evenness changed to: " + evenness);

// This gets executed every time "evenness" or "count" changes.
$: {
  console.log("The evenness changed to: " + evenness);
  console.log("The count is: " + count)
}

// This gets executed every time "count" changes.
$: if (count >= 10) {
  alert("count is dangerously high!");
}
You can go low level
Svelte offers various mechanisms for going low level and directly handling the DOM. One such method is the “this” binding. With it, we can take a given HTML element and have Svelte assign a reference to it into a variable of our choosing. Here’s how it works:
<script>
  // First, we need to import the "onMount" function which allows us to
  // execute some code when the Svelte component is fully mounted into the DOM
  // and ready to use.
  import { onMount } from 'svelte';

  // Here we define this variable which we will use to capture a reference to
  // one of our DOM elements.
  let myDiv;

  // The "myDiv" variable is initialized when the component is mounted. So any
  // code that uses it needs to be inside an "onMount" callback. The variable
  // contains a reference to our div element defined below.
  onMount(() => {
    console.log("Here's a reference to some div: ", myDiv);
    myDiv.innerText = "The component has been mounted";
  });
</script>

<!-- Using this 'bind:this="{div}"' binding, we tell Svelte to store a reference
  to the DOM element represented by this div into the myDiv variable. -->
<div bind:this="{myDiv}">
  This is some text that will go away.
</div>
The only thing to keep in mind is that we should only use the myDiv variable inside the onMount life cycle hook (more info here). This is the only way to make sure that the variable is correctly initialized, since it will be undefined before the component is mounted.
Another mechanism to perform low level DOM operations is via “actions” and the “use” directive. This is a more robust and reusable alternative to the “this” binding in that it allows us to define a separate function to augment a given DOM element with custom functionality and interact with the rest of the Svelte app ecosystem via firing events. Here’s an example illustrating the most unnecessarily roundabout way of making a div clickable using the DOM API directly:
<script>
  // This function encapsulates all direct DOM manipulations. It receives a
  // "node" parameter which contains a reference to the DOM element that had
  // the "use" directive called on it with this "customClickable" as a
  // parameter. This function could have been defined in a separate file and
  // imported here for easy reusability.
  function customClickable(node) {
    function handleOnClick(event) {
      // We have full access to the DOM element. We can use members like
      // "id" or "dispatchEvent".
      console.log(`dispatching ${node.id}'s customclick event`);
      // Here we dispatch a custom event named "customclick" with some
      // arbitrary parameters.
      node.dispatchEvent(new CustomEvent('customclick', {
        detail: { x: event.clientX, y: event.clientY }
      }));
    }

    // Here we directly use the DOM API to set up an event handler for our
    // "node".
    node.addEventListener('click', handleOnClick);

    // We should return an object with a "destroy" method to be called by
    // Svelte when the component is unmounted. In this case, all we do is
    // remove the event listener that we added above.
    return {
      destroy() {
        node.removeEventListener('click', handleOnClick);
      }
    };
  }

  // This function gets passed the custom event data, just as
  // "customClickable" defines it when it calls "dispatchEvent" on the "node".
  function logCoordinates(event) {
    console.log("Div clicked in ", {
      x: event.detail.x, y: event.detail.y
    });
  }
</script>

<!-- When defining our custom clickable div, we use the "use:customClickable"
  directive to tell Svelte to call the "customClickable" function and pass it
  the div's underlying DOM element. "customClickable" in turn augments the div
  so that it can dispatch a new type of event: "customclick". Then, using
  Svelte's usual event handling mechanisms, we set the element up so that when
  the div dispatches the "customclick" event, "logCoordinates" gets executed.
-->
<div
  id="my_custom_clickable_div"
  style="border: 1px solid blue; padding: 10px; cursor: pointer;"
  use:customClickable
  on:customclick={logCoordinates}
>
  Click here and see what happens.
</div>
Again, this example is doing something completely unnecessary because divs are already clickable. For a more complex example you can study this one from Svelte’s official documentation.
And that’s it for now. These are the features that called my attention as I dove into Svelte for the first time. Of course, Svelte offers many other features that I didn’t discuss here like:
- Two-way data binding for input elements in forms and even between components.
- Handling and dispatching DOM and custom events to keep the flow of data through the component hierarchy clean and obvious.
- Transitions and Animations which in Svelte are built in, first-class citizens.
- Component composition: traditional nesting and via slots.
- Global application state management à la Vuex or Redux.
- A full-stack application framework in the form of Sapper.
These are features that other frameworks also include and Svelte offers similar implementations, with its own particular flavor. I just wanted to mention them so you know they are there. To learn more, I’d encourage you to work through the excellent official tutorial.
When talking about features, Svelte has one advantage in that it has more freedom than traditional frameworks to add a lot of functionality. They have this freedom because more features don’t mean any additional overhead (in space or performance) for those who don’t use them. Svelte is a compiler, so it has the ability to produce a bundle which includes only the features that are being used in your app. In other words, the framework can grow and not have to deal with the constraints of traditional library-based frameworks. The future seems bright.
All in all, I think Svelte is a great contender. It offers all the features that put it right up there with the big guys. It also promises a great uplift in performance when compared to said big guys. As a cherry on top, it offers a great developer/code authoring experience which is familiar and also arguably better than existing frameworks. I for one am looking forward to seeing how the project evolves and matures and what cool things people make with it. And of course, also trying it out in some projects of my own.
javascript development frameworks
Comments