How to set up a local development environment for WordPress from scratch

By Kevin Campusano
August 7, 2019
I recently got pulled into a project for a client who wanted to have a new WordPress website developed for them. I started by setting up a development environment with the niceties that I’m used to from my other application development work. That is, a development server, interactive debugging, linting, and a good editor.
Another thing that I wanted was not to have to deal with LAMP or WAMP or XAMPP or any of that. I wanted a clean, from scratch installation where I knew and controlled everything that was there. I’ve got nothing against those packages, but I think that, by setting up everything manually, I’d be able to better learn the technology as I would know exactly how everything is set up under the hood. The shortcuts could come later.
Luckily for me, there aren’t many pieces when it comes to setting up a basic, running development environment for WordPress. You only need three things: 1. MySQL, 2. PHP, and 3. WordPress itself. I also wanted a few other goodies and we’ll get there.
Let’s go through the steps that I took to set all of this up:
1. Set up PHP
In Ubuntu, installing PHP is easy enough. Just run the following command:
sudo apt-get install phpAfter that’s done, run php -v to validate that it was successfully installed. It should result in something like this:
PHP 7.2.19-0ubuntu0.18.04.1 (cli) (built: Jun  4 2019 14:48:12) ( NTS )
Copyright (c) 1997-2018 The PHP Group
Zend Engine v3.2.0, Copyright (c) 1998-2018 Zend Technologies
    with Zend OPcache v7.2.19-0ubuntu0.18.04.1, Copyright (c) 1999-2018, by Zend Technologies
There’s one particular PHP extension that we’re going to need. Let’s install it with:
sudo apt-get install php-mysqlThe php-mysql extension is necessary for our PHP installation to interact with MySQL. That’s all that’s needed to run WordPress as far as PHP is concerned.
2. Set up MySQL
WordPress uses MySQL for all of its data storage concerns. So, let’s install it. Again, in Ubuntu, installing and setting up MySQL is super easy. First, we need to run this command:
sudo apt-get install mysql-serverThis will install both the MySQL database engine and a command-line client for us to connect to it and do some initial configuration. We now need to log into our freshly installed MySQL instance. But first, make sure that it’s running with:
sudo service mysql startNow that our instance is running, log into it as root with:
sudo mysql -u rootThis will open up the MySQL command-line client where we can do some initial configuration to support WordPress.
We now need to create a new MySQL user that will be used by WordPress to log into the database. You can do so with a command like this from within the MySQL CLI client:
CREATE USER 'wordpress_user'@'localhost' IDENTIFIED BY 'password';Obviously, choose a username and password that work for you. I like to keep things simple and obvious so that’s what I use. Also obviously, use a strong, unique password in a production environment.
Now, create a new database that will be used by WordPress with:
CREATE DATABASE wordpress_dev;Again, feel free to choose a name that suits your needs.
Now, we need to allow the user that we created a few steps ago to access and control that new database. Since this is only a dev environment, let’s just give our WordPress user access to everything. This can be done with:
GRANT ALL ON *.* TO 'wordpress_user'@'localhost'With that, we’re done with MySQL, we can close the CLI client with the exit command.
3. Set up WordPress
Now that we have our prerequisites ready, we can proceed to setting up the actual WordPress site. It turns out, this is pretty easy as well. Get a new directory ready and let’s get started.
First, we need to download the package of WordPress files from the official site. In Ubuntu, this can be done with this command:
wget https://wordpress.org/latest.tar.gzThis will result in a new latest.tar.gz file being created in your directory. Now, extract it with:
tar xvzf latest.tar.gzThen, enter the new wordpress directory that gets created as a result of the last operation. Explore the wordpress directory and you should be able to see a bunch of wp-* files and directories. These are all the files that WordPress needs to run.
Before running WordPress though, we need to configure it so that it uses the MySQL database that we just created. We do this by specifying that configuration in a wp-config.php file. This file does not exist yet, but we have a wp-config-sample.php file that we can use as a template. Create the new wp-config.php file based on wp-config-sample.php with the following command:
cp wp-config-sample.php wp-config.phpNow, in the new wp-config.php file, put in your MySQL database information. Starting around line 23, it should look like this:
/** The name of the database for WordPress */
define( 'DB_NAME', 'wordpress_dev' );

/** MySQL database username */
define( 'DB_USER', 'wordpress_user' );

/** MySQL database password */
define( 'DB_PASSWORD', 'password' );

/** MySQL hostname */
define( 'DB_HOST', 'localhost' );

/** Database Charset to use in creating database tables. */
define( 'DB_CHARSET', 'utf8' );

/** The Database Collate type. Don't change this if in doubt. */
define( 'DB_COLLATE', '' );
4. Run WordPress
Now we’re finally ready to actually run WordPress. WordPress, as a web application, needs a web server like Apache to run. We don’t have Apache though; what we have is PHP’s built-in development web server. From within our wordpress directory, we can fire up the built-in web server with:
php -S localhost:3000Now it’s just a matter of navigating to the localhost:3000/wp-admin/install.php page in your browser of choice. This page should show up on screen:
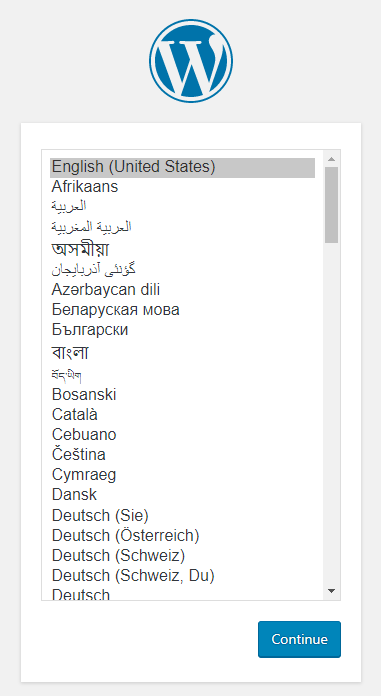
Just follow the steps within the wizard at install.php and your new development WordPress site will be ready to go in no time.
Bonus 1: Set up a linter: PHP Code Sniffer
Prerequisites: Composer and the
php-xmlextension
You can install Composer by following these instructions. In Ubuntu, installing the php-xml extension can be done with:
sudo apt-get install php-xmlNow, to set up the PHP Code Sniffer linter, just follow these steps, from your wordpress directory:
- Install PHP Code Sniffer with
composer require --dev squizlabs/php_codesniffer. - Download the WordPress PHP Code Sniffer standards with
composer require --dev wp-coding-standards/wpcs. - Install it into
phpcswith:vendor/bin/phpcs --config-set installed_paths vendor/wp-coding-standards/wpcs. - Sniff something with
vendor/bin/phpcs --standard=WordPress index.php.
If all goes well, you should be able to see reports like this (which is exaggerated for demonstration purposes; your default index.php file will not show as many warnings):
FILE: /home/kevin/projects/random/wordpress/index.php
-----------------------------------------------------------------------------------------
FOUND 5 ERRORS AND 1 WARNING AFFECTING 2 LINES
-----------------------------------------------------------------------------------------
 14 | ERROR   | [x] Expected 1 spaces after opening bracket; 0 found
 14 | ERROR   | [x] Expected 1 spaces before closing bracket; 0 found
 17 | WARNING | [x] "require" is a statement not a function; no parentheses are required
 17 | ERROR   | [x] Expected 1 spaces after opening bracket; 0 found
 17 | ERROR   | [x] Expected 1 spaces before closing bracket; 0 found
 17 | ERROR   | [x] Concat operator must be surrounded by a single space
-----------------------------------------------------------------------------------------
PHPCBF CAN FIX THE 6 MARKED SNIFF VIOLATIONS AUTOMATICALLY
-----------------------------------------------------------------------------------------

Time: 103ms; Memory: 10MB
Bonus 2: Setup interactive debugging with VS Code
Prerequisites: VS Code, XDebug and the PHP Debug VS Code extension
For writing PHP, my editor of choice is VS Code. You can get the editor from the official download site. VS Code has a huge extensions ecosystem where you can find almost anything. Naturally, there’s a debugger for PHP. It’s aptly called PHP Debug. See the instructions on how to set it up. The PHP Debug extension works on top of XDebug, a debugger for PHP. Luckily for us, PHP Debug’s instructions page includes all the details on how to install and set up both itself and XDebug.
If you followed the instructions, you should now have a new .vscode/launch.json file within your wordpress directory with the following contents:
{
   "version": "0.2.0",
   "configurations": [
       {
           "name": "Listen for XDebug",
           "type": "php",
           "request": "launch",
           "port": 9000
       }
   ]
}
This is what’s called a launch configuration in VS Code speak. This tells VS Code’s debugger all the info it needs to attach to a running PHP process. To see it in action, fire up the built-in web development server with:
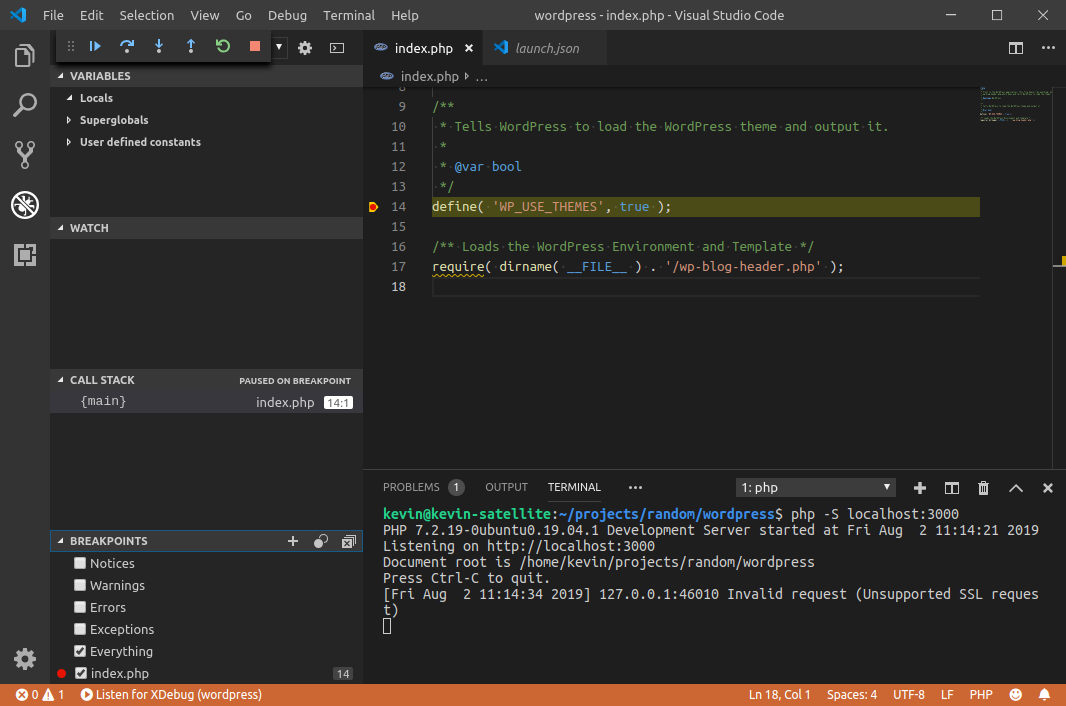
php -S localhost:3000Then, click the Start Debugging button. That’s the green triangle icon near the top of the screen, when you select the Debug sidebar in VS Code. It should have the Listen for XDebug option selected.
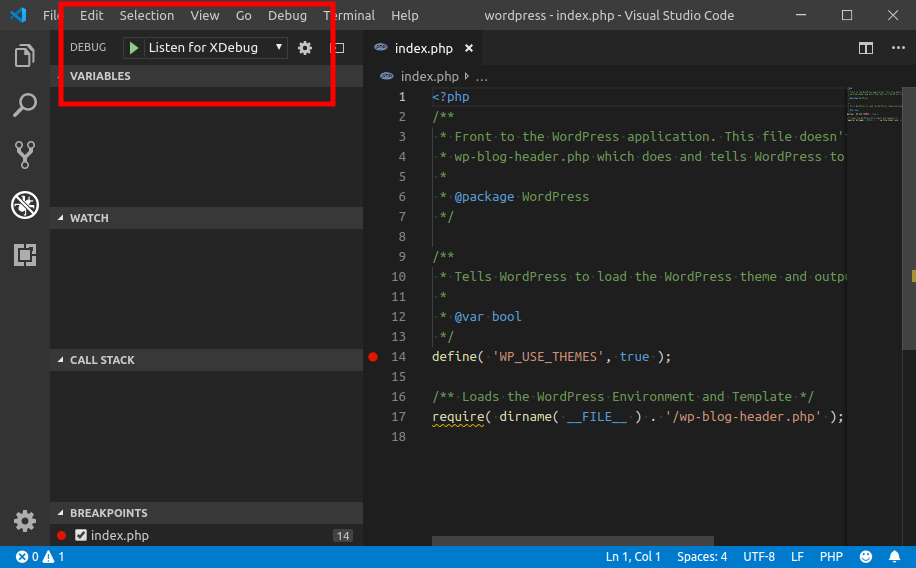
Now it’s just a matter of putting a breakpoint anywhere within the source code and request the page from your browser. You can set a breakpoint by clicking right next to the line number indicator, within any file. Here, I’ve put a breakpoint on line 14 in index.php:
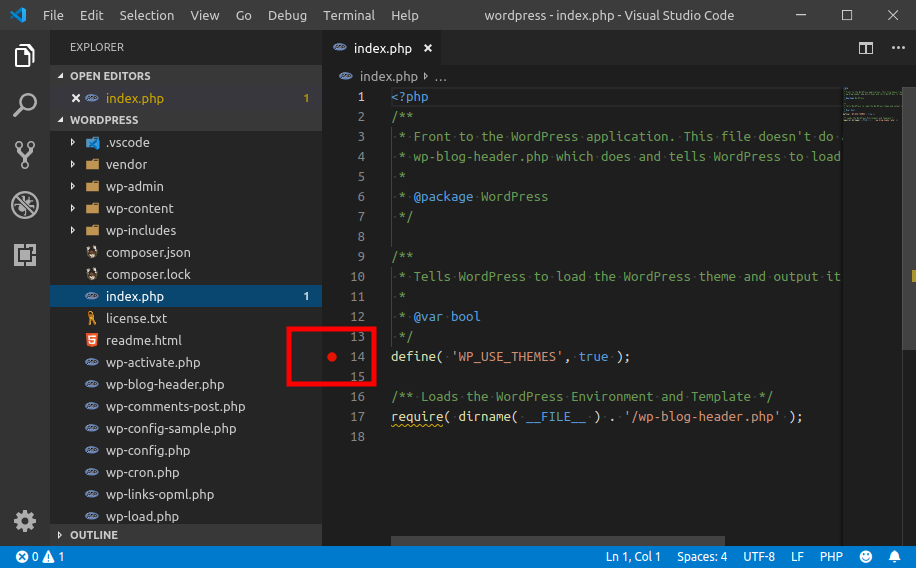
When the code execution hits the breakpoint, it should stop right there and allow you to inspect variables and the like, just like any other debugger.
And that’s all for now! Hopefully this little write-up can help you jumpstart your next WordPress development project.
wordpress development mysql php ubuntu vscode
Comments