Creating a Symbol Web Font

By Zed Jensen
July 17, 2014
Creating a custom font that only includes a few characters can be very useful. I was looking for a good way to display left and right arrows for navigating between clients and also between team members on our site and after doing some research, creating a custom font seemed like a good way that would be small and that would support all kinds of screens and browsers. So, here I’ll show how to create a web font with a few custom characters in it that you can use on your website.
You’ll need to get the free, open source vector graphics editor Inkscape and familiarize yourself with its drawing tools.
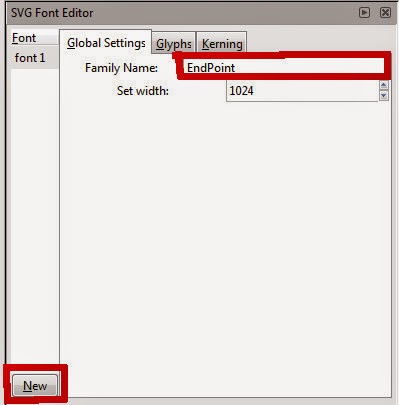
To start, open Inkscape and open the SVG font editor by clicking Text -> SVG Font Editor. Under the font column, click “New” and then name your new font.
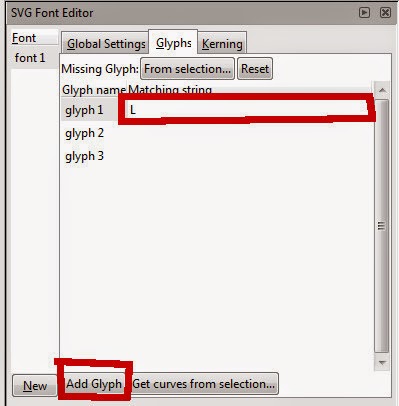
Now you can start adding characters. Begin by adding as many glyphs as you need and choosing letters for your character to be represented by. Only use characters that you can find on a standard QWERTY keyboard, as FontSquirrel (which we’ll use to convert this to a web font) won’t work with, for instance, Unicode special characters.
Now, for each symbol, draw it using Inkscape’s tools and make sure that its dimensions are roughly 750 pixels high (which will be about the height of an uppercase letter) and that it’s flush with the bottom of the canvas.
When your symbol looks like you want it to, make sure that all of the shapes you used to form it are selected and merge them together with Path -> Union. When you’re done, you should have a single object, your glyph. Now, select your glyph and do Path -> Object to Path.
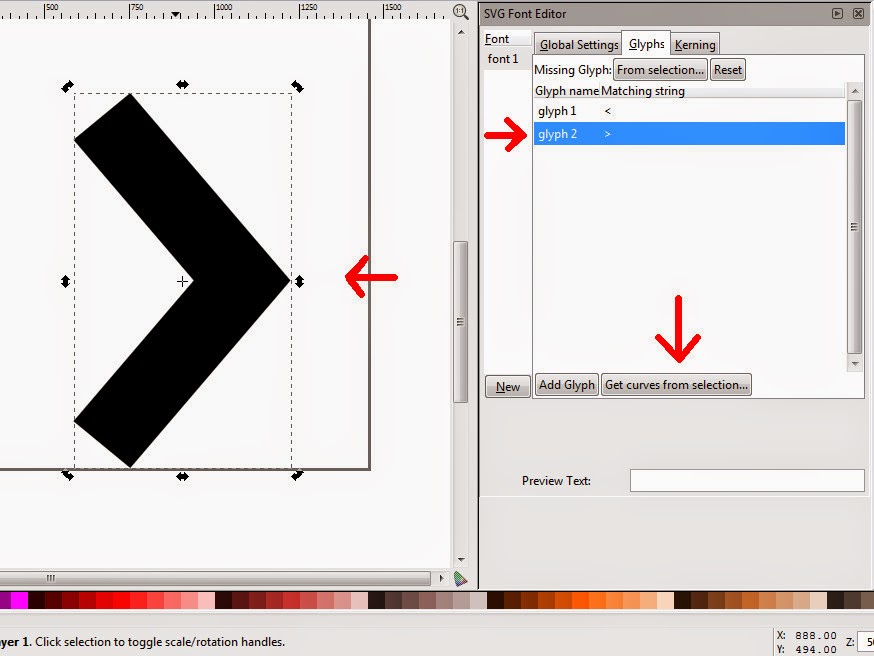
To add this symbol to your new font, select your object and the corresponding glyph and click “Get curves from selection.”
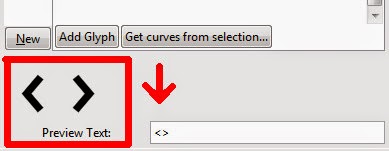
To test, enter the character you’re using for your symbol in the “Preview Text” area. If it shows your symbol, you’re set. Otherwise, you need to make sure that you merged and converted your object to a path correctly.
After you’ve repeated these steps with every symbol you need, save with Inkscape as an SVG. We need to convert this to a TrueType font, so go to www.freefontconverter.com/ (or any other font converter) and convert to .ttf.
The last thing you need to do before using your font in your webpage is convert it to a webfont. Fortunately, FontSquirrel makes this easy. Go to FontSquirrel’s webfont generator and upload your TrueType font. After the conversion has finished, you’ll get a zipfile with the font in several different webfont formats, and even an HTML page telling you how to use it in a webpage.
Have fun creating custom webfonts!
Comments