How to write end-to-end & component tests with Cypress in Vue.js

By Edgar Mlowe
December 10, 2022

Is writing tests painful for you? In this tutorial, I explain how to handle UI testing with Cypress and hope to convince you that writing tests is not always so tedious and expensive, but can be fun instead.
Cypress is a purely JavaScript-based front-end testing tool built for the modern web. it can test anything that runs in a browser and has built-in support for testing modern frameworks such as Vue.js, React, and Angular. See the full list of front-end frameworks Cypress supports.
As an example we are going to use a to-do app built using Vue. We will learn:
- How to install and set up Cypress.
- How to create a simple to-do app with Vue 3.
- How to write end-to-end tests.
- How to write component tests.
How to install and set up Cypress
-
First let’s create a new Vue project using the Vue CLI.
Install Vue CLI if you don’t have it in your machine:
npm install -g @vue/cli -
Create a project (pick the
Vue 3,babel,eslintpreset):vue create todo-app -
cdinto thetodo-appproject and install Cypress:npm install cypress --save-devNo dependencies, extra downloads, or changes to your code are required!
-
Edit
package.json. In thescriptssection, add a command,"cypress:open": "cypress open". See the example below."scripts": { "cypress:open": "cypress open" } -
Launch Cypress:
npm run cypress:open
When Cypress opens up you should be able to view the Cypress launchpad as shown in this screenshot:

We will use the Launchpad to configure both E2E Testing and Component Testing. Cypress will automatically generate configuration files as you configure the tests in the Launchpad. If you get stuck, please visit the docs for Launchpad.
How to create a simple to-do app with Vue 3
Open the todo-app project in your favourite editor and add the following single-file components:
-
src/components/BaseTextInput.vueBaseTextInput will contain a text input and a button for adding new to-do items.
<template> <form class="add-todo-form"> <input type="text" class="input" placeholder="Add a new todo" v-model="todo"> <input type="submit" value="Add" @click="emitNewTodoEvent"> </form> </template> <script> export default { data() { return { todo: '' } }, methods: { emitNewTodoEvent(e) { e.preventDefault(); this.$emit('newTodo', this.todo); this.todo = ''; } } } </script> <style scoped> .input { width: 100%; padding: 8px 10px; border: 1px solid #32485F; } .add-todo-form { width: 100%; display: flex; align-items: center; } input[type="submit"] { margin-left: 5px; padding: 8px 10px; border: 1px solid #32485F; background-color: #32485F; color: #fff; font-weight: bold; cursor: pointer; } input[type="submit"]:hover { background-color: #00C185; } </style> -
src/components/TodoListItem.vueTodoListItem displays a to-do along with a button for removing that to-do.
<template> <li> {{ todo.text }} <button @click="$emit('remove', todo.id)"> X </button> </li> </template> <script> export default { props: { todo: { type: Object, required: true } } } </script> -
src/components/TodoList.vueTodoList component lists all to-dos.
<template> <div> <BaseTextInput @newTodo="addTodo" /> <ul v-if="todos.length"> <TodoListItem v-for="todo in todos" :key="todo.id" :todo="todo" @remove="removeTodo" /> </ul> <p class="empty-state-message" v-else> Nothing left in the list. Add a new todo in the input above. </p> </div> </template> <script> import BaseTextInput from './BaseTextInput.vue'; import TodoListItem from './TodoListItem.vue'; let nextTodoId = 1; export default { components: { BaseTextInput, TodoListItem }, data () { return { todos: [] } }, methods: { addTodo (todo) { const trimmedText = todo.trim(); if (trimmedText) { this.todos.unshift({ id: nextTodoId++, text: trimmedText }); } }, removeTodo (idToRemove) { this.todos = this.todos.filter(todo => { return todo.id !== idToRemove; }); } } } </script> -
Edit
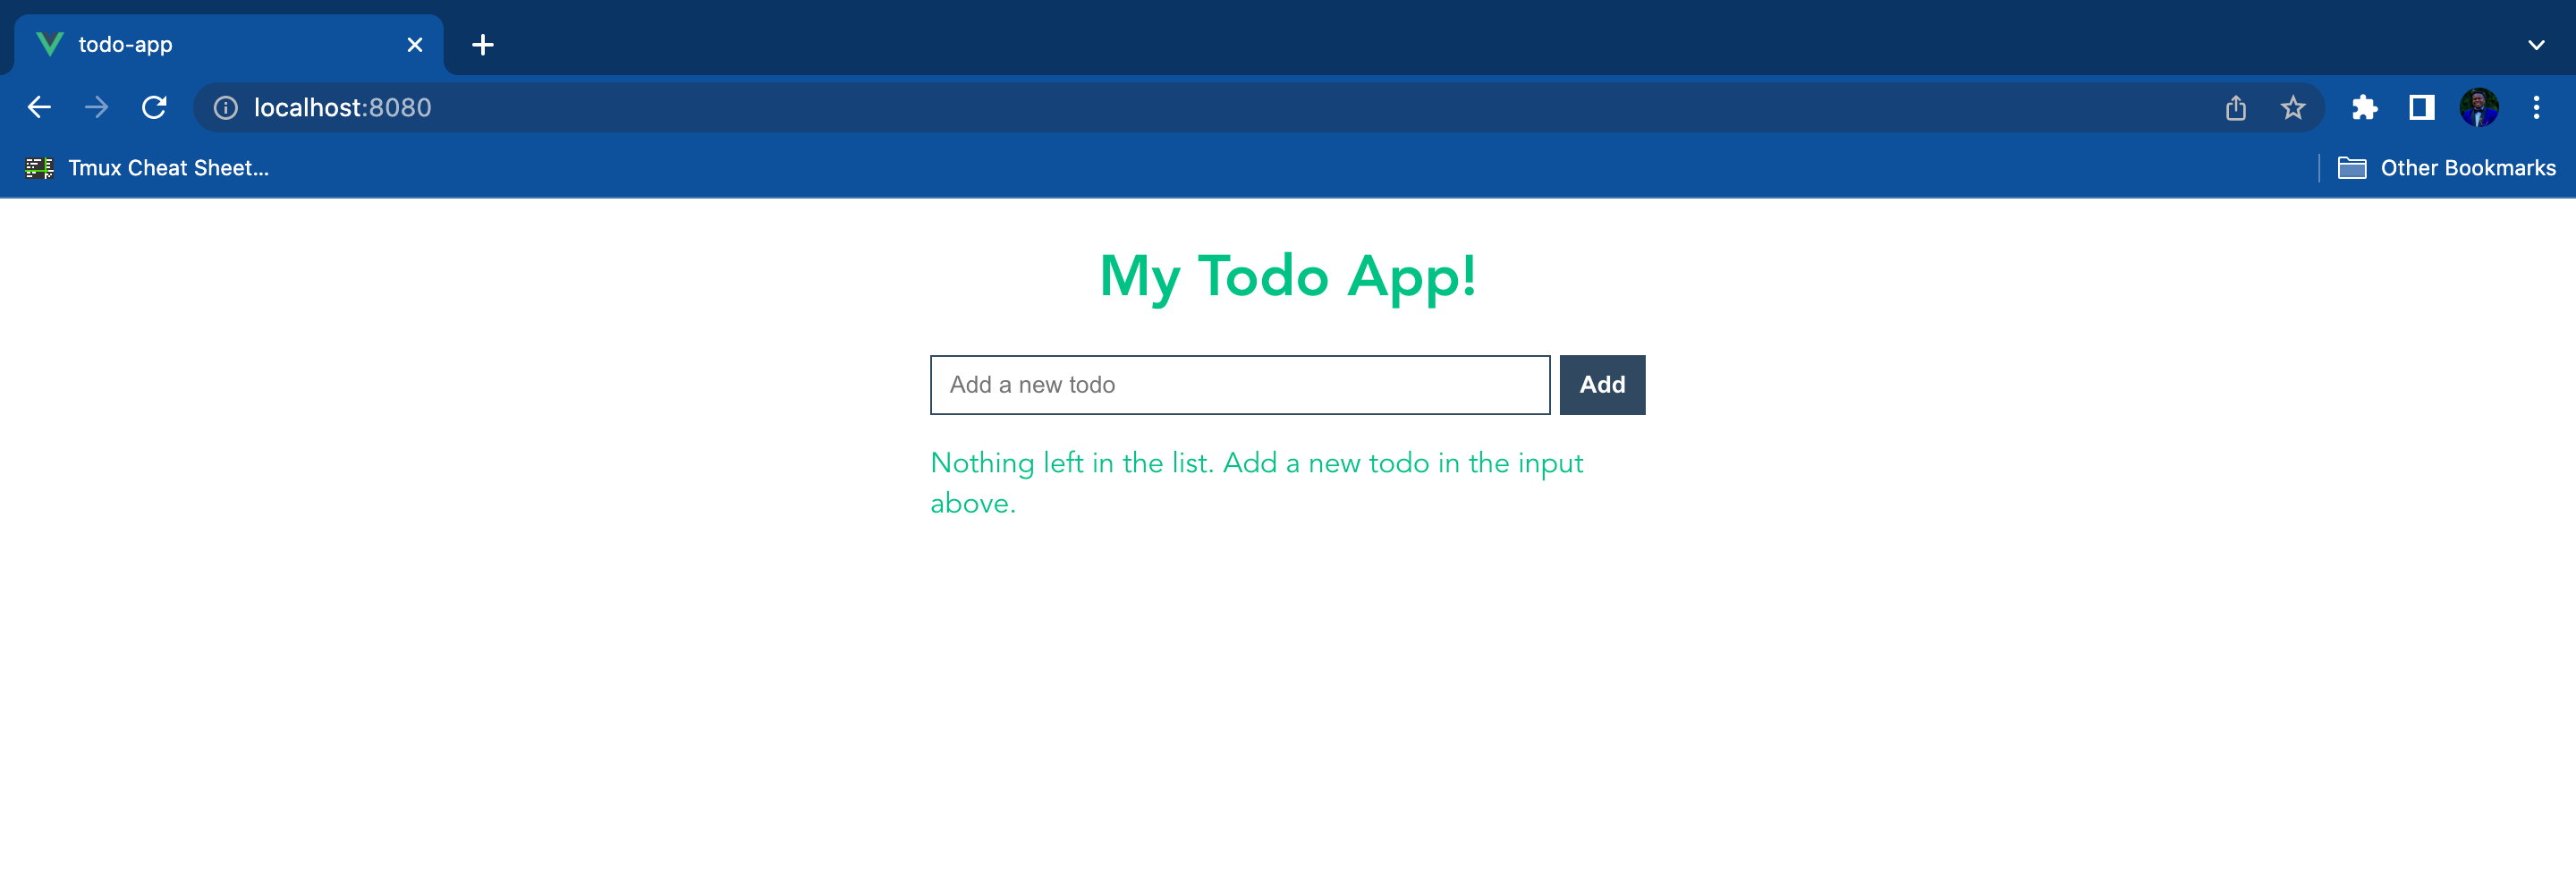
src/App.vueto include code that will render the Todo App.<template> <div id="app"> <h1>My Todo App!</h1> <TodoList/> </div> </template> <script> import TodoList from './components/TodoList.vue'; export default { components: { TodoList } } </script> <style> *, *::before, *::after { box-sizing: border-box; } #app { max-width: 400px; margin: 0 auto; line-height: 1.4; font-family: 'Avenir', Helvetica, Arial, sans-serif; -webkit-font-smoothing: antialiased; -moz-osx-font-smoothing: grayscale; color: #00C185; } h1 { text-align: center; } </style>
Then, run:
npm run serveand visit http://localhost:8080 to view your Todo App!
How to write end-to-end tests
End-to-end (E2E) testing is used to test an application flow from start to finish. Tests are designed to use the application the same way that a user would.
In our example we are going to test the whole Todo app with the following test cases:
- The user should see a message when the to-do list is empty.
- The user should be able to view a list of to-dos.
- The user should be able to add a new to-do.
- The user should be able to remove an existing to-do.
Cypress is built on top of Mocha and Chai. If you’re familiar with writing tests in JavaScript, then writing tests in Cypress will be a breeze.
Visit the official Cypress docs to learn more about how to start testing a new project in Cypress.
Without futher ado lets start testing our Todo app.
Inside the cypress folder that was added during installation create a file, cypress/e2e/todo.cy.js, and add the following tests.
Please visit the folder structure docs to learn more about how to organise tests in Cypress and understand the generated Cypress folder structure.
/* eslint-disable no-undef */

// describe() function is used to group tests
describe('Todo tests', () => {
  it('should display empty state message', () => {
    // cy.visit() used to visit a remote url
    // learn more about it here: https://docs.cypress.io/api/commands/visit#Syntax
    cy.visit('http://localhost:8080');

    // cy.get() command Gets one or more DOM elements by selector or alias
    // learn more about Cypress commands/api here: https://docs.cypress.io/api/table-of-contents
    cy.get('.empty-state-message')
    .contains('Nothing left in the list. Add a new todo in the input above.')
    .should('be.visible');
  });

  it('should add todo', () => {
    cy.visit('http://localhost:8080');

    // add todo by typing in the input and pressing enter
    cy.get('input[type="text"]').type('new todo{enter}');

    // check if the todo is added
    cy.get('ul').contains('new todo').should('be.visible');
    cy.get('ul').find('li').should('have.length', 1);


    // add another todo by typing in the input and pressing 'add' button
    cy.get('input[type="text"]').type('more todo');
    cy.get('input[type=submit]').click();

    // check if the todo is added
    cy.get('ul').contains('more todo').should('be.visible');
    cy.get('ul').find('li').should('have.length', 2);
  });

  it('should delete todo', () => {
    cy.visit('http://localhost:8080');

    // delete the first todo
    cy.get(':nth-child(1) > button').click();

    // check if the todo is deleted
    // cy.should() command is used to assert that the todo list has only one todo
    // learn more about Cypress assertions here: https://docs.cypress.io/guides/references/assertions
    cy.get('ul').find('li').should('have.length', 1);
  });
});
To make Vue available at http://localhost:8080, run:
npm run serveThen, to launch Cypress, run:
npm run cypress:openOn the Cypress launcher select “End2End Tests” and click on the todo.cy.js spec to run your tests.

How to write component tests
Cypress Component Test Runner executes your component tests in the browser as a user would by simulating real interactions. Since it runs in the browser, you get to debug your components using your favourite developer tools.
To demonstrate how to write component tests using Cypress let’s write tests for the following components:
BaseTextInput.vueTodoListItem.vue
Component tests for BaseTextInput.vue
Here we are going to assert the following;
- Text input is rendered with
placeholdertext “Add a new todo”. - When the “add” button is clicked a
newTodoevent is emitted with a payload containing text that was typed in the text input.
First create a spec, src/components/BaseTextInput.cy.js, then add the following code:
/* eslint-disable no-undef */
import BaseTextInput from './BaseTextInput.vue';

describe('<BaseTextInput />', () => {
  it('renders base text input component', () => {
    // Renders the component in DOM.
    // cy.mount() is a custom command.
    // Learn more about cypress custom commands here:
    // https://docs.cypress.io/api/commands/mount#Creating-a-New-cy-mount-Command
    cy.mount(BaseTextInput);

    // Asserts that the text input is rendered with the correct placeholder
    cy.get('input').should('have.attr', 'placeholder', 'Add a new todo');

    // asserts that when the 'add' button is clicked, an event is emitted
    // with the payload containing the value of the text input
    cy.get('input[type="text"]').type('new todo');
    cy.get('input[type=submit]').click().then(() => {
      // Cypress.vueWrapper provides access to the Vue Test Utils.
      // With this wrapper you can access any Vue Test Utils API.
      // Learn more about Vue Test Utils here: https://vue-test-utils.vuejs.org/
      // e.g. cy.vueWrapper().emitted() returns all the events emitted by the BaseTextInput component
      cy.wrap(Cypress.vueWrapper.emitted()).should('have.property', 'newTodo');
      expect(Cypress.vueWrapper.emitted().newTodo[0]).to.deep.equal(['new todo']);
    });
  })
});
To run the test, launch Cypress using cypress:open. This time select “component testing”, then click on BaseTextInput.cy.js to run tests.
![Screenshot displaying BaseTextInput component tests that have run successfully. Cypress is open to src/components/BaseTextInput.cy.js. In the test output sidebar, there is one green check mark, next to “renders base text input component”. It is followed by the test body in a code block, which reads: “-mount <BaseTextInput … />; get input; -assert expected [ <input.input>, 1 more…] to have attribute placeholder with the value Add a new todo; get input[type=“text”]; -click; assert expected [ new todo ] to deeply equal [ new todo ]; wrap Object{25}; -assert expected { Object (DOMSubtreeModified, pointerover, …) } to have property newTodo”.](/blog/2022/12/how-to-use-cypress-for-ui-testing/base-text-input-tests.webp)
Component tests for TodoListItem.vue
Here we are going to assert the following:
- A Todo list item is rendered with correct text.
- When the “remove” button is clicked, a “remove” event is emitted with payload containing the ID of the Todo to be removed.
First create a spec, src/components/TodoListItem.cy.js, and add the following code:
/* eslint-disable no-undef */
import TodoListItem from './TodoListItem.vue';

describe('<TodoListItem />', () => {
  it('renders todo list item', () => {
    const text = 'new todo';
    const id = 1;
    // mount the component with props
    // see: https://test-utils.vuejs.org/guide/
    cy.mount(TodoListItem, {props: {todo: { id, text }}});

    // asserts that the todo list item is rendered with the correct text
    cy.get('li').contains(text);

    // asserts that when 'x' button is clicked, 'remove' event is emitted with the correct payload
    cy.get('button').click().then(() => {
      cy.wrap(Cypress.vueWrapper.emitted()).should('have.property', 'remove');
      expect(Cypress.vueWrapper.emitted().remove[0]).to.deep.equal([id]);
    })
  })
});
To run the test, launch Cypress using cypress:open. Select “component testing” again, then click on TodoListItem.cy.js to run tests.
![Screenshot displaying TodoListItem component tests that have run successfully. The same cypress window is navigated to src/components/TodoListItem.cy.js. There is a green check mark next to “renders todo list item. The test body cody block reads “-mount <TodoListItem … />; get li; -contains new todo; get button; -click; assert expected [ 1 ] to deeply equal [ 1 ]; wrap Object{16}; -assert expected { Object (DOMSubtreeModified, pointerover, …) } to have property remove”.](/blog/2022/12/how-to-use-cypress-for-ui-testing/todo-list-item-test.webp)
The final source code with all the tests can be found in my GitHub todo-app repo.
Next steps
This article is meant to provide you with knowledge on how to set up and run tests using Cypress. However, you may need to further learn Cypress and its API to write better and efficient tests. I recommend you continue learning with:
Comments