Integrate Twilio in Django

By Kulbir Singh
November 24, 2014
Twilio
Twilio is a powerful HTTP API that allows you to build powerful voice and SMS apps. The goal of this blog post is to help make building the SMS applications as simple as possible in django.
There is a already Twilio Python help library available. The open source twilio-python library lets us to write Python code to make HTTP requests to the Twilio API.
Installation
The easiest way to install twilio-python library is using pip. Pip is a package manager for Python.
Simply run following command in terminal.
$ pip install twilioTwilio API Credentails
To Integrate twilio API in django application, we need TWILIO_ACCOUNT_SID and TWILIO_AUTH_TOKEN variables. These variables can be found by logging into your Twilio account dashboard. These variables are used to communicate with the Twilio API.
You’ll need to add them to your settings.py file:
TWILIO_ACCOUNT_SID = 'ACXXXXXXXXXXXXXXXXXXXXXXXXXXXXXXXX'
TWILIO_AUTH_TOKEN = 'YYYYYYYYYYYYYYYYYYYYYYYYYYYYYYYY'
Create a New App
We are going to interact with people using SMS, so I prefer to create an app named communication. I am assuming you’ve already installed Django.
Run following command in terminal.
$ django-admin.py startapp communcationWe will need to register the new app in our django project.
Add it to your INSTALLED_APPS tuple in your settings.py file:
INSTALLED_APPS = (
'django.contrib.auth',
'django.contrib.contenttypes',
'django.contrib.sessions',
'django.contrib.sites',
'django.contrib.messages',
'django.contrib.staticfiles',

‘communication’,
...
)
Create the Model
Now we’ll open up communication/models.py to start creating models for our app.
class SendSMS(models.Model):
    to_number = models.CharField(max_length=30)
    from_number = models.CharField(max_length=30)
    sms_sid = models.CharField(max_length=34, default="", blank=True)
    account_sid = models.CharField(max_length=34, default="", blank=True)
    created_at = models.DateTimeField(auto_now_add=True)
    sent_at = models.DateTimeField(null=True, blank=True)
    delivered_at = models.DateTimeField(null=True, blank=True)
    status = models.CharField(max_length=20, default="", blank=True)
and run the syncdb command after defining the model:
$ python manage.py syncdbIt will create the necessary database tables for our app.
Create utils.py file
Create a new file named utils.py and save in communication/utils.py.
Put the following code in communication/utils.py:
from django.conf import settings

import twilio
import twilio.rest

def send_twilio_message(to_number, body):
    client = twilio.rest.TwilioRestClient(
        settings.TWILIO_ACCOUNT_SID, settings.TWILIO_AUTH_TOKEN)

    return client.messages.create(
        body=body,
        to=to_number,
        from_=settings.TWILIO_PHONE_NUMBER
    )
Testing send_twilio_message
Open the shell and run following commands.
>>> from communication.utils import send_twilio_message
>>> sms = send_twilio_message('+15005550006', 'Hello Endpointer,')
>>> print sms.sid
SM97f8ac9321114af1b7fd4463ff8bd038
Having the sid means that everything in the backend is working fine. And we can proceed to work on the front end.
Create Form
Lets create a form to gather the data. Now open/create up communication/forms.py to start creating forms for our app. And paste the following code into it:
class SendSMSForm(forms.ModelForm):

    class Meta:
        model = SendSMS
        fields = ('to_number', 'body')
The View CreateView
class SendSmsCreateView(CreateView):
    model = SendSMS
    form_class = SendSMSForm
    template_name = 'communication/sendsms_form.html'
    success_url = reverse_lazy('send_sms')

    def form_valid(self, form):
        number = self.cleaned_data['to_number']
        body = self.cleaned_data['body']
        # call twilio
        sent = send_twilio_message(number, body)

        # save form
        send_sms = form.save(commit=False)
        send_sms.from_number = settings.TWILIO_PHONE_NUMBER
        send_sms.sms_sid = sent.sid
        send_sms.account_sid = sent.account_sid
        send_sms.status = sent.status
        send_sms.sent_at = now()
        if sent.price:
            send_sms.price = Decimal(force_text(sent.price))
            send_sms.price_unit = sent.price_unit
        send_sms.save()

    return super(SendSmsCreateView, self).form_valid(form)
Defining URLS
The URL configuration tells Django how to match a request’s path to your Python code. Django looks for the URL configuration, defined as urlpatterns, in the urls.py file in your project:
from django.conf.urls import patterns, url

from .views import SendSmsCreateView

urlpatterns = patterns('',
    url(
        regex=r'^communication/send/sms/$',
        view=SendSmsCreateView.as_view(),
        name='send_sms'
    ),
)
Creating the Template
Now that we’ve defined a URL for our list view, we can try it out. Django includes a server suitable for development purposes that you can use to easily test your project:
If you visit the http://127.0.0.1:8000/communication/send/sms/ in your browser, though, you’ll see an error: TemplateDoesNotExist.
This is because we have not defined the template file yet. So now create sendsms_form.html file in templates/communication/ and put the following code in it:
<form action="." class="form-horizontal" method="post" role="form">{% csrf_token %}
    {% for field in form %}
        <div class="form-group">            <label class="col-sm-2 control-label" for="inputEmail3">{{ field.label_tag }}</label>
            <div class="col-sm-10">                {{ field }}
                {{ field.errors }}
            </div>        </div>    {% endfor %}
    <div class="form-group">        <div class="col-sm-offset-2 col-sm-10">            <button class="btn btn-default" type="submit">Submit</button>
        </div>    </div></form>
Now reload the http://127.0.0.1:8000/communication/send/sms/ in your browser. Assuming everything is okay, you should then see the following form:
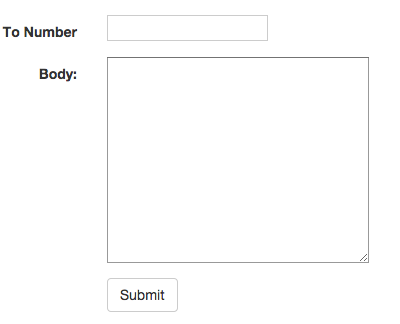
Fill out the form, and hit the submit button to send your SMS.
CONCLUSION
Congratulations, your SMS is successfully sent. Good luck!
Comments