Performing Bulk Edits in Rails: Part 1

By Brian Buchalter
November 14, 2011
This will be the first article in a series, outlining how to implement a bulk edit in Rails 3.1.1 (although most any version of Rails will do). Today we’ll be focusing on a simple user interface to allow the user to make a selection of records. But first, let’s look at our user story.
The user story
-
User makes a selection of records and clicks “Bulk Edit” button
-
User works with the same form they would use for a regular edit, plus
- check boxes are added by each attribute to allow the user to indicate this variable should be affected by the bulk edit
- only attributes which are the same among selected records should be populated in the form
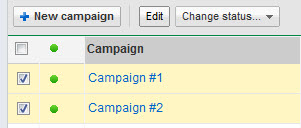
An example UI from Google’s AdWords interface for
selecting multiple records for an action.
Sounds straight forward, right? Well, there are a couple of gotcha’s to be worked out along the way.
Capturing the user’s selection
We’d like to offer the user a form with check boxes to click so when submitted, our controller gets an array of IDs we can pass to our ActiveRecord finder. It’s best implemented using check_box_tag which means it’s not auto-magically wired with an ActiveRecord object, which makes sense in this case because we don’t want our form manipulating an active record object. We simply want to send our user’s selection of records along to a new page. Let’s see what this looks like.
# app/views/search/_results.html

<% @foos.each  do |foo| %>
  <%= check_box_tag "foo_ids[]", foo.id  %>
<% end  %>

# when posted looks like
# "foo_ids"=>["4", "3", "2"]
Because we now have an array of IDs selected, it becomes very easy for us to work with our user’s selection.
# app/controller/bulk_edit_controller.rb

def new
  if params[:foo_ids].is_a?(Array) && params[:foo_ids].length > 1  #let's make sure we got what we expected
    @foos = Foo.find(params[:foo_ids])
  else
    redirect_to search_path
  end
end
Refining the UI with JavaScript and CSS
It’s not just enough to have these check boxes. We need our “Bulk Edit” button only to appear when the user has made an appropriate selection. Let’s update our view code to give our tags some class.
# app/views/search/_results.html

<%= form_tag new_bulk_edit_path, :method => "GET", :id => "bulk-edit-form" do %>
  <%= submit_tag "Bulk Edit", :id => "bulk-edit-submit" %>
<% end %>

<div class="search_results">
  <% @foos.each  do |foo| %>
    <%= check_box_tag "foo_ids[]", foo.id, false, :class => "downloadable"  %>
  <% end %>
</div>

# app/assets/stylesheets/search.css

#bulk-edit-submit {
  input { display: none; }
}
We’ve added the downloadable class tag to our check boxes, while adding a simple form to send data to the new_bulk_edit_path. This path corresponds to the new action, which typically, you don’t post forms to (which is why we needed to be explicit about setting the GET method). However, in this case we need this information before we can proceed with a new bulk edit. We’ve also hidden the submit button by default. We’ll need some JavaScript to show and hide it.
# app/assets/javascripts/search.js

$('.downloadable').click(function() {     //when an element of class downloadable is clicked
  var check_count = $('.downloadable:checked').size();  //count the number of checked elements
  if( check_count > 1 ) {
    $("#bulk-edit-submit").show();
  } else {
    $("#bulk-edit-submit").hide();
  }
});
At this point, you might have noticed that we’re submitting a form with no fields in it! While we could simply wrap our form_tag around our search results, but we may not always want this. For example, what if we need multiple forms to be able to send our selection to different controllers in our application? Right now we’re working on a bulk edit, but you know the client is expecting a bulk download as well. We can’t wrap the same search results partial in multiple forms. Let’s see how we would populate the our form using more JavaScript.
# app/assets/javascripts/search.js

$('#bulk-edit').submit(function() {  //When the bulk-edit form is submitted
  $('#bulk-edit input:checked').remove();  //clear all checked elements from form
  var selected_items = $('.downloadable:checked').clone();
  $('#bulk-edit').append(selected_items);
  return true;  //VERY IMPORTANT, needed to actually submit the form
});
This is a simple, unobtrusive way to give your forms a little more flexibility. It’s also a good example of how to use :checked as a modifier on our jQuery selector.
Namespacing and Refactoring our JavaScript
Knowing you’ll need to implement a bulk-download form later in this same style, so let’s refactor out this cloning functionality.
# app/assets/javascripts/search.js

$('#bulk-edit').submit(function() {
  MyAppName.clone_downloadable_checkboxes_to($(this));  //You MUST wrap "this" inside $()
  return true;
});

if(!window.MyAppName) {
  MyAppName = {};  //Initialize namespace for javascript functions
}

MyAppName.clone_downloadable_checkboxes_to = function(destination) {
  destination.children("input:checked").remove();
  var selected_items = $('.downloadable:checked').clone();
  destination.append(selected_items);
};
One of the big highlights here is namespacing our JavaScript function. While the chances are low that someone out there is going to have clone_downloadable_checkboxes_to in the global namespace too, it’s always best to use proper namespaces.
Well, we’ve made it through the first part of our user story. The user can now check their boxes, and submit a form to the appropriate Rails resource. Stay tuned to see how we implement the second half of our user’s story.
Comments