• Home

  • Custom Ecommerce
  • Application Development
  • Database Consulting
  • Cloud Hosting
  • Systems Integration
  • Legacy Business Systems
  • Security & Compliance
  • GIS

  • Expertise

  • About Us
  • Our Team
  • Clients
  • Blog
  • Careers

  • CasePointer

  • VisionPort

  • Contact
  • Our Blog

    Ongoing observations by End Point Dev people

    Ruby Ecommerce with Sinatra: Admin and Products

    Steph Skardal

    By Steph Skardal
    January 22, 2011

    Last week, I wrote about creating a very simple ecommerce application on Ruby with Sinatra. This week, we continue on the yellow brick road of ecommerce development on Ruby with Sinatra.

    yellow brick road

    A yellow brick road.

    Part 2: Basic Admin Authentication

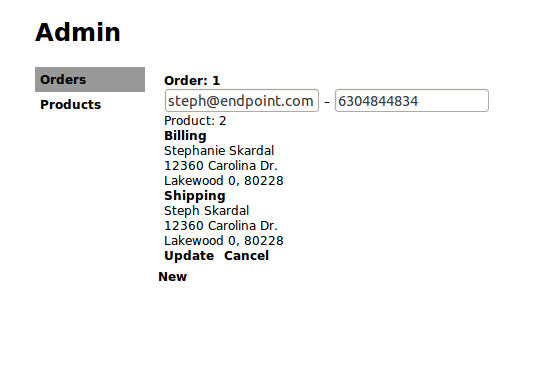
    After you’ve got a basic application running which accepts payment for a single product as described in the previous tutorial, the next step is to add admin authorization to allow lookup of completed orders. I found several great resources for this as well as a few Sinatra extensions that may be useful. For the first increment of implementation, I followed the instructions here, which uses Basic::Auth. The resulting code can be viewed here. I also introduce subclassing of Sinatra::Base, which allows us to keep our files a bit more modular and organized.

    And if we add an “/admin” method to display orders, we can see our completed orders:
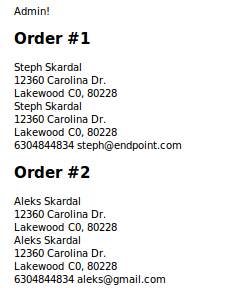
    Completed orders.

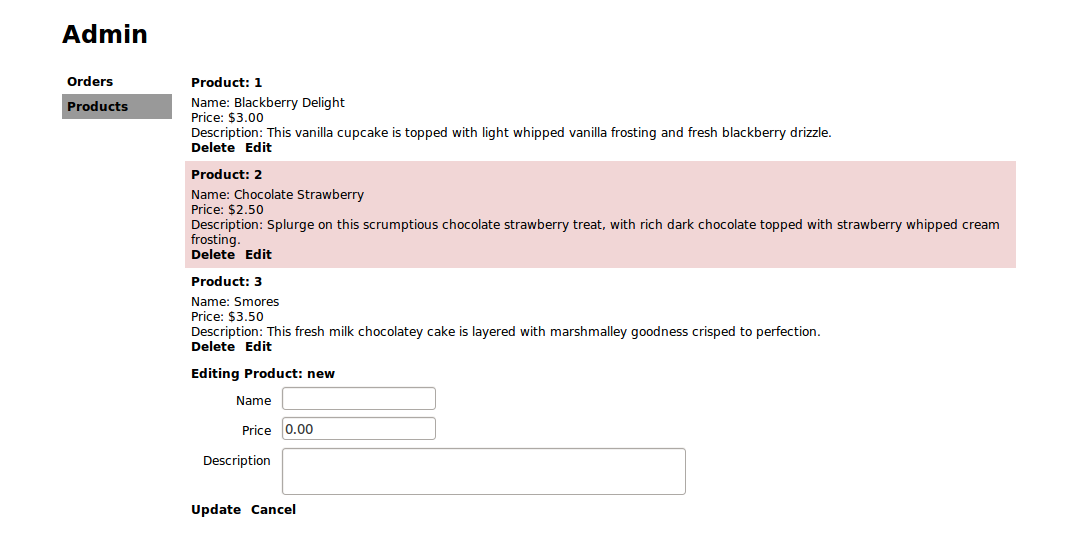
    Part 3: Introducing Products

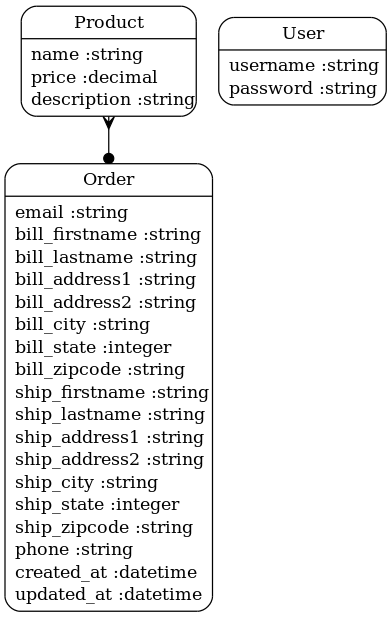
    Now, let’s imagine an ecommerce store with different products! Whoa! For this increment, let’s limit each order to one product. A migration and model definition is created to introduce products, which contains a name, description, and price. For this increment, product images match the product name and live ~/public/images. The orders table is modified to contain a reference to products.id. The orders model is updated to belong_to :products. Finally, the frontend authorization method is modified to use the order.product.price in the transaction.

    
    # Products ActiveRecord migration
    require 'lib/model/product'
    class CreateProducts < ActiveRecord::Migration
      def self.up
        create_table :products do |t|
          t.string :name,
            :null => false
          t.decimal :price,
            :null => false
          t.string :description,
            :null => false
        end
      end
    

    def self.down drop_table :products end end

    
    # Products model class
    class Product < ActiveRecord::Base
      validates_presence_of :name
      validates_presence_of :price
      validates_numericality_of :price
      validates_presence_of :description
    

    has_many :orders end

    
    # Order migration update
    class CreateOrders < ActiveRecord::Migration
      def self.up
        create_table :orders do |t|
    +      t.references :product,
    +        :null => false
        end
      end
    

    def self.down drop_table :orders end end

    
    # Order model changes
    class Order < ActiveRecord::Base
    ...
    + validates_presence_of :product_id
    +
    +  belongs_to :product
    end
    
    
    # in main checkout action
    # Authorization amount update
    - response = gateway.authorize(1000,
    -   credit_card)
    + response = gateway.authorize(order.product.price*100,
    +   credit_card)


    Our new data model.

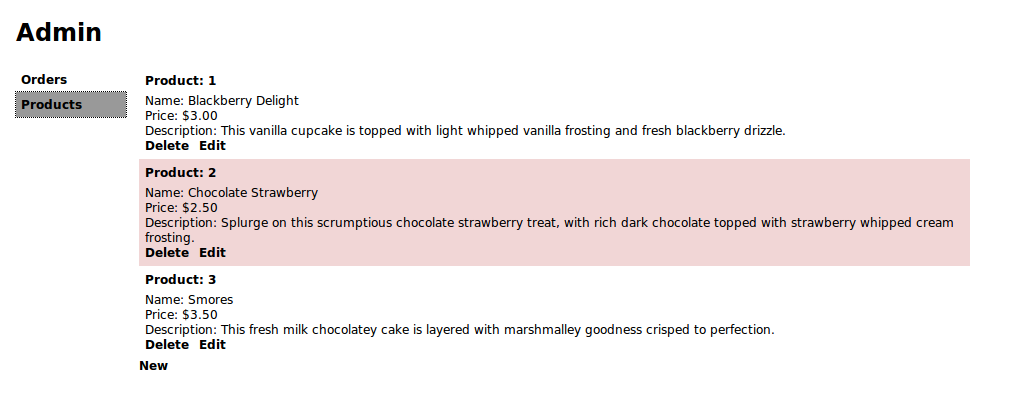
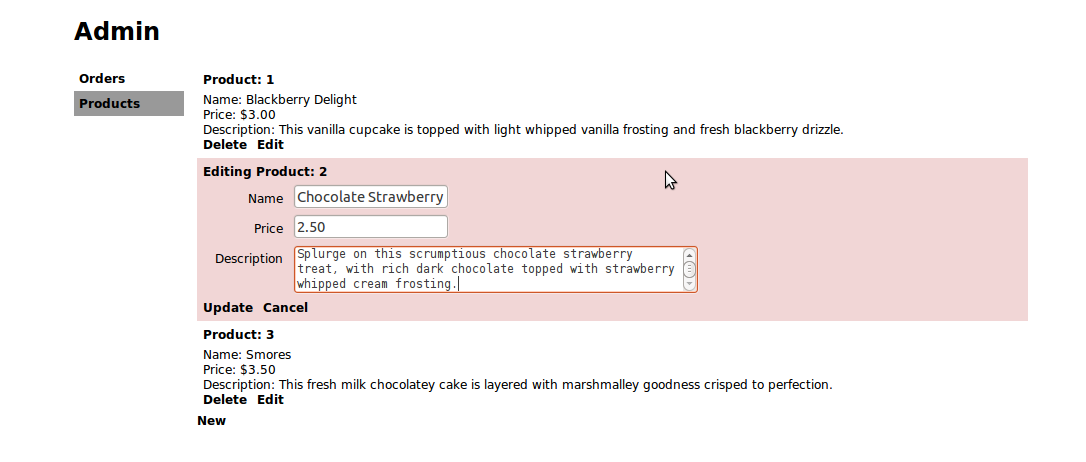
    And let’s use Sinatra’s simple and powerful routing to build resource management functionality that allows our admin to list, create, update, and delete items, or in this case orders and products. Here’s the sinatra code that accomplishes this basic resource management:

    
    # List items
    app.get '/admin/:type' do |type|
      require_administrative_privileges
      content_type :json
    

    begin klass = type.camelize.constantize objects = klass.all status 200 objects.to_json rescue Exception => e halt 500, [e.message].to_json end end

    
    # Delete item
    app.delete '/admin/:type/:id' do |type, id|
      require_administrative_privileges
      content_type :json
    

    begin klass = type.camelize.constantize instance = klass.find(id) if instance.destroy status 200 else status 400 errors = instance.errors.full_messages [errors.first].to_json end rescue Exception => e halt 500, [e.message].to_json end end

    
    # Create new item
    app.post '/admin/:type/new' do |type|
      require_administrative_privileges
      content_type :json
      input = json_to_hash(request.body.read.to_s)
    

    begin klass = type.camelize.constantize instance = klass.new(input) if instance.save status 200 instance.to_json else status 400 errors = instance.errors.full_messages [errors.first].to_json end rescue Exception => e halt 500, [e.message].to_json end end

    
    # Edit item
    app.post '/admin/:type/:id' do |type, id|
      require_administrative_privileges
      content_type :json
      input = json_to_hash(request.body.read.to_s)
    

    begin klass = type.camelize.constantize instance = klass.find(id) if instance.update_attributes(input) status 200 instance.to_json else status 400 errors = instance.errors.full_messages [errors.first].to_json end rescue Exception => e halt 500, [e.message].to_json end end

    Note that in the code shown above, the request includes the class (product or order in this application), and the id of the item in some cases. The constantize method is used to get the class constant, and ActiveRecord methods are used to retrieve and edit, create, or delete the instance. This powerful routing now allows us to easily manage additional resources with minimal changes to our server-side code.

    Next, I use jQuery to call these methods via AJAX, also in such a way that it’ll be easy to manage new resources with minimal client side code. That base admin code can be found here. With this jQuery admin base, we now define our empty resource, content for displaying that resource, and content for editing that resource. Examples of this are shown below:

    
    functions.product = {
      edit: function(product) {
        return '<h4>Editing Product: '
          + product.id
          + '</h4>'
          + '<p><label for="name">Name</label>'
          + '<input type="text" name="name" value="'
          + product.name
          + '" /></p>'
          + '<p><label for="price">Price</label>'
          + '<input type="text" name="price" value="'
          + parseFloat(product.price).toFixed(2)
          + '" /></p>'
          + '<p><label for="description">Description</label>'
          + '<textarea name="description">'
          + product.description
          + '</textarea></p>';
      },
      content: function(product) {
        var inner_html = '<h4>Product: '
          + product.id
          + '</h4>'
          + 'Name: '
          + product.name
          + '<br />Price: $'
          + parseFloat(product.price).toFixed(2)
          + '<br />Description: '
          + product.description
          + '<br />';
        return inner_html;
      },
      empty: function() {
        return { name: '',
          price: 0, 
          description: '' };  
      }
    };


    Product listing.

    Creating a new product.

    Editing an existing product.

    
    functions.order = {
      edit: function(order) {
        return '<b>Order: '
          + order.id
          + '</b><br />'
          + '<input name="email" value="'
          + order.email
          + '" />'
          + ' – '
          ...
          //Order editing is limited
      },
      content: function(order) {
        return '<b>Order: '
          + order.id
          + '</b><br />'
          + order.email
          + ' – '
          + order.phone
          + '<br />'
          ...
      },
      empty: function() {
        return { 
          email: '',
          phone: '',
          ...
        };  
      }
    };


    For this example, we limit order editing to email and phone number changes.

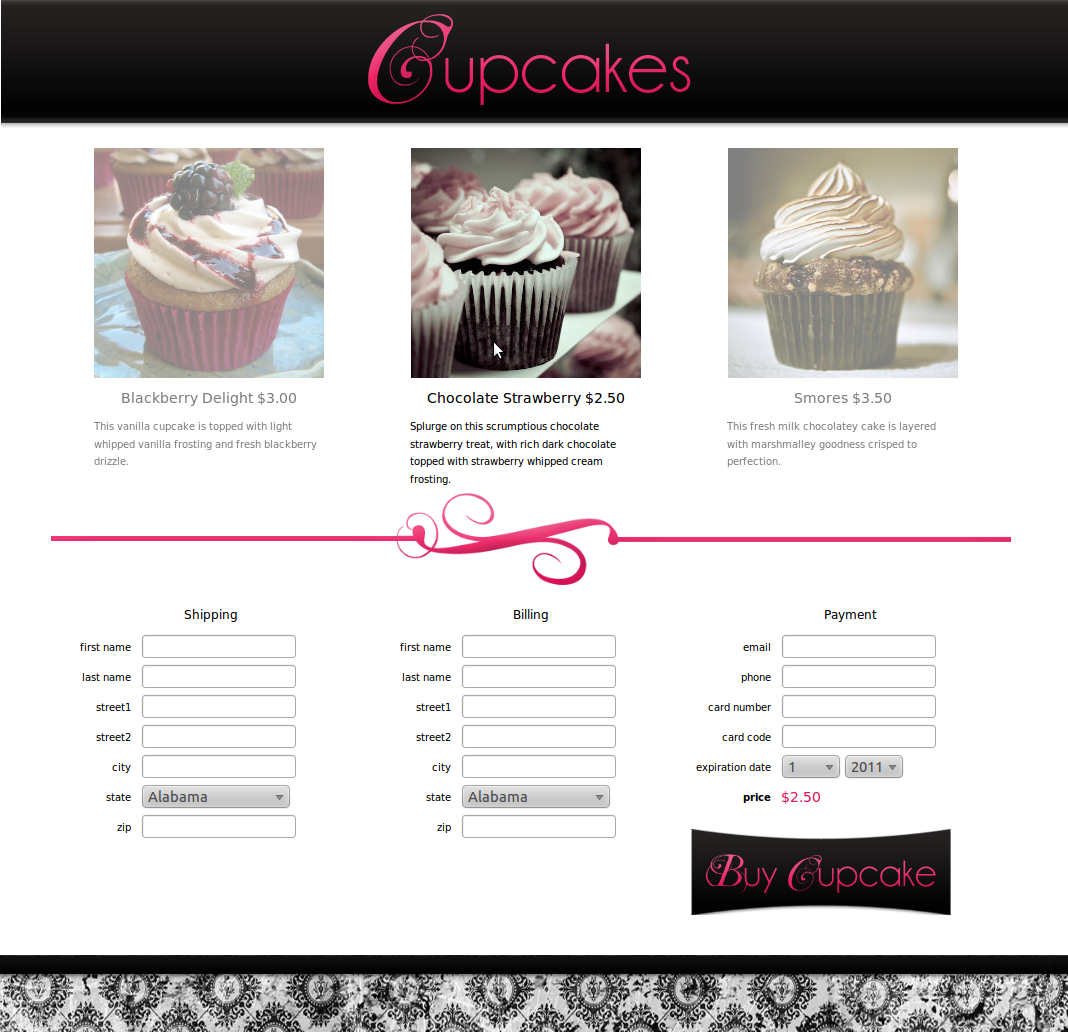
    With a final touch of frontend JavaScript and CSS changes, the following screenshots show the two customer-facing pages from our example store. Like the application described in the previous article, this ecommerce application is still fairly lightweight, but it now allows us to sell several products and manage our resources via the admin panel. Stay tuned for the next increment!

    The cupcake images shown in this article are under the Creative Commons license and can be found here, here, and here. The code shown in this article can be found here (branches part2 and part3).

    ecommerce rails sinatra


    Comments