Ansible tutorial with AWS EC2

By Jeffry Johar
August 11, 2022

Photo by David Buchi
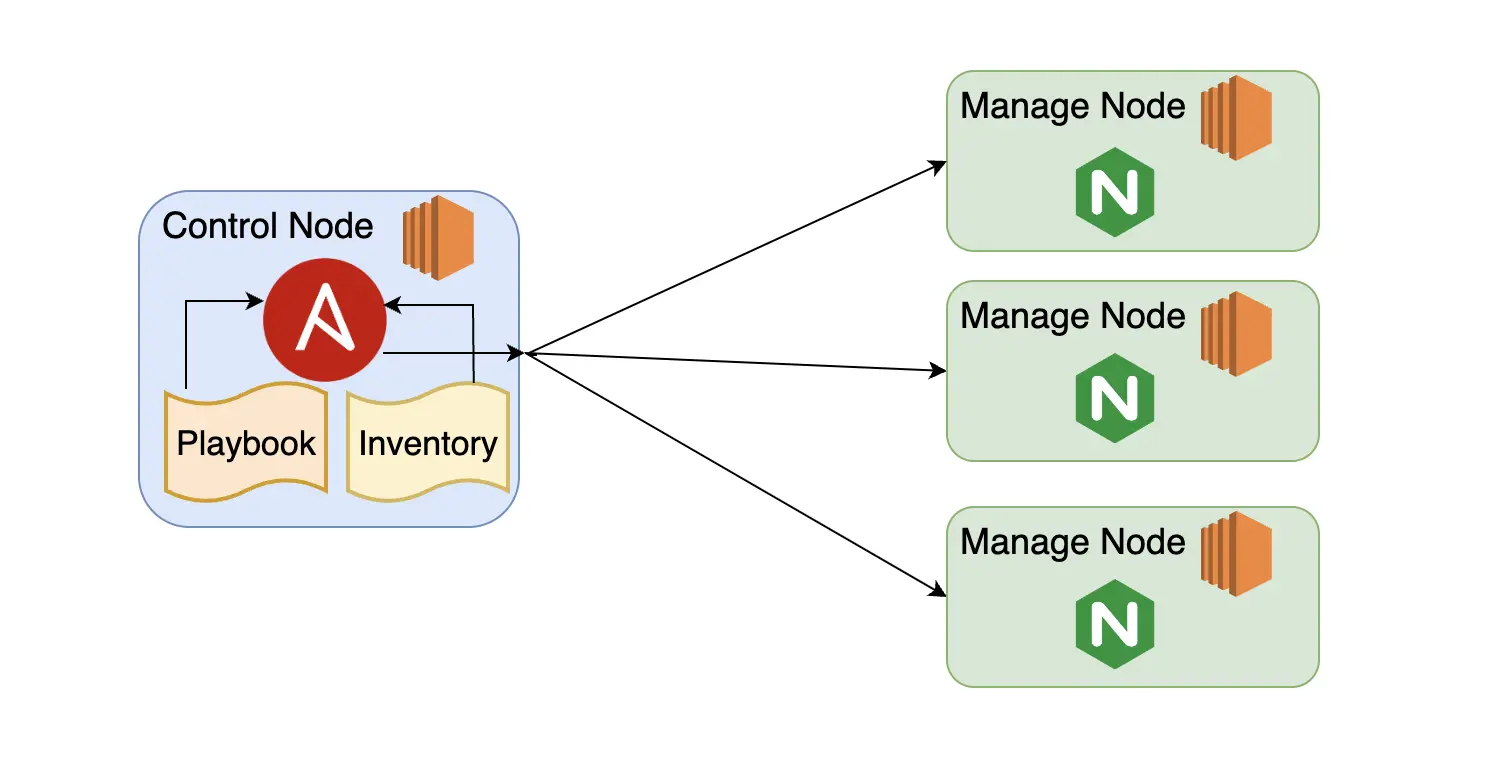
Ansible is a tool to manage multiple remote systems from a single command center. In Ansible, the single command center is known as the control node and the remote systems to be managed are known as managed nodes. The following describes the 2 nodes:
-
Control node:
- The command center where Ansible is installed.
- Supported systems are Unix and Unix-like (Linux, BSD, macOS).
- Python and sshd are required.
- Remote systems to be managed are listed in a YAML or INI file called an inventory.
- Tasks to be executed are defined in a YAML file called a playbook.
-
Managed node:
- The remote systems to be managed.
- Supported systems are Unix/Unix-like, Windows, and Appliances (eg: Cisco, NetApp).
- Python and sshd are required for Unix/Unix-like.
- PowerShell and WinRM are required for Windows.
In this tutorial we will use Ansible to manage multiple EC2 instances. For simplicity, we are going to provision EC2 instances in the AWS web console. Then we will configure one EC2 as the control node that will be managing multiple EC2 instances as managed nodes.
Prerequisites
For this tutorial we will need the following from AWS:
- An active AWS account.
- EC2 instances with Amazon Linux 2 as the OS.
- AWS Keys for SSH to access control node and managed nodes.
- Security group which allows SSH and HTTP.
- A decent editor such as Vim or Notepad++ to create the inventory and the playbook.
EC2 Instances provisioning
The following are the steps to provision EC2 instances with the AWS web console.
- Go to AWS Console → EC2 → Launch Instances.
- Select the Amazon Linux 2 AMI.
- Select a key pair. If there are no available key pairs, please create one according to Amazon’s instructions.
- Allow SSH and HTTP.
- Set Number of Instances to 4.
- Click Launch Instance.
Ansible nodes and SSH keys
In this section we will gather the IP addresses of EC2 instances and set up the SSH keys.
-
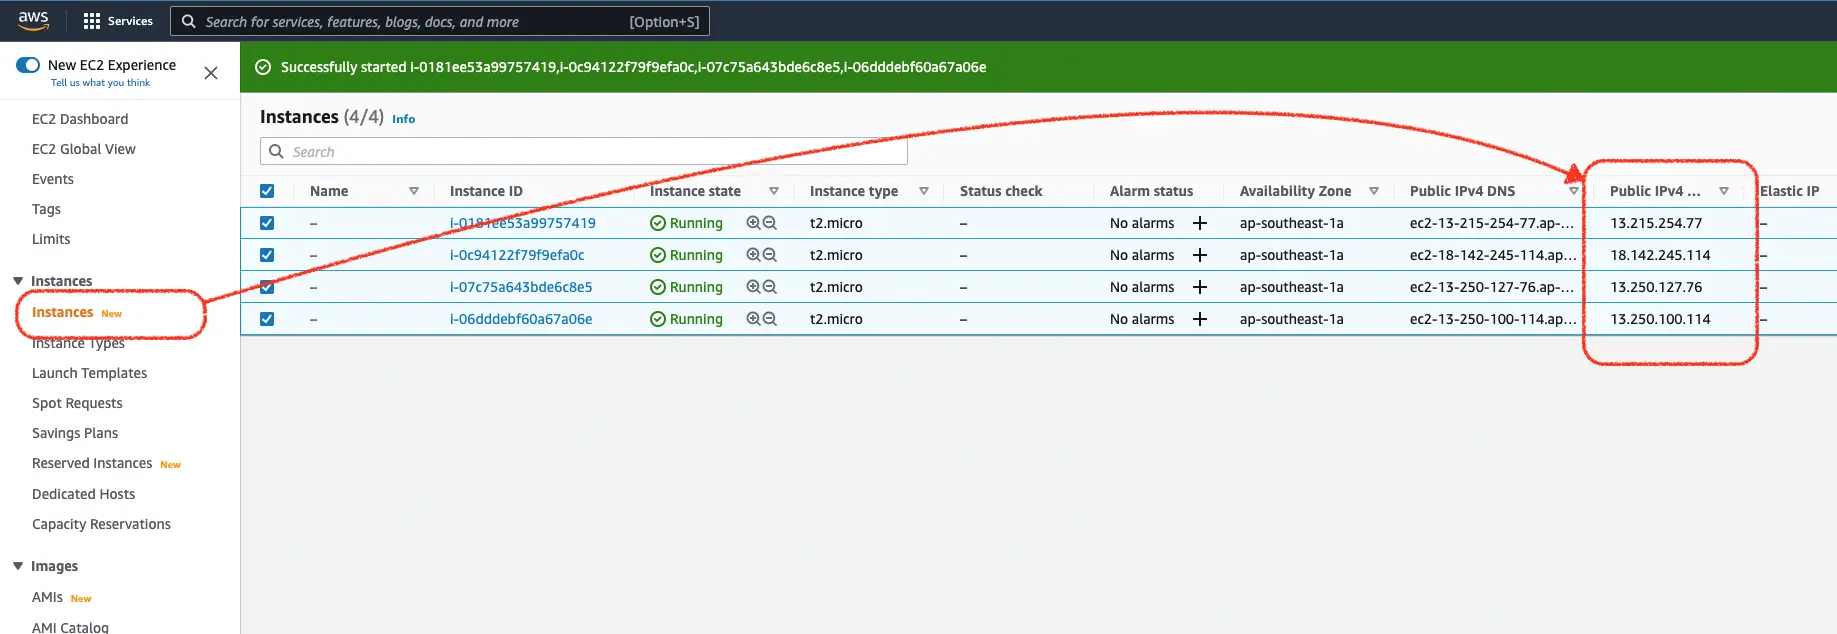
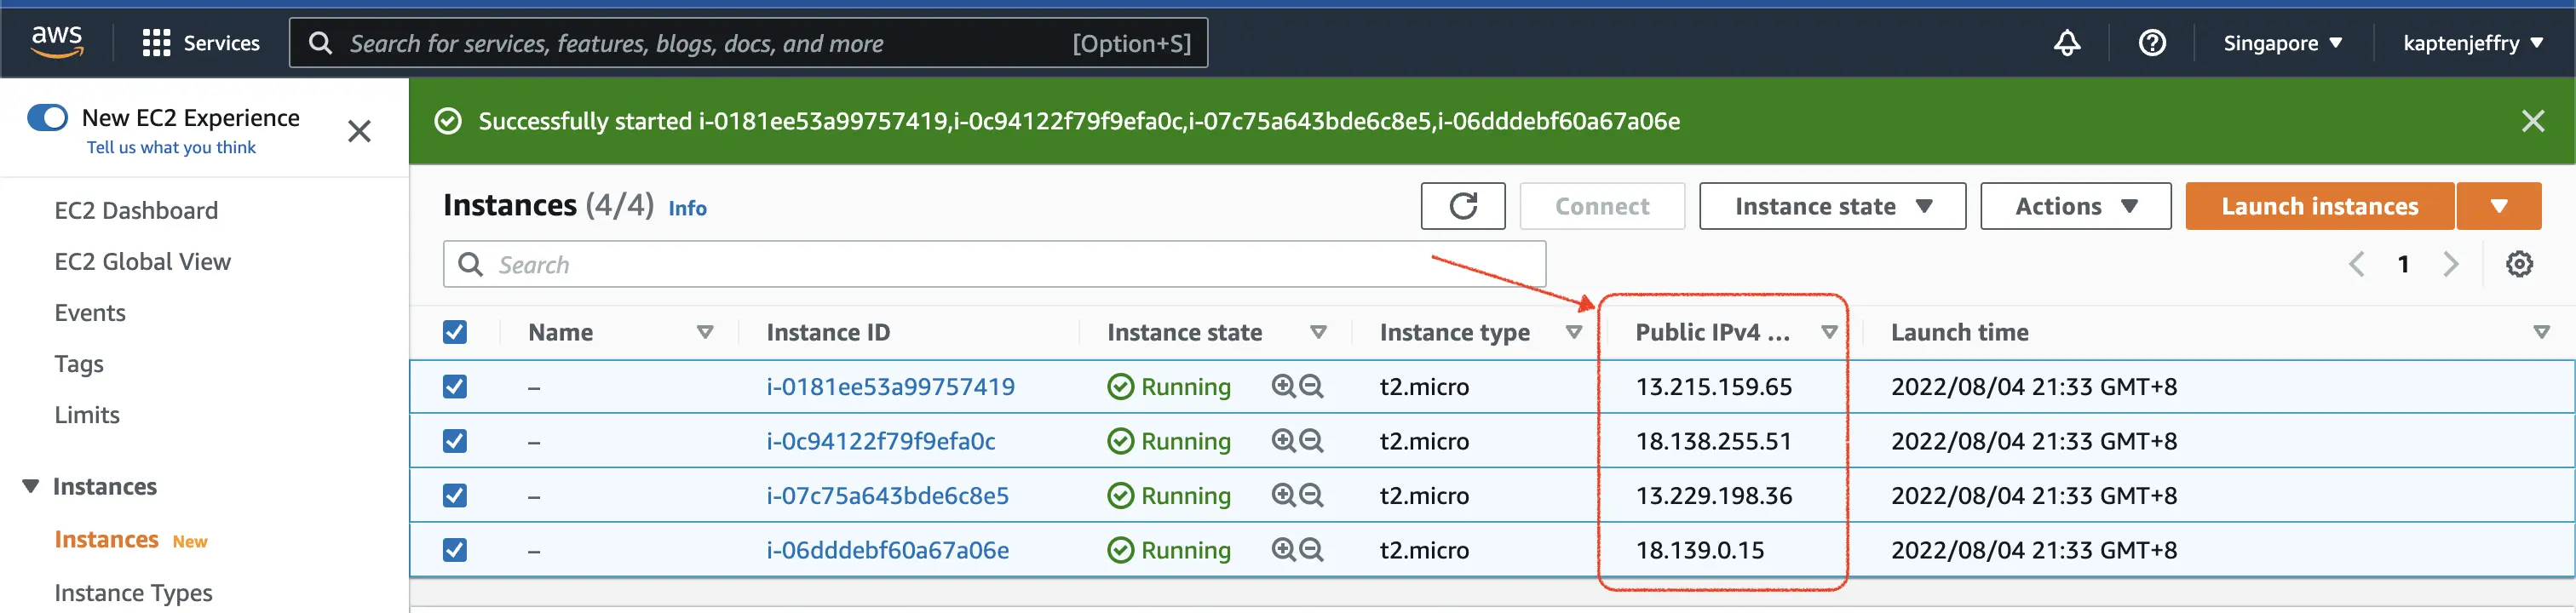
Go to AWS Console → EC2 → Launch Instances.
-
Get the Public IPv4 addresses.
-
We will choose the first EC2 to be the Ansible control node and the rest to be the managed nodes:
- control node: 13.215.159.65
- managed nodes: 18.138.255.51, 13.229.198.36, 18.139.0.15
Login to the control node using our key pair. For me, it is kaptenjeffry.pem.
ssh -i kaptenjeffry.pem ec2-user@13.215.159.65Open another terminal and copy the key pair to the control node
scp -i kaptenjeffry.pem kaptenjeffry.pem ec2-user@13.215.159.65:~/.sshGo back to the control node terminal. Try to log in from the control node to one of the managed nodes by using the key pair. This is to ensure the key pair is usable to access the managed nodes.
ssh -i .ssh/kaptenjeffry.pem ec2-user@18.138.255.51Register the rest of the managed nodes as known hosts to the control nodes, in bulk:
ssh-keyscan -t ecdsa-sha2-nistp256 13.229.198.36 18.139.0.15 >> .ssh/known_hostsAnsible Installation and Configuration
In this section we will install Ansible in the control node and create the inventory file.
-
In the control node, execute the following commands to install Ansible:
sudo yum update
sudo amazon-linux-extras install ansible2
ansible --version
Where:
yum updateupdates all installed packages using the yum package manager,amazon-linux-extras installinstalls Ansible, andansible --versionchecks the installed version of Ansible.
-
Create a file named
myinventory.ini. Insert the IP addresses that we identified earlier to be the managed nodes in the following format:
[mynginx]
red ansible_host=18.138.255.51
green ansible_host=13.229.198.36
blue ansible_host=18.139.0.15
Where:
[mynginx]is the group name of the managed nodes,red,green, andblueare the aliases of each managed node, andansible_host=x.x.x.xsets the IP Address each managed node.
myinventory.ini is a basic inventory file in a INI format. An inventory file could be either in INI or YAML format. For more information on inventory see the Ansible docs.
Ansible modules and Ansible ad hoc commands
Ansible modules are scripts to do a specific task at managed nodes. For example, there are modules to check availability, copy files, install applications, and lots more. To get the full list of modules, you can check the official Ansible modules page.
A quick way to use Ansible modules is with an ad hoc command. Ad hoc commands use the ansible command-line interface to execute modules at the managed nodes. The usage is as follows:
ansible <pattern> -m <module> -a "<module options>" -i <inventory>Where:
<pattern>is the IP address, hostname, alias or group name,-m moduleis name of the module to be used,-a "<module options>"sets options for the module, and-i <inventory>is the inventory of the managed nodes.
Ad hoc command examples
The following are some example of Ansible ad hoc commands:
ping checks SSH connectivity and Python interpreter at the managed node. To use the ping module against the mynginx group of servers (all 3 hosts: red, green, and blue), run:
ansible mynginx -m ping -i myinventory.ini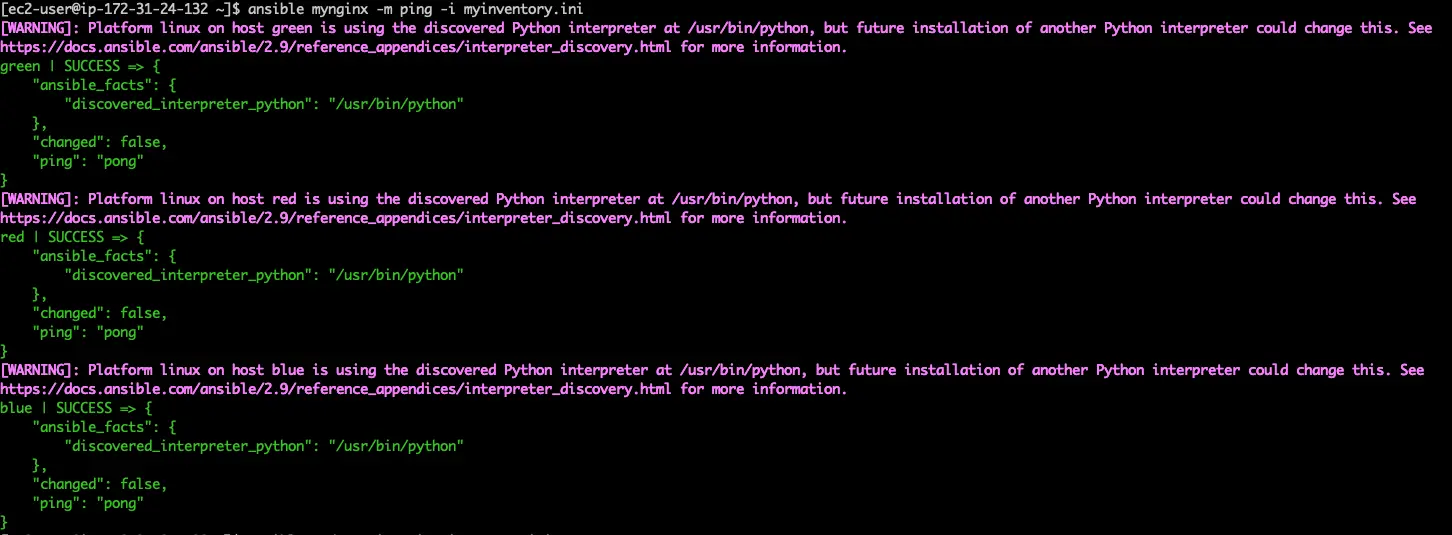
copy copies files to a managed node. To copy a text file (/home/ec2-user/hello.txt in our test case) from the Control node to /tmp/ at all managed nodes in the mynginx group, run:
ansible mynginx -m copy \
-a 'src=/home/ec2-user/hello.txt dest=/tmp/hello.txt' \
-i myinventory.ini
shell executes a shell script at a managed node. To use module shell to execute uptime at all managed nodes in the mynginx group, run:
ansible mynginx -m shell -a 'uptime' -i myinventory.iniAnsible playbooks
Ansible playbooks are configuration files in a YAML format that tell Ansible what to do. A playbook executes its assigned tasks sequentially from top to bottom. Tasks in playbooks are grouped by a block of instructions called a play. The following diagram shows the high level structure of a playbook:
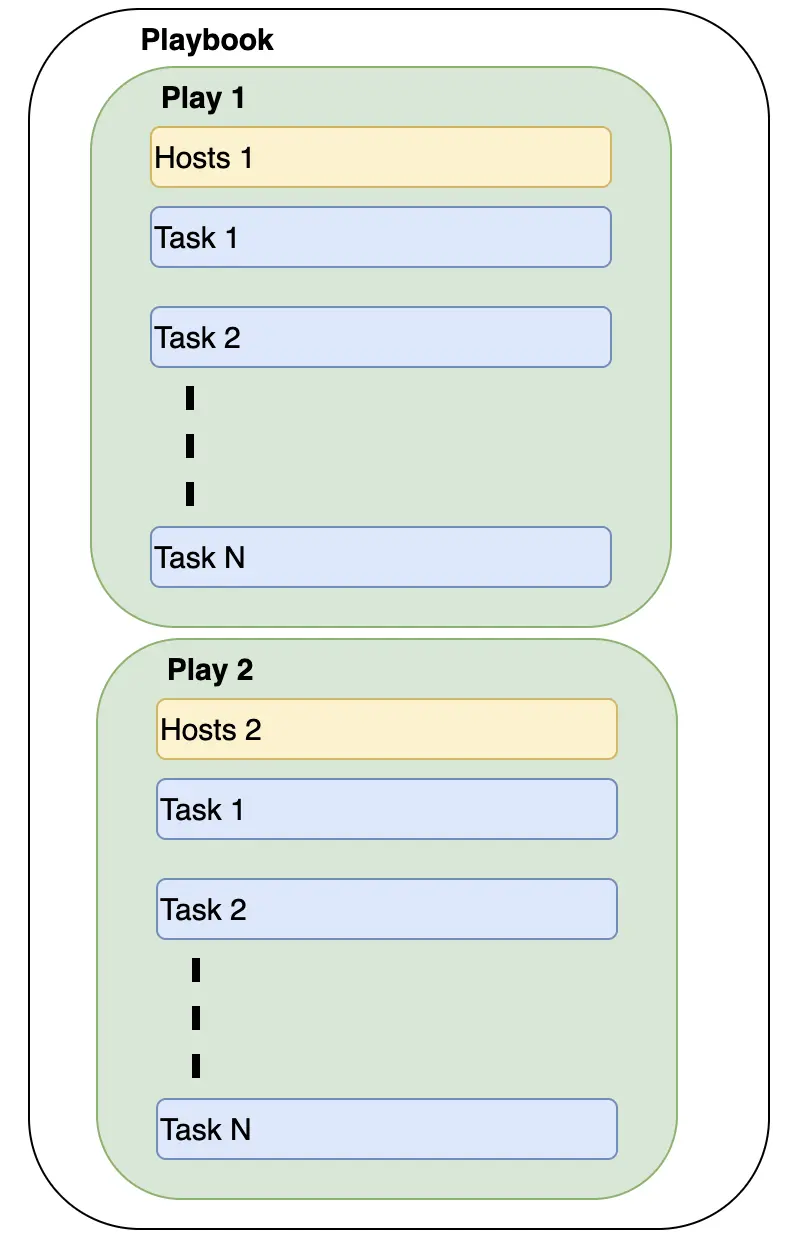
Now we are going to use a playbook to install Nginx at our three managed nodes as depicted in the following diagram:
Create the following YAML file and name it nginx-playbook.yaml. This is a playbook with one play that will install and configure Nginx service at the managed node.
---
- name: Installing and Managing Nginx Server
  hosts: mynginx
  become: True
  vars:
    nginx_version: 1
    nginx_html: /usr/share/nginx/html
    user_home: /home/ec2-user
    index_html: index.html
  tasks:
    - name: Install the latest version of nginx
      command: amazon-linux-extras install nginx{{ nginx_version }}=latest -y

    - name: Start nginx service
      service:
        name: nginx
        state: started

    - name: Enable nginx service
      service:
         name: nginx
         enabled: yes
    - name: Copy index.html to managed nodes
      copy:
        src:  "{{ user_home }}/{{ index_html }}"
        dest: "{{ nginx_html }}"
Where:
name(top most) is the name of this play,hostsspecifies the managed nodes for this play,becomesays whether to use superuser privilege (sudo for Linux),varsdefines variables for this play,tasksis the start of the task section,name(under task section) specifies the name of each task, andname(in aservicesection) specifies the name of a module.
Let’s try to execute this playbook. Firstly we need to create the source index.html to be copied to managed nodes.
echo 'Hello World!' > index.htmlExecute ansible-playbook against our playbook. Just like the ad hoc command, we need to specify the inventory with the -i switch.
ansible-playbook nginx-playbook.yaml -i myinventory.ini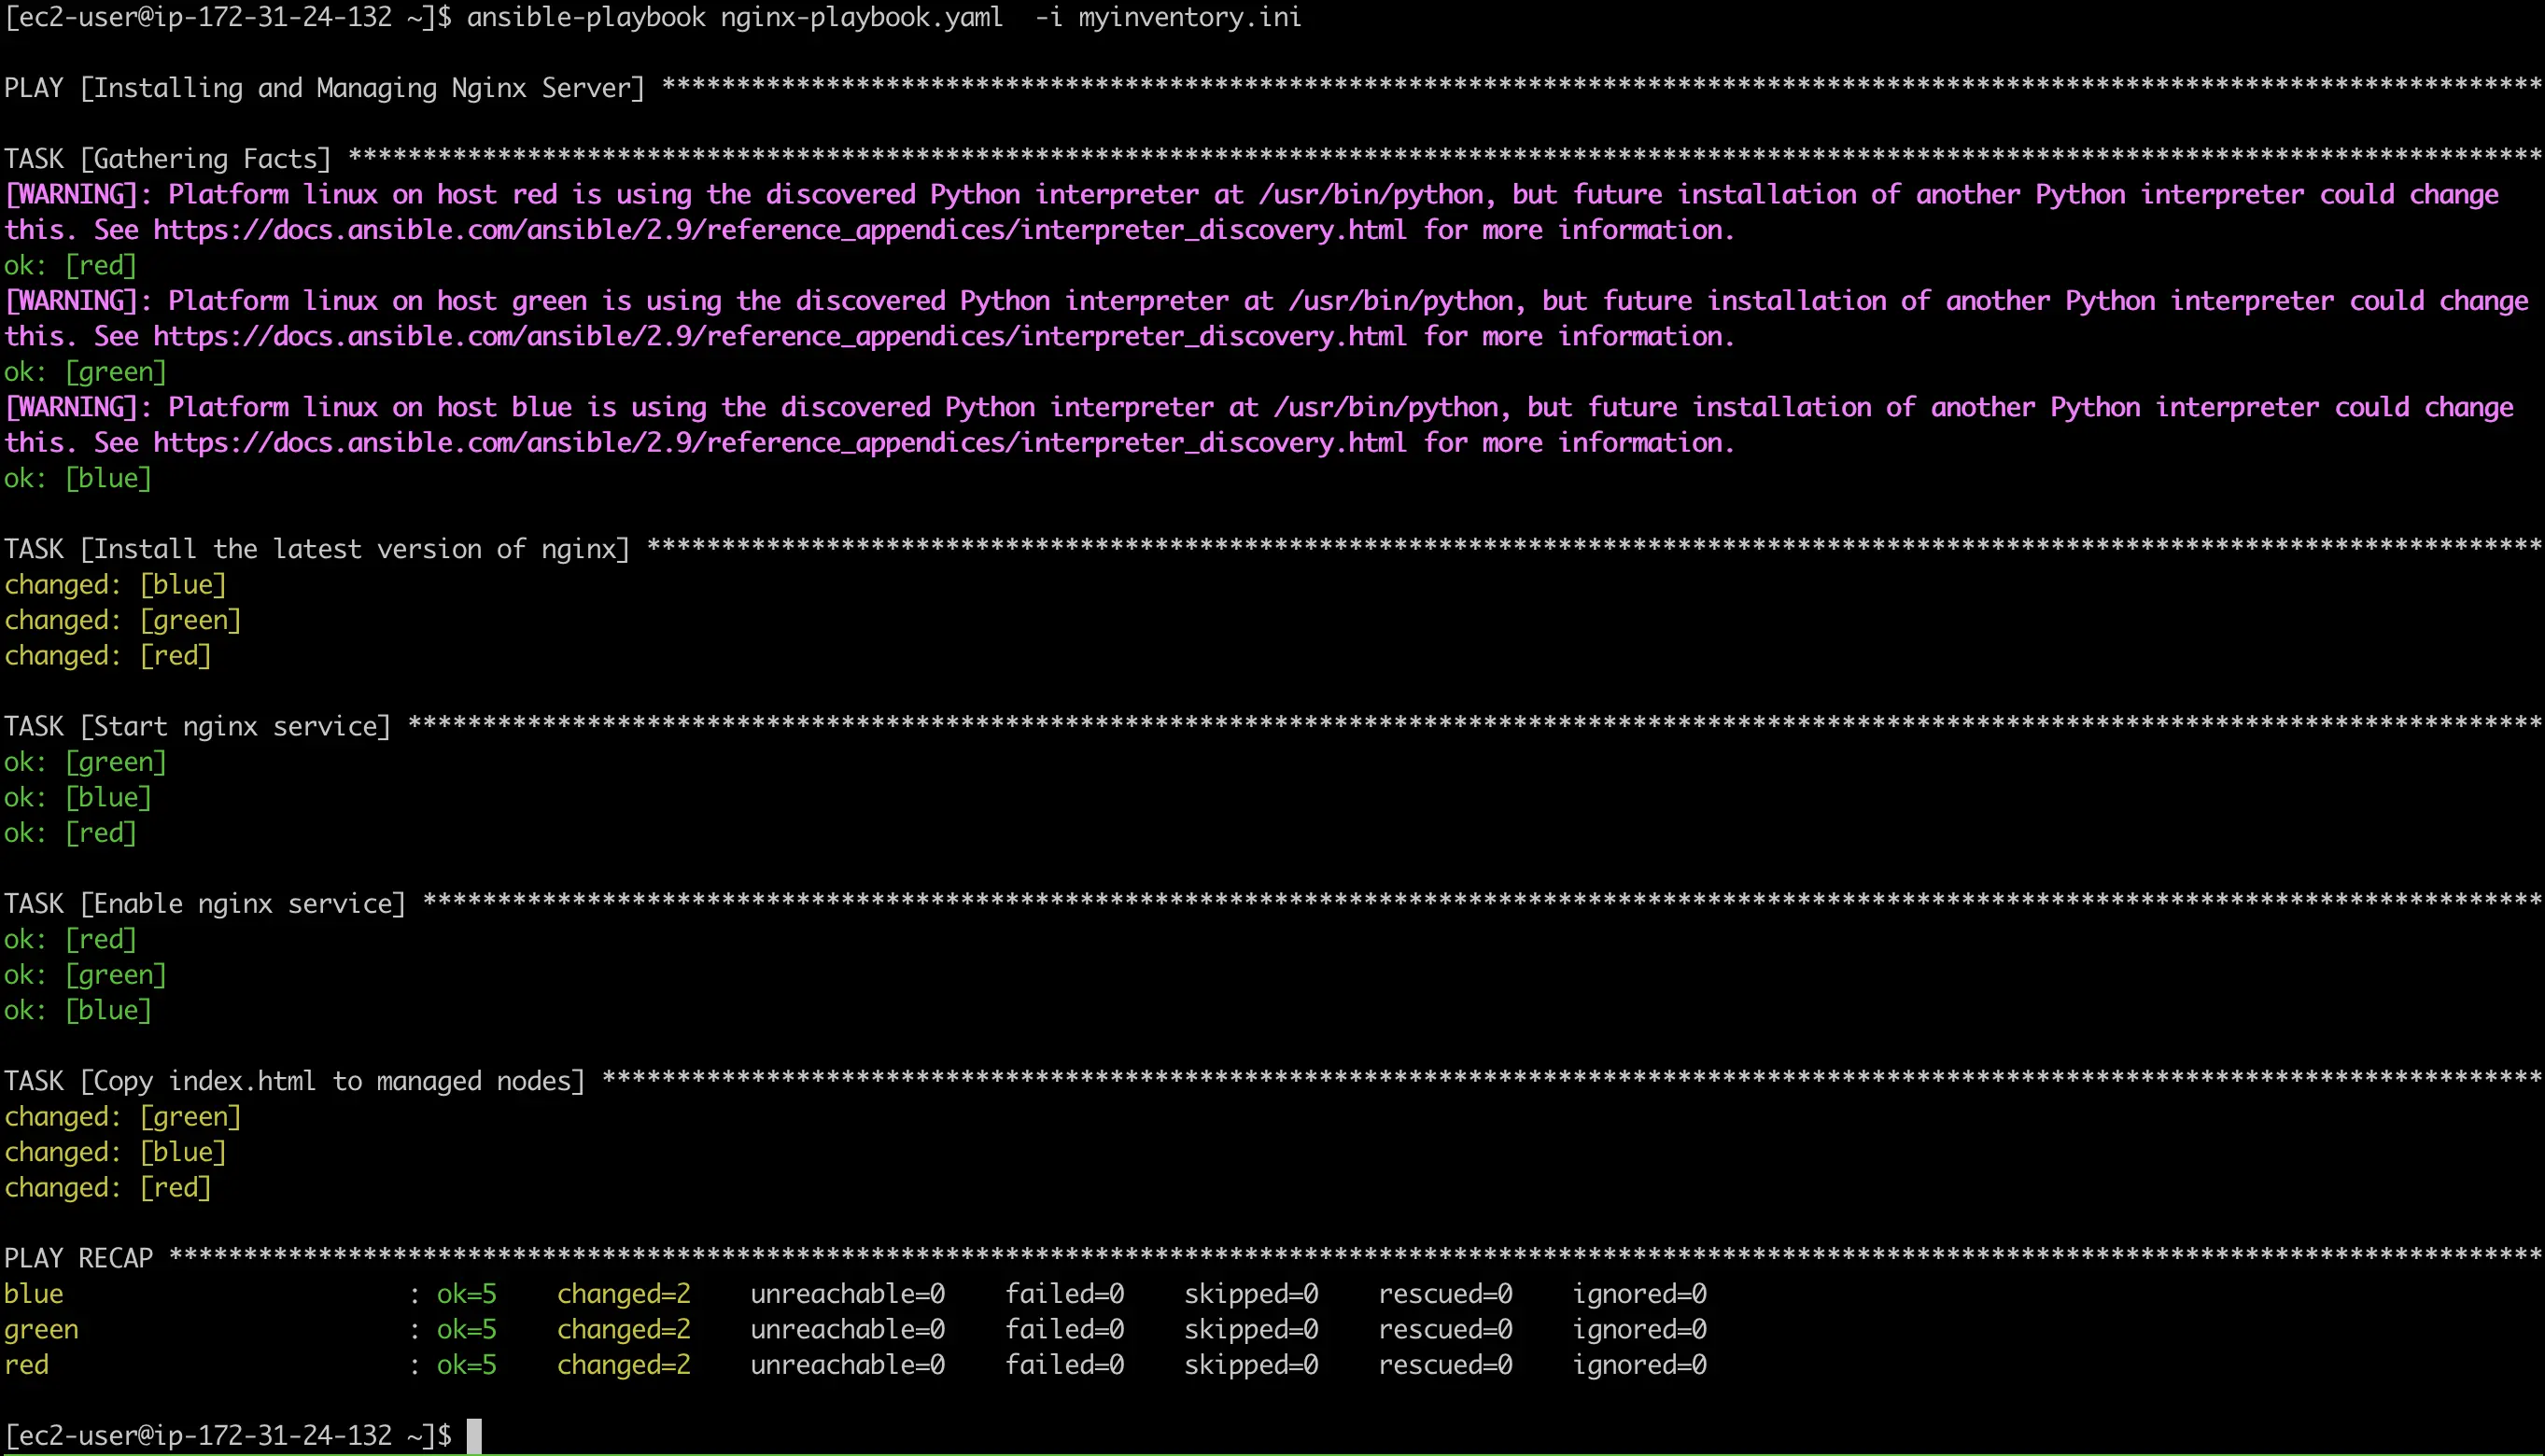
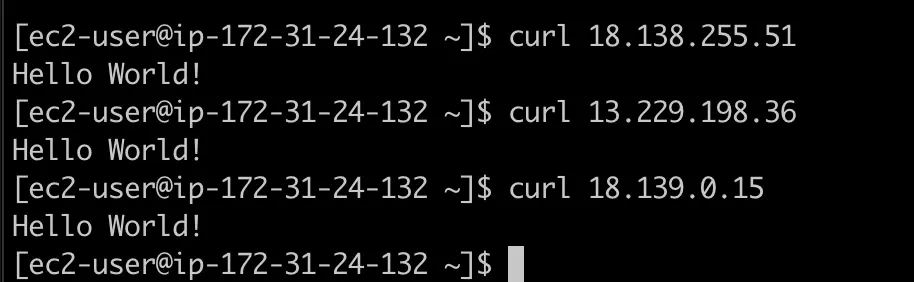
Now we can curl our managed nodes to check on the Nginx service and the custom index.html.
curl 18.138.255.51
curl 13.229.198.36
curl 18.139.0.15
Conclusion
That’s all, folks. We have successfully managed EC2 instances with Ansible. This tutorial covered the fundamentals of Ansible to start managing remote servers.
Ansible rises above its competitors due to its simplicity of its installation, configuration, and usage. To get further information about Ansible you may visit its official documentation.
Comments