Getting started with Docker and Kubernetes on macOS

By Jeffry Johar
June 20, 2022
What is the best way to master American English? One school of thought says that the best way to learn a language is to live in the country of the origin. For American English that would be the USA. Why is that so? Because we as the learners get to talk to native speakers daily. By doing this, we get to know how the natives use the language and its grammar in the real world.
The same goes for learning Docker and Kubernetes. The best way to learn Docker and Kubernetes is to get them in our MacBooks, laptops, and PCs. This way we can learn and try locally what works and what doesn’t work in our local host at any time, any day.
Lucky for us earthlings who enjoy GUIs, Docker now has Docker Desktop. As its name suggests, it is nicely built for the desktop. It comes with GUI and CLI to manage our Docker and Kubernetes needs. Please take note of the Docker Desktop license. It is free for personal use, education, and open source projects, and has a fee for enterprise usage. With that out of the way, let’s get things started.
Docker Desktop Installation
The official Docker Desktop for can be found on Docker’s website. It covers installation for macOS, Linux, and Windows. For this post we are going to install Docker Desktop for macOS using Brew. Execute the following command to proceed with the Docker Desktop installation:
brew install --cask docker
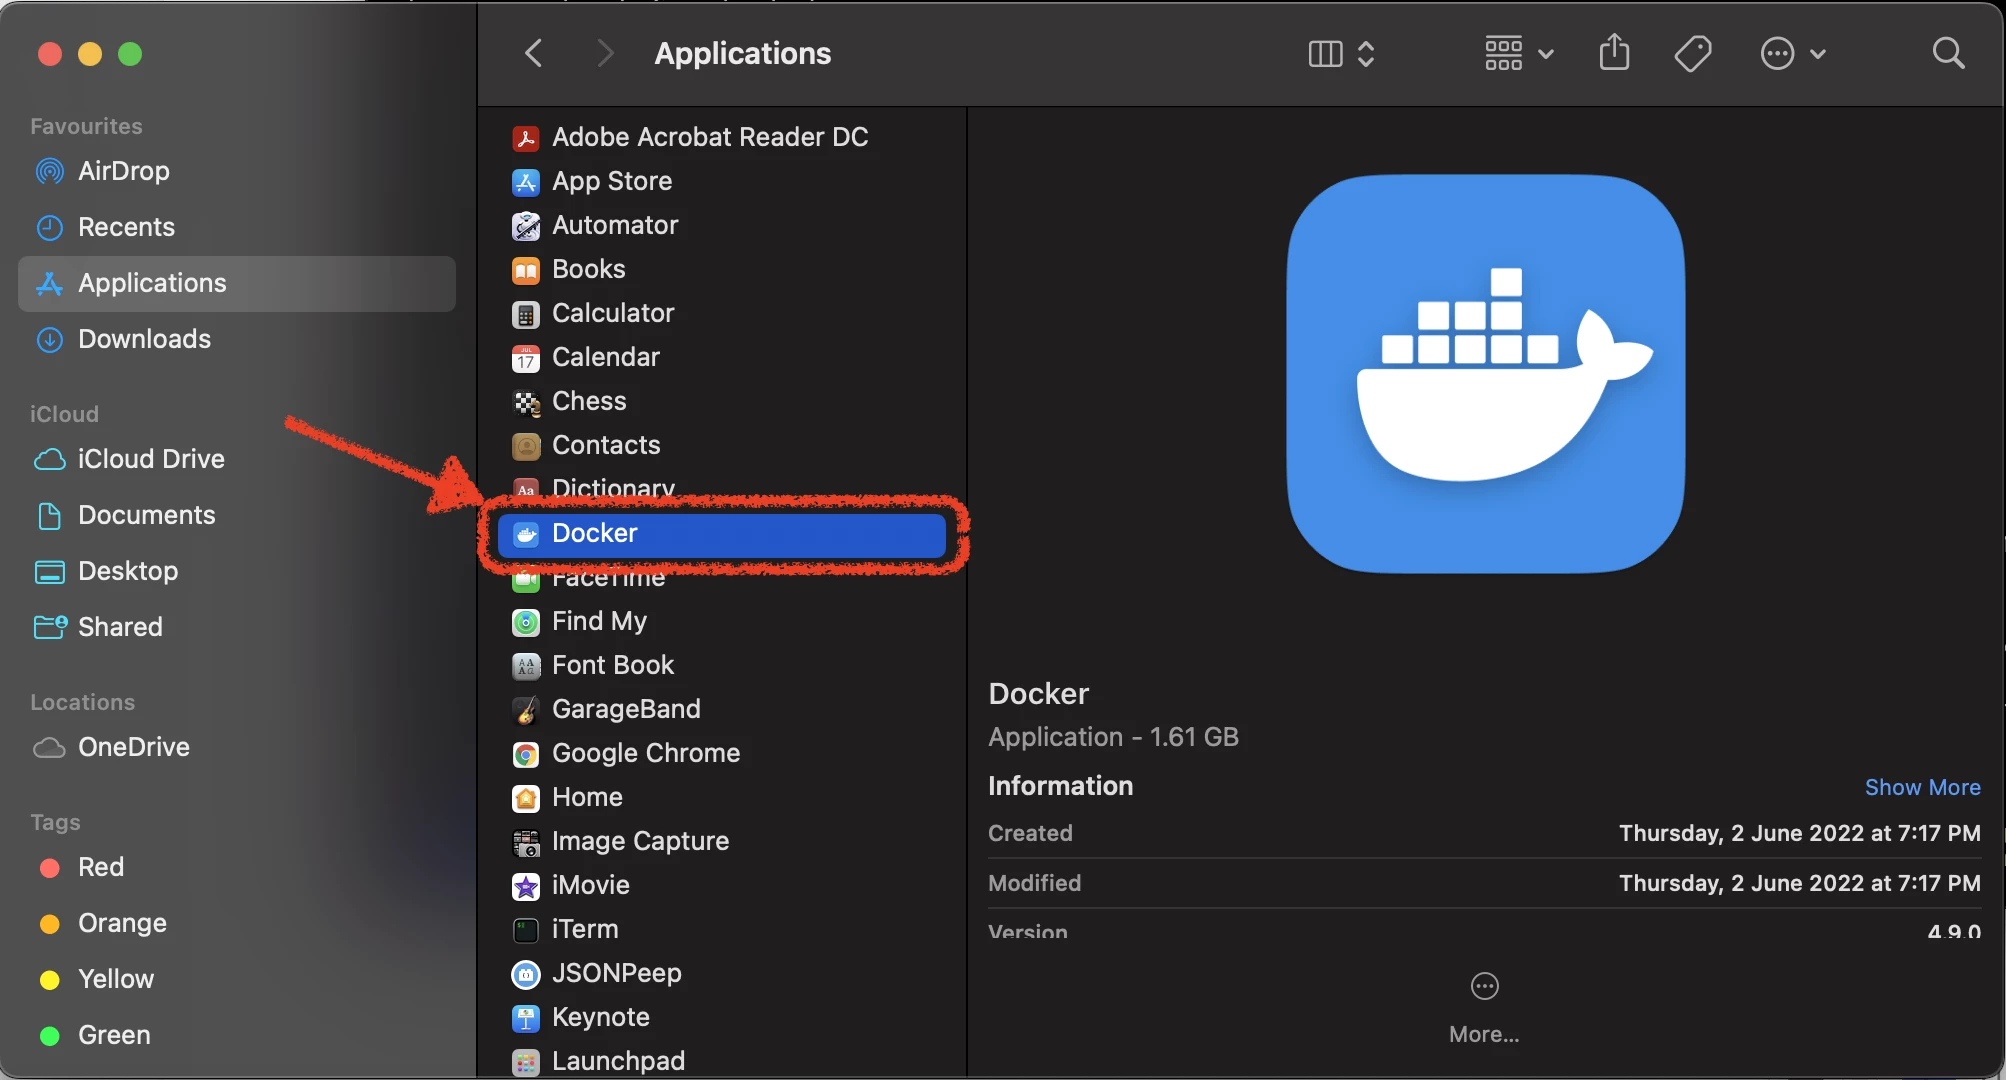
Then run it at Finder ➝ Application ➝ Docker.
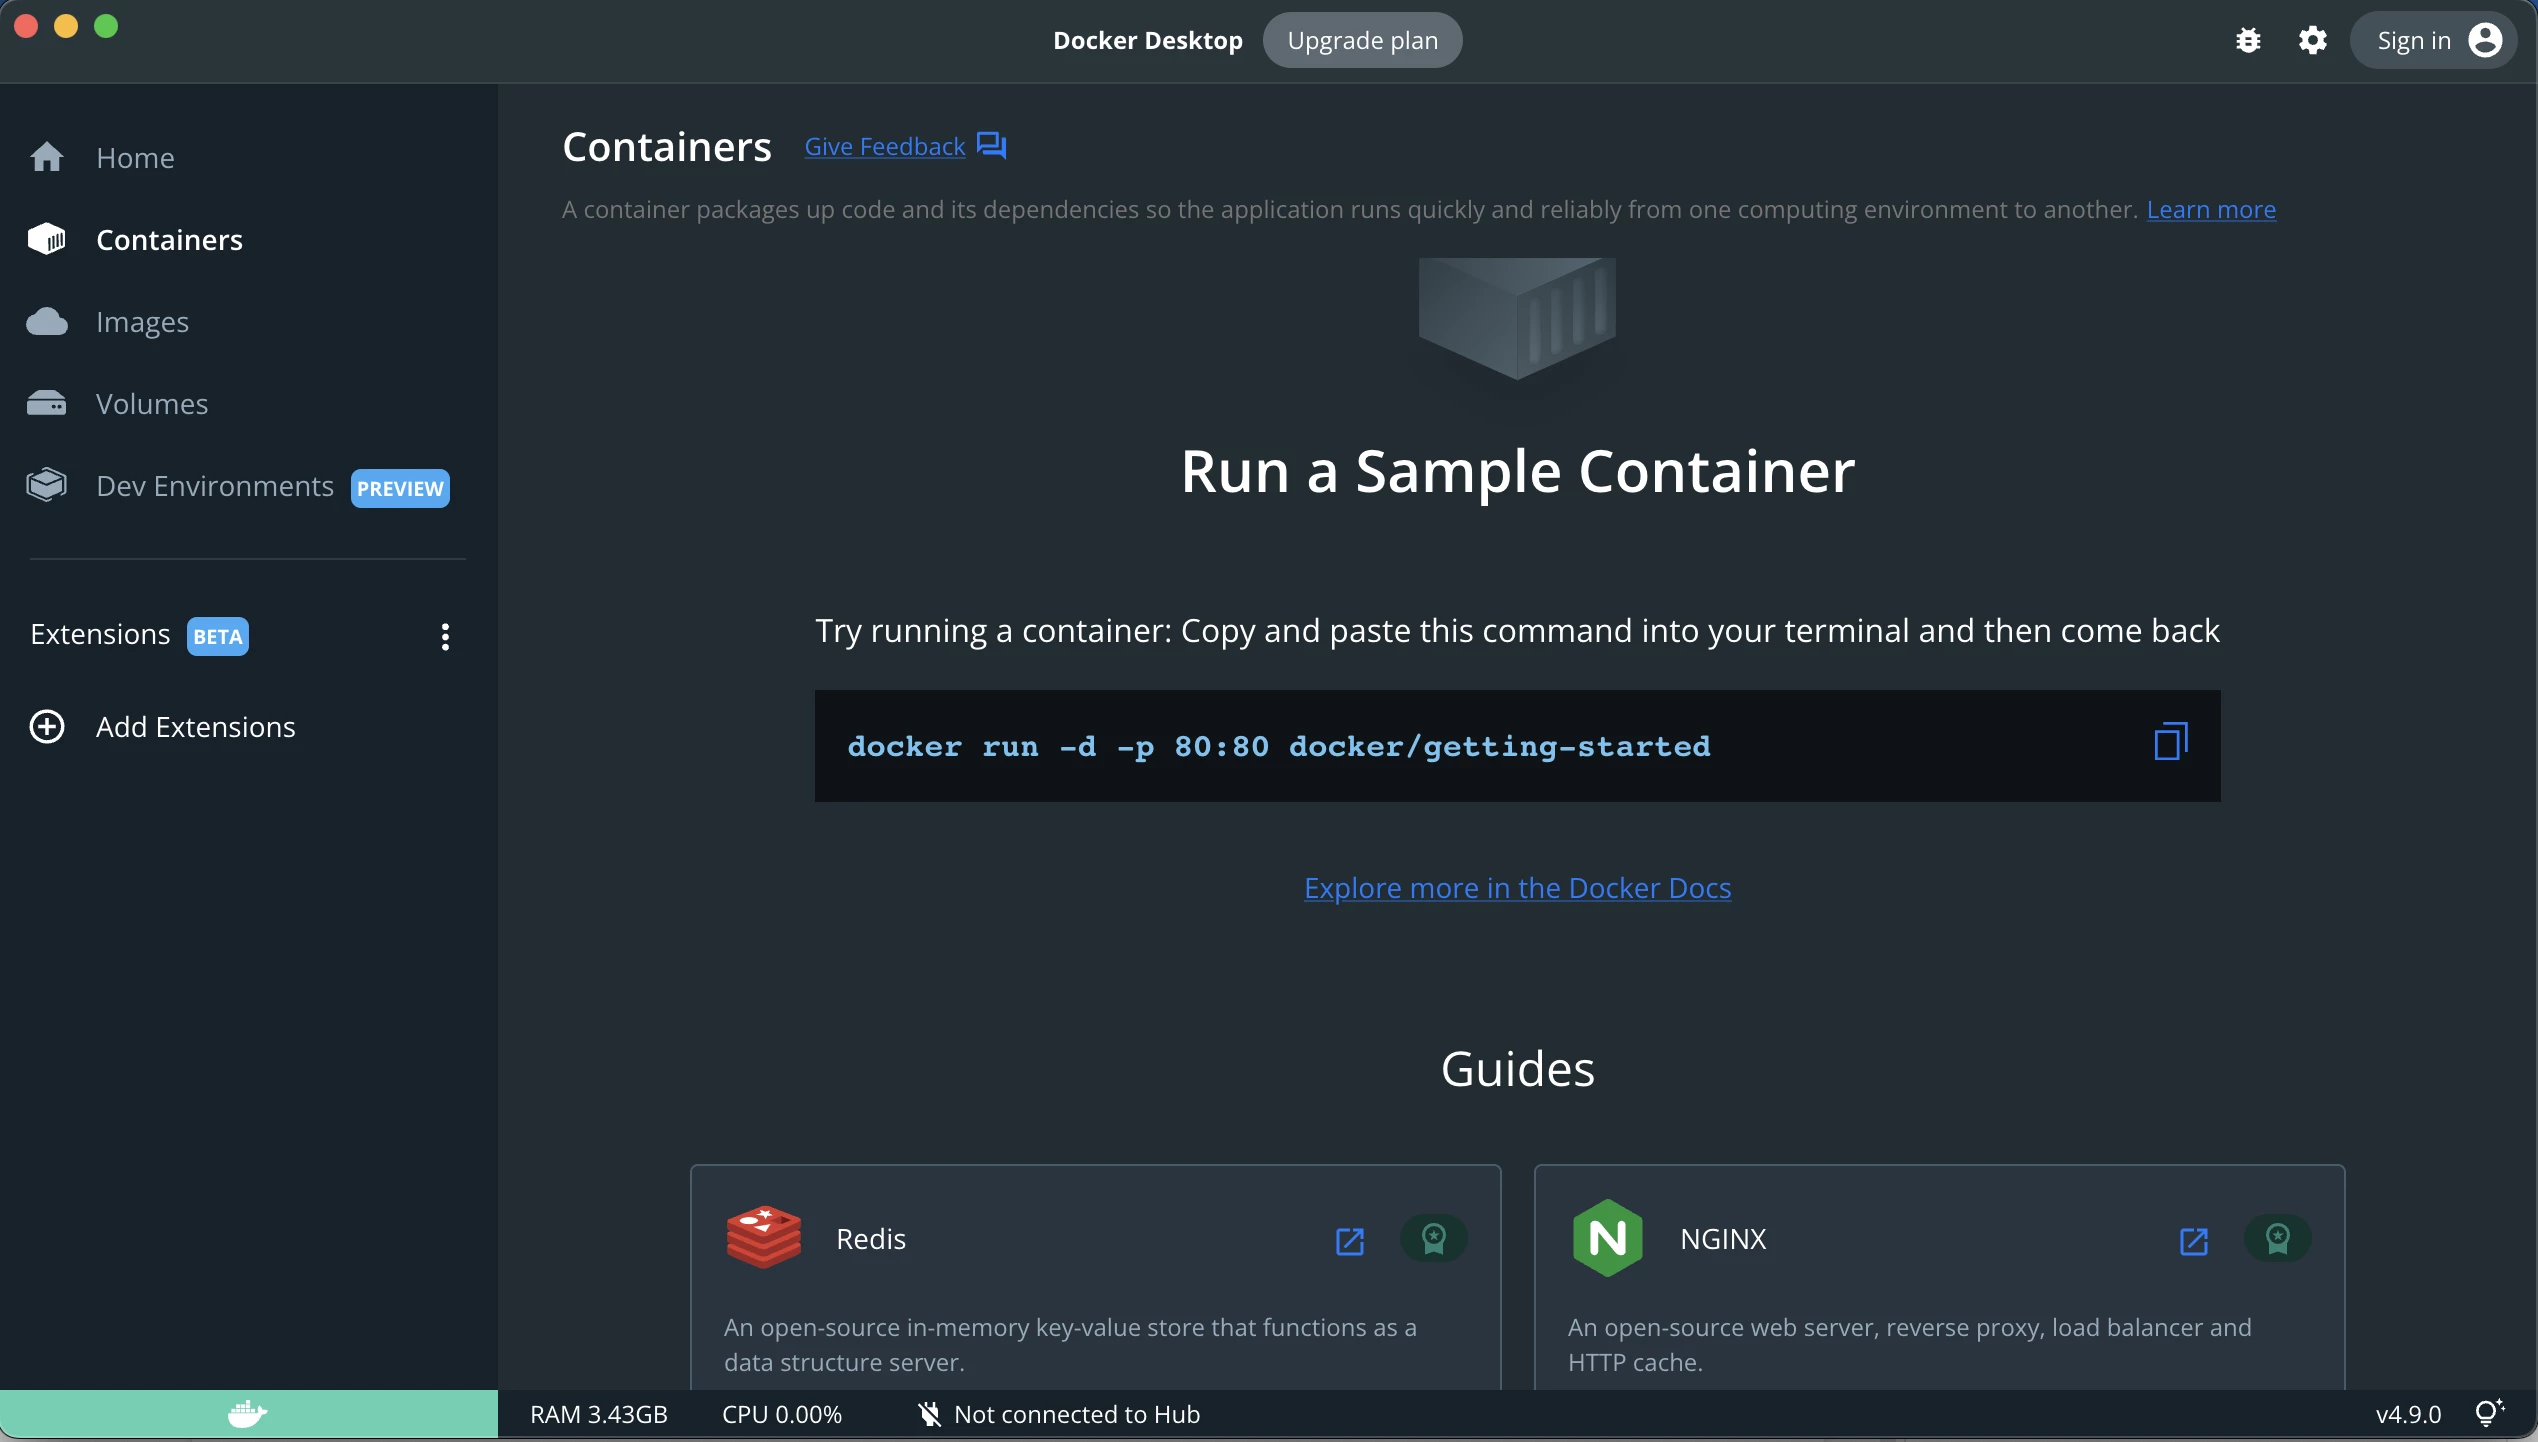
Upon a successful installation, Docker Desktop will appear as the following:
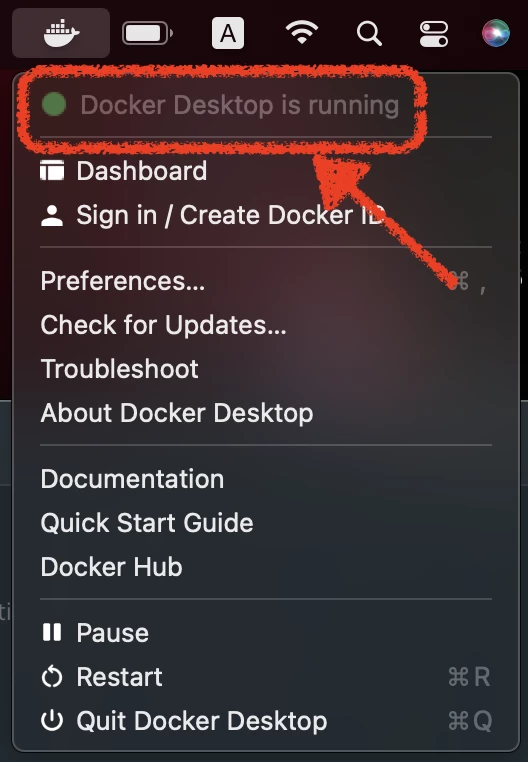
Click the Docker icon at the top menu bar to ensure the Docker Desktop is running.
Run the first containerized application
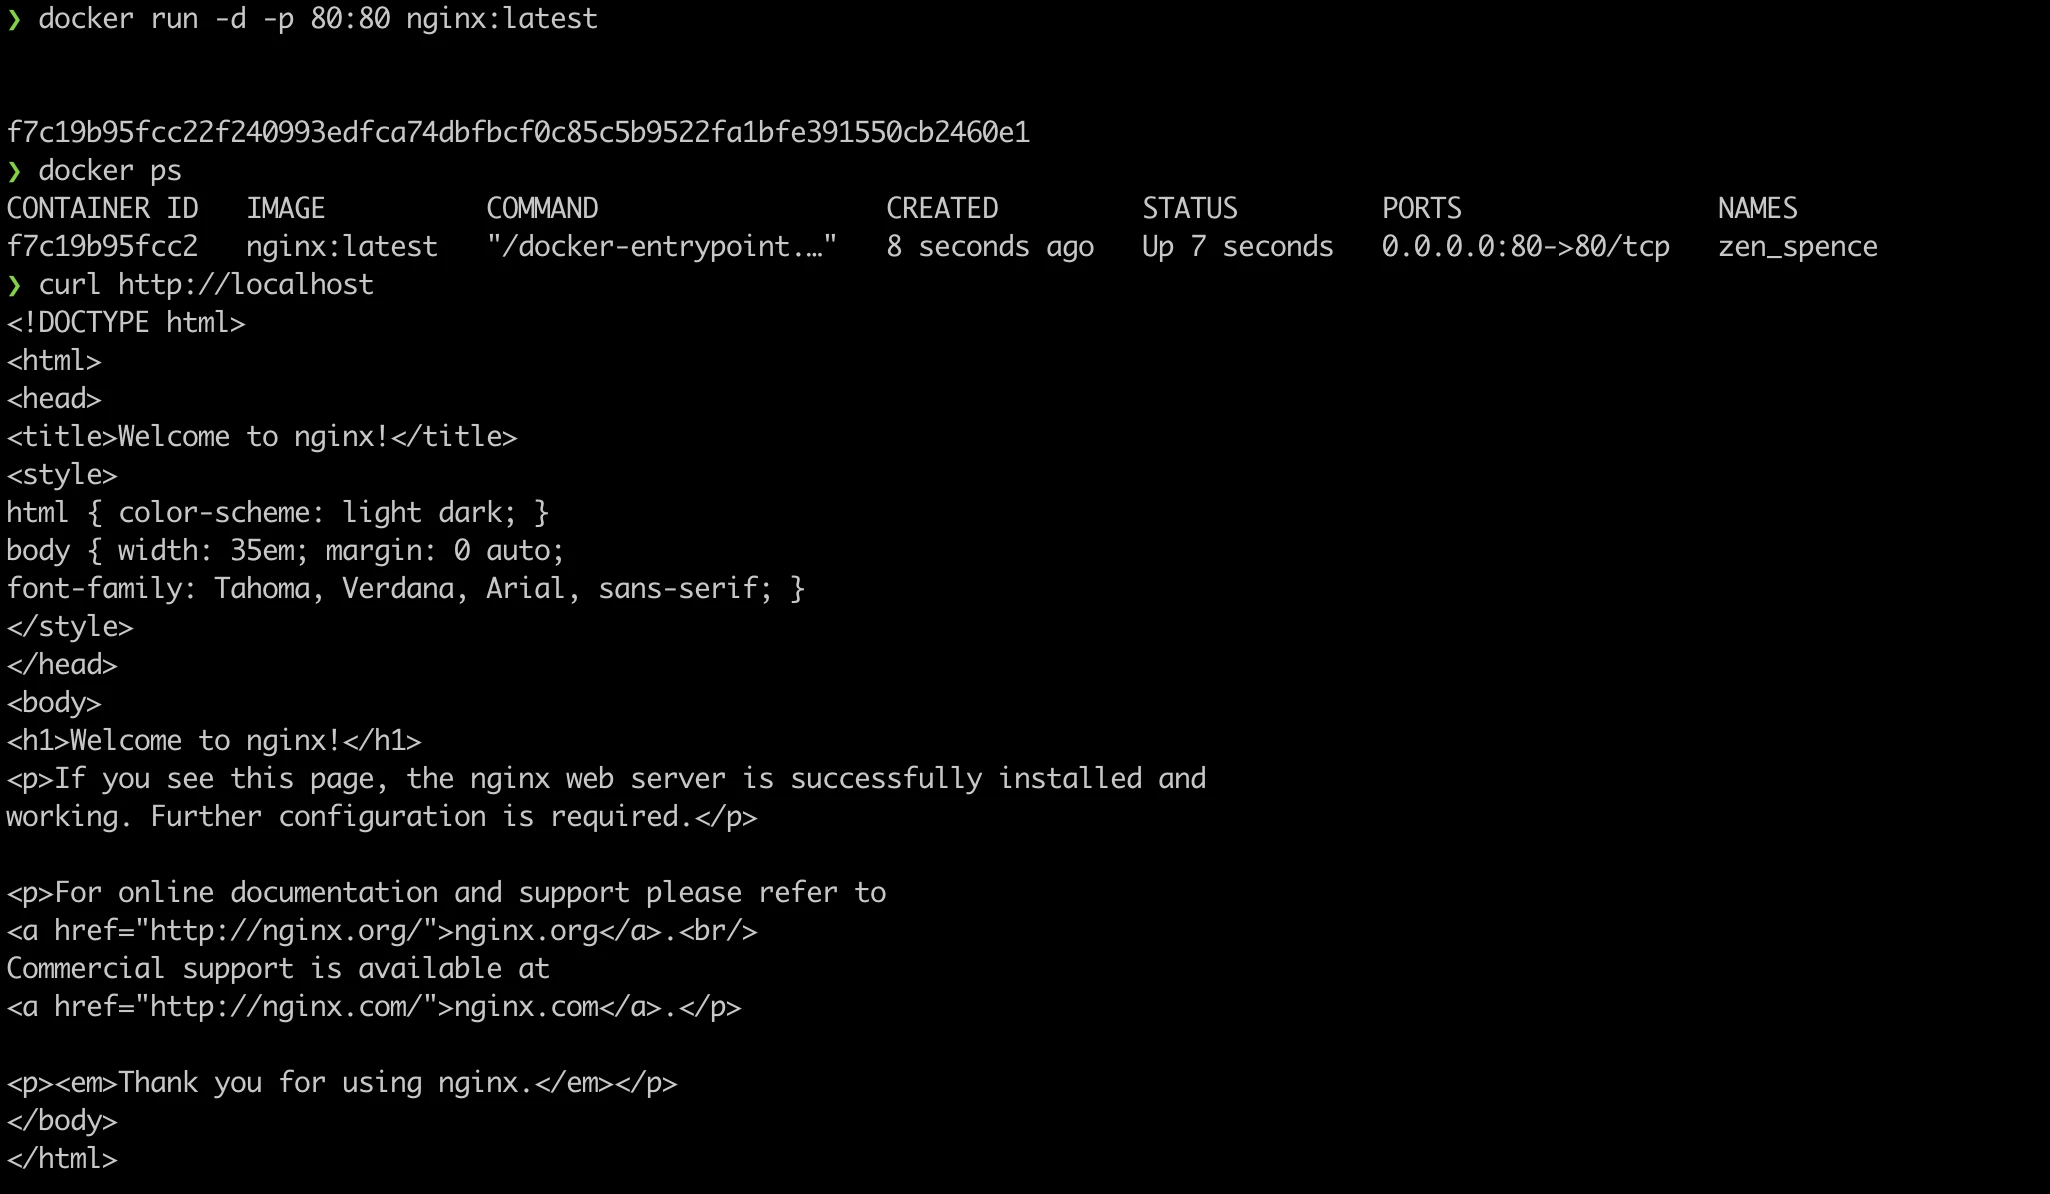
For the first application we are going to run the latest version of nginx official image from hub.docker.com. Open the terminal and execute the following to run the nginx image as a background service at port 80:
docker run -d -p 80:80 nginx:latestRun the following command to check on the application. This is the Docker equivalent to the standard ps Unix command to list processes.
docker pscurl the application at localhost port 80:
curl http://localhostSample output:
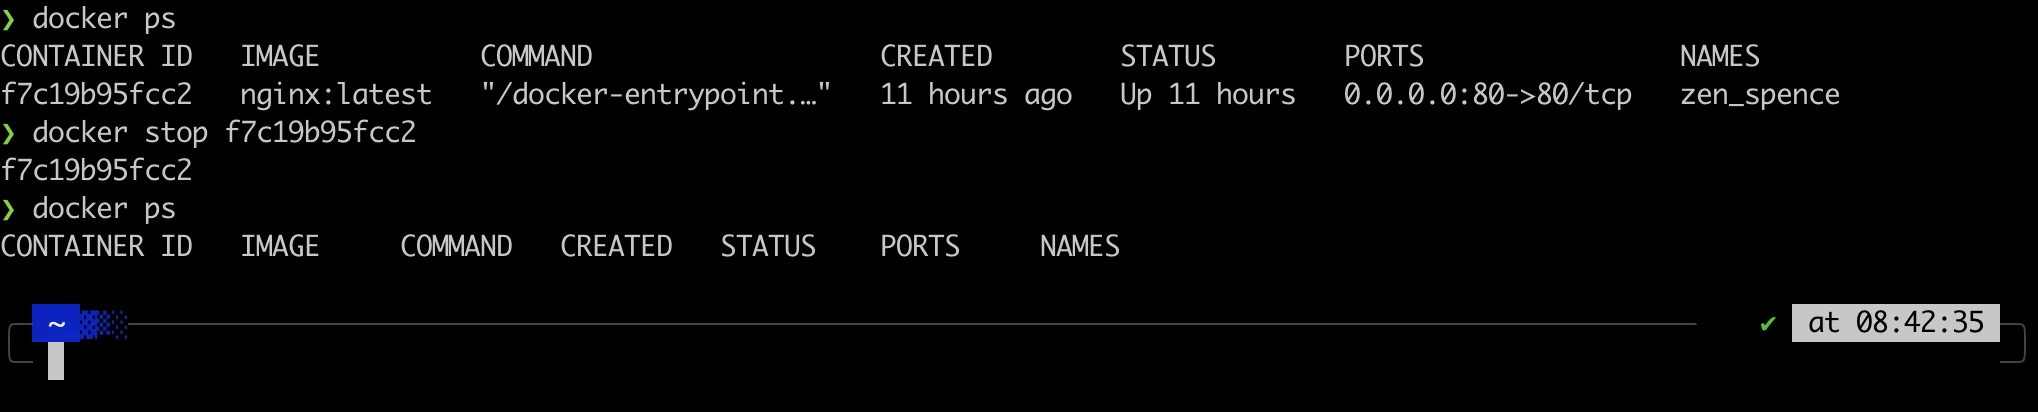
Stop the application
Execute the following command to get the application information and take note of the container ID.
docker psExecute the following to stop the application by its container ID. In the following example the container ID is f7c19b95fcc2.
docker stop {container ID}Run docker ps again to ensure that the stopped application is not being display as a running application.
Sample Output:
Enable Kubernetes
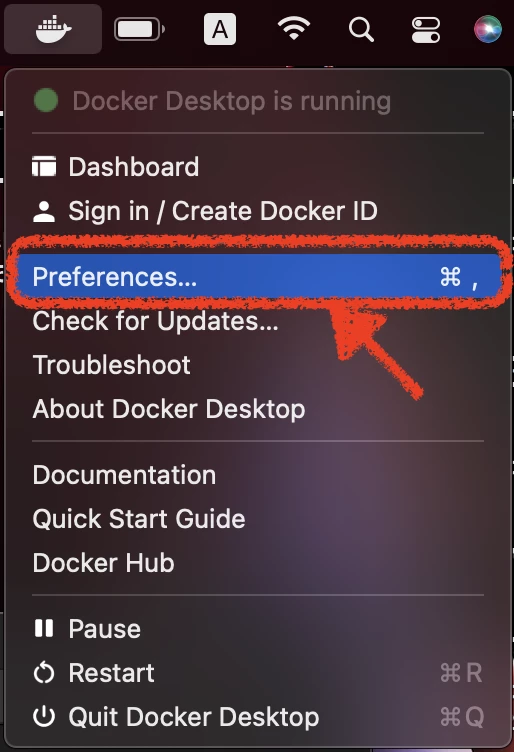
Click the Docker icon at the top menu bar and click Preferences:
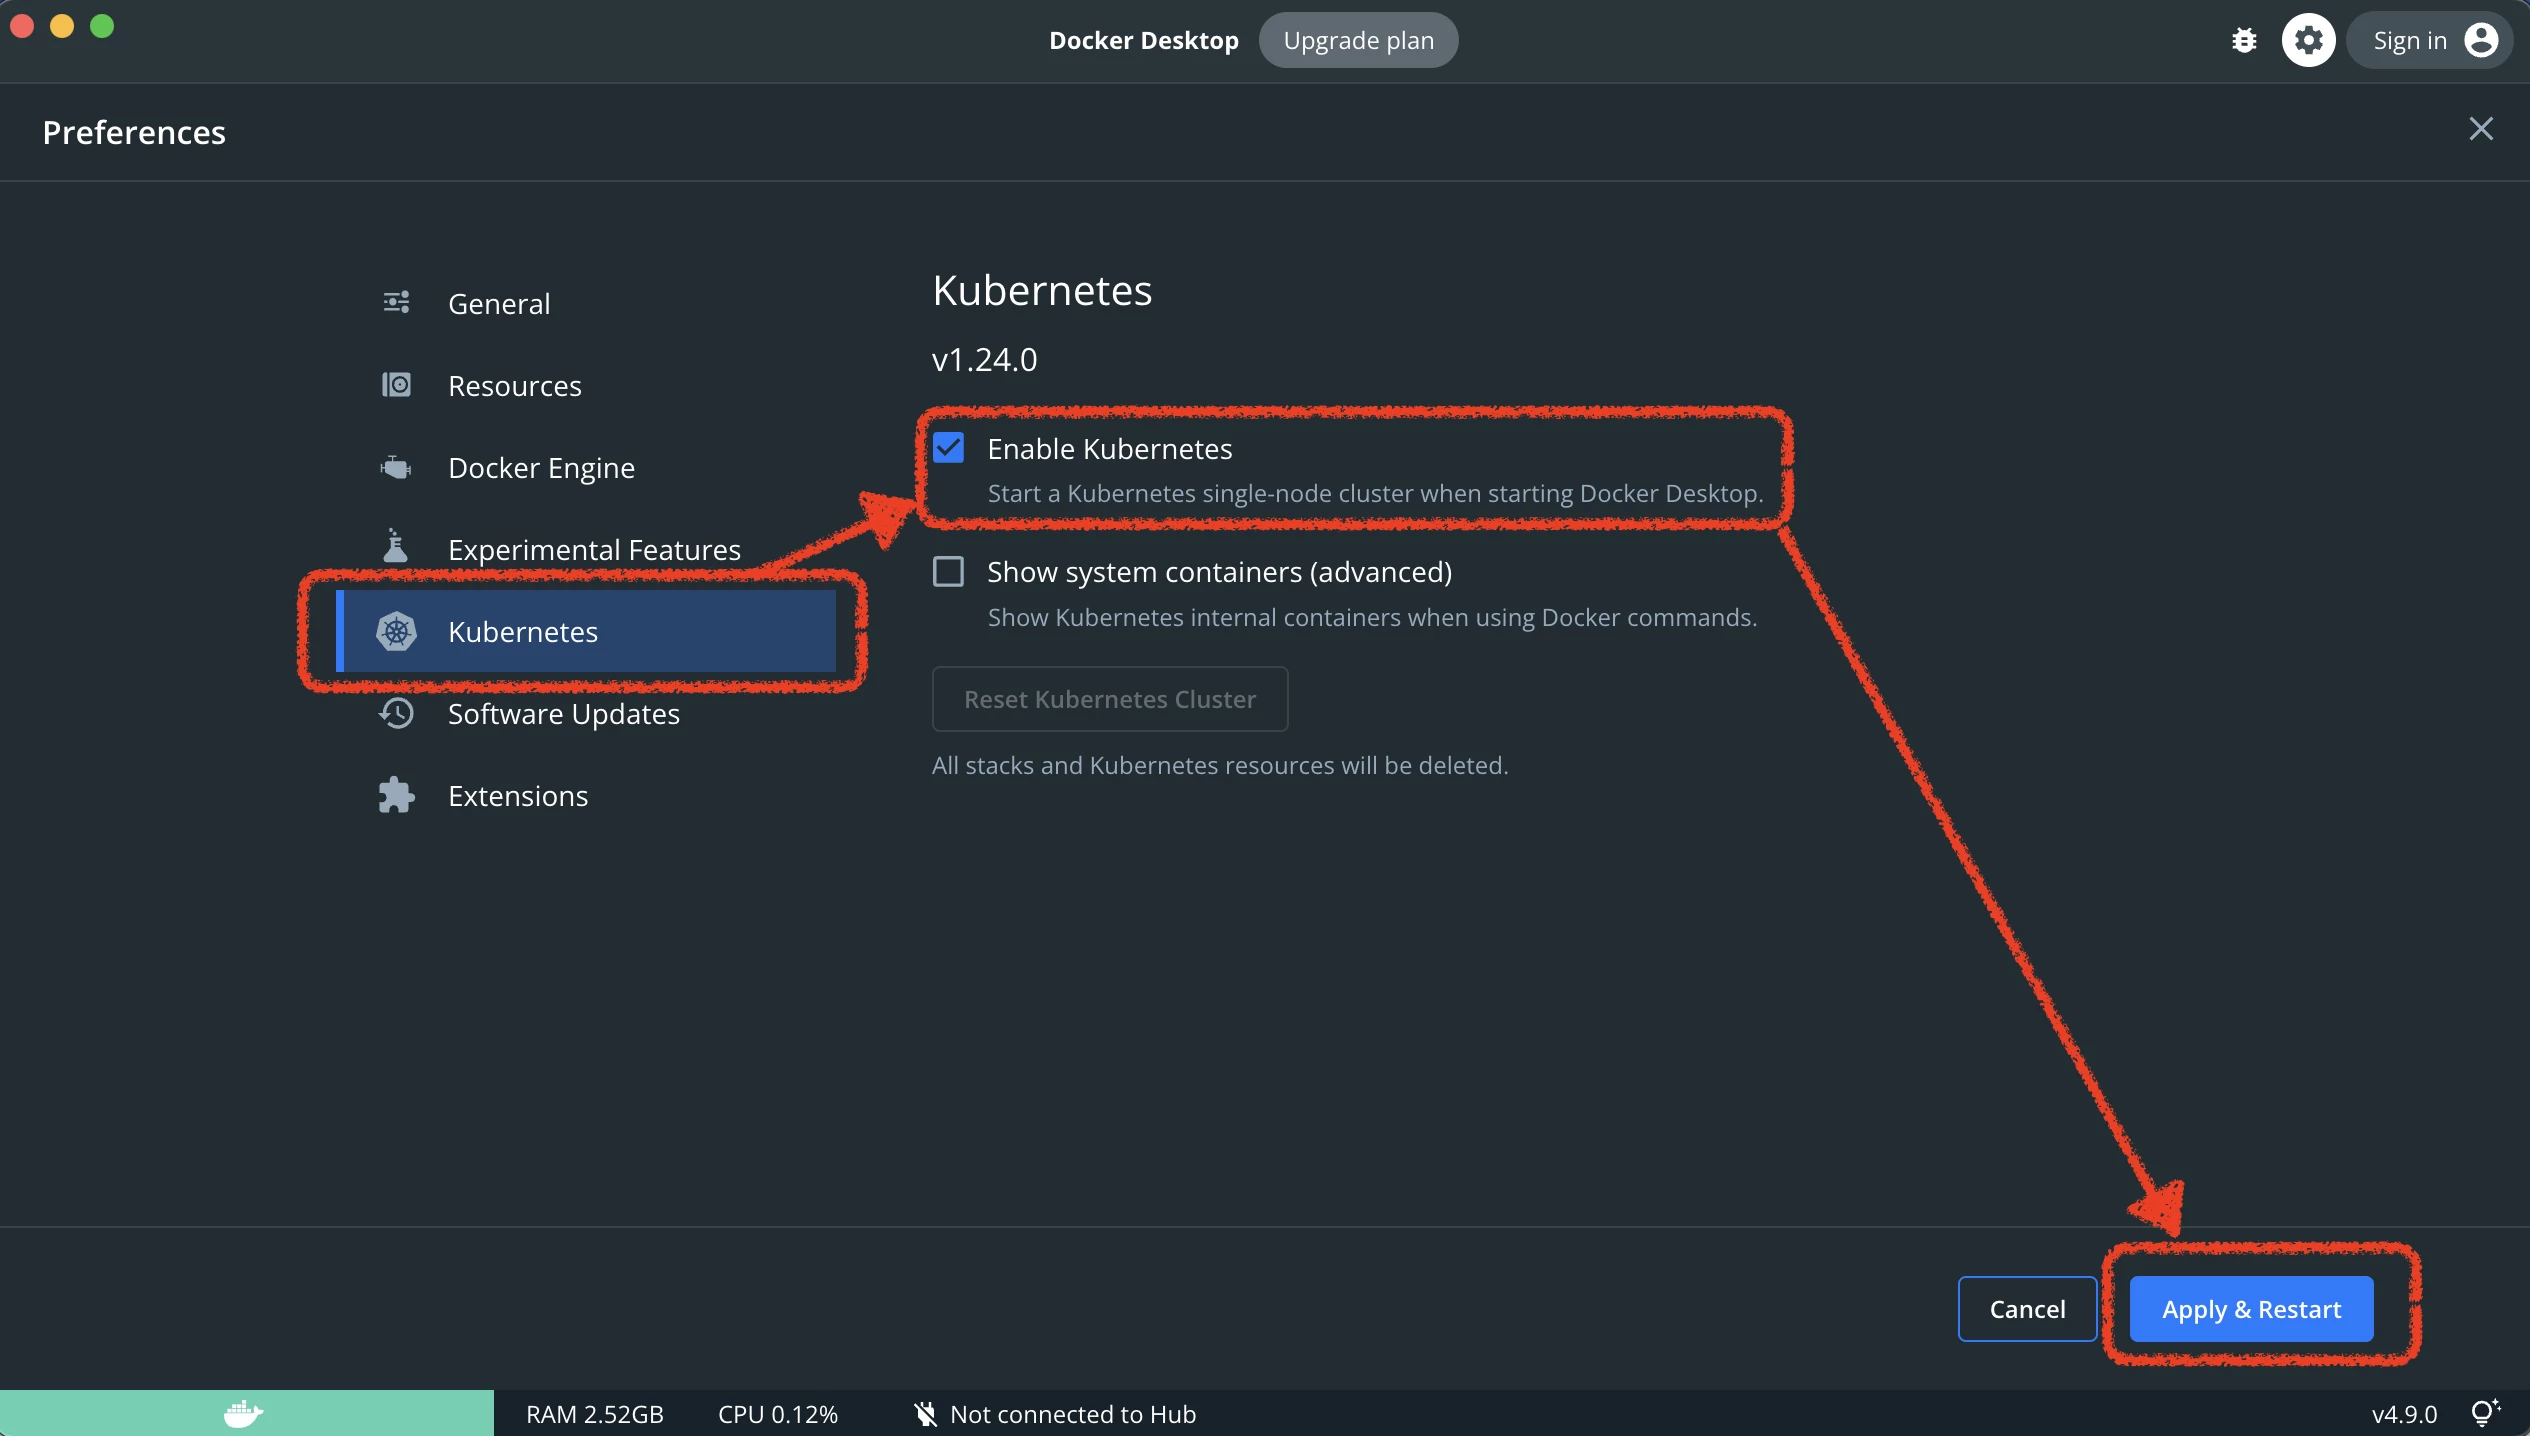
Enable Kubernetes and click Apply and Restart:
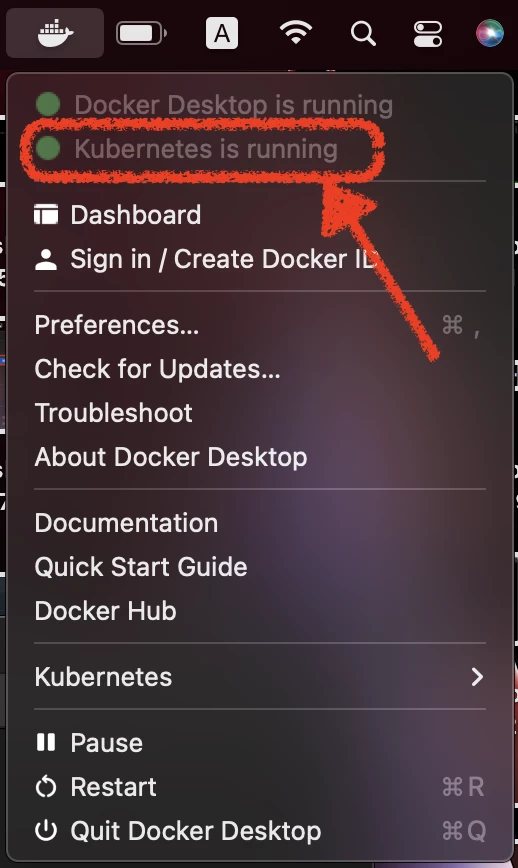
Click the Docker icon at the top menu bar and ensure the Kubernetes is running:
Open the terminal and check on the Kubernetes nodes. The status should be Ready:
kubectl get nodes
Deploy the first application on Kubernetes
We are going to deploy the same official latest nginx images at Kubernetes. Execute the following command:
kubectl run mynginx --image=nginx:latestExecute the following command to check on the application. Its status should be Running. On a slow machine this will take some time and we might need to do this multiple times.
kubectl get podExecute the following command to create the Kubernetes service resource for the application. A service in Kubernetes serves as an internal named load balancer.
kubectl expose pod mynginx --port 80Execute the following command to redirect the localhost network to the Kubernetes network. By doing this we can curl or access the application from localhost:{port}. This is a foreground process, so it needs to be left open.
kubectl port-forward service/mynginx 8080:80Open another terminal to curl localhost:8080 or open the address in a web browser.
curl http://localhost:8080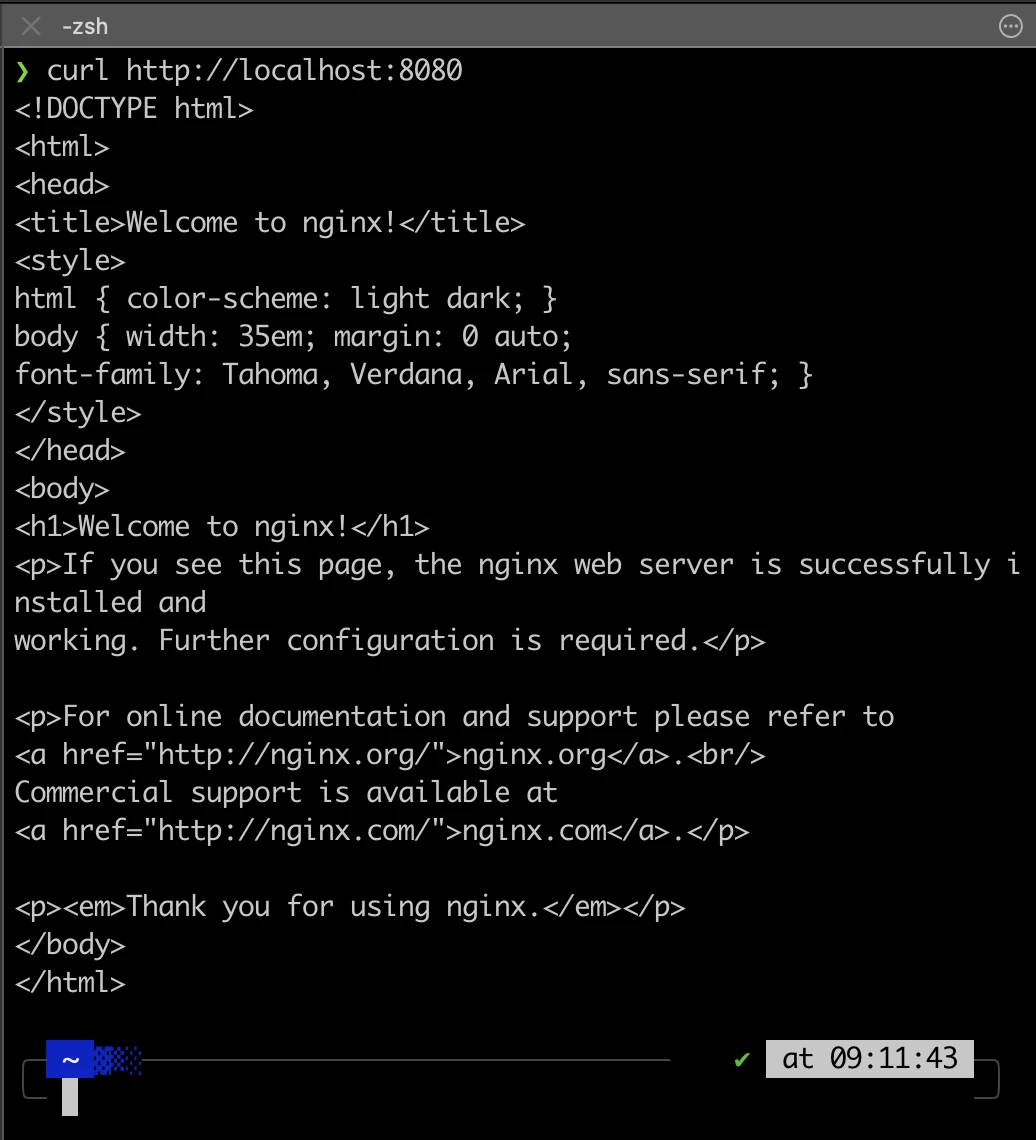
In a browser:

Clean up the Kubernetes resources
Ctrl-C at the port-forwarding process in the terminal and list all the running Kubernetes resources. We should see our application in a pod and its services:
kubectl get all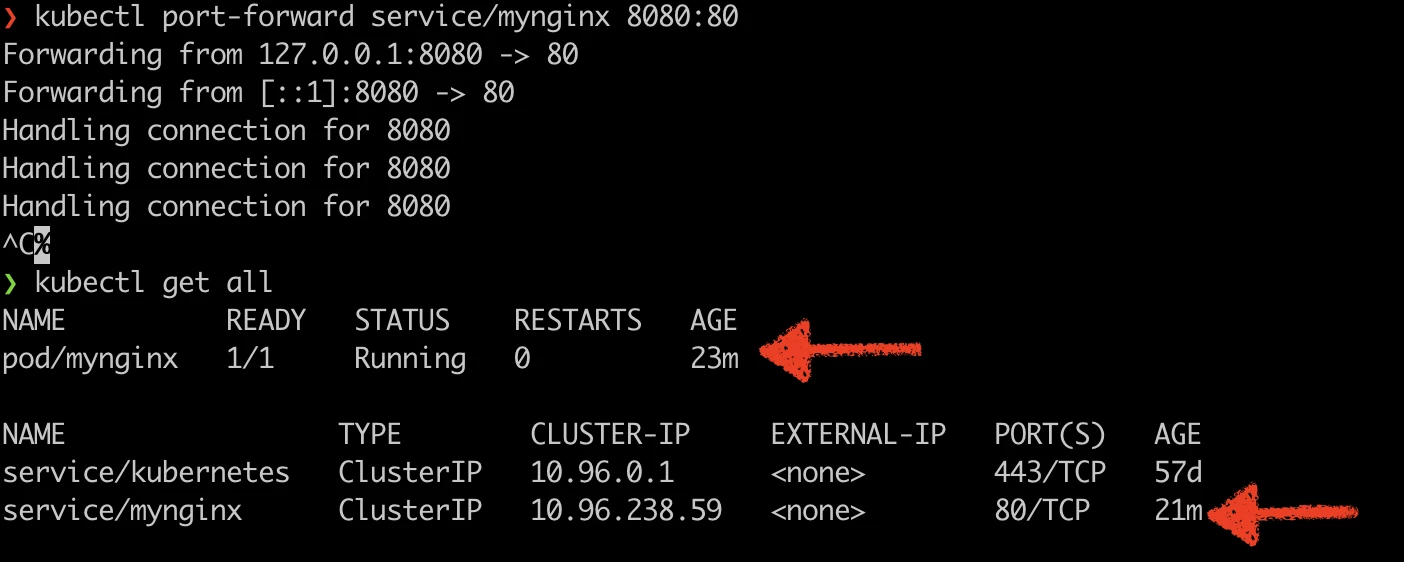
Now we need to delete these resources.
To delete the service:
kubectl delete service/mynginxTo delete the application:
kubectl delete pod/mynginxNow list back all resources. The mynginx-related resources should not be displayed.
kubectl get all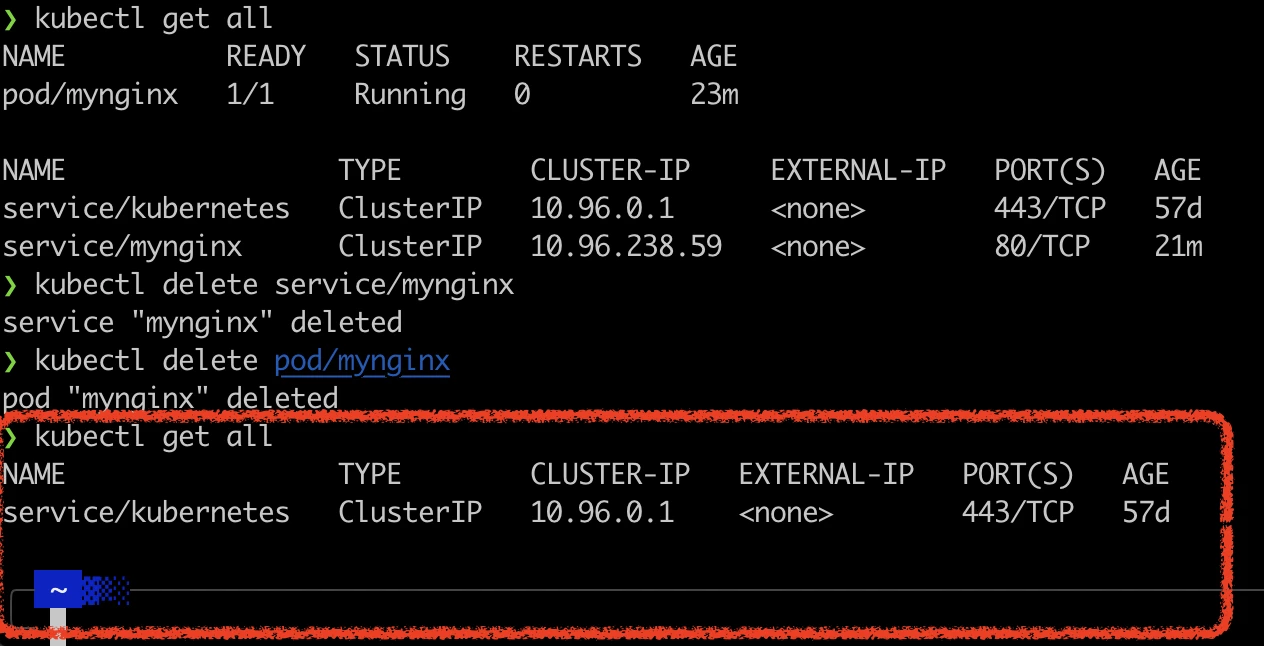
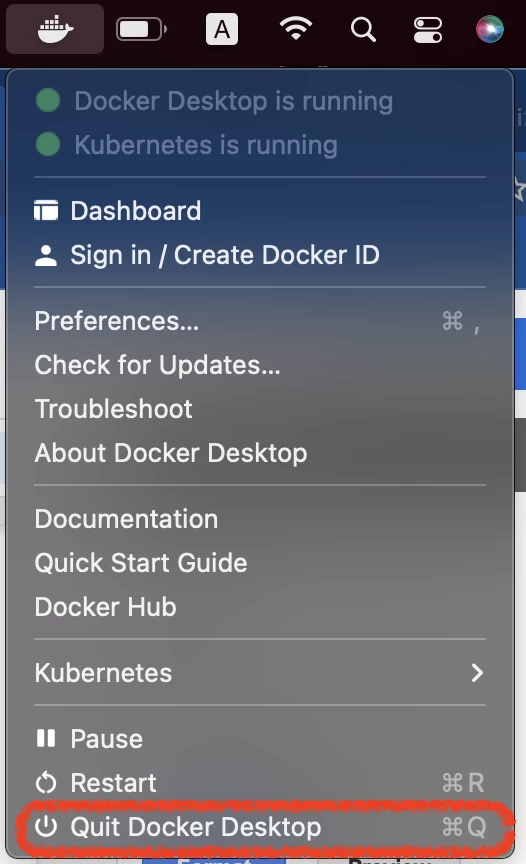
To stop Docker Desktop
If we are done with Docker Desktop we can stop its services by going to the top menu bar and selecting the Quit Docker Desktop option. This will stop Docker and Kubernetes services.
That’s all, folks. We now have the tools to learn and explore Docker and Kubernetes in our own local host.
Now we may proceed with the official documentation and other tutorials to continue on the path to learn Docker and Kubernetes.
Comments