Forwarding Google Forms responses to an external API

By Afif Sohaili
November 16, 2021

Google Forms is a great form service that many people use for surveys, research, questionnaires, etc. It has an intuitive and flexible interface for building forms and is fairly easy to use for everyone. Once you get a response, you can view the results in the admin section of the form or in a Google Sheets document in which Google will automatically insert all your responses.
However, you may need to do something else with the responses. For example, what if you want to have the response printed in your Slack channel or Discord server? Or what if you want to use the raw data to make more complex visualizations than Google Sheets is capable of?
Google Apps Script to the rescue!
Google Apps Script is a development platform for building add-ons for Google products, such as Google Sheets, Google Docs, and Google Forms. You write your JavaScript in the code editor that Google provides for you, so there is nothing to install on your local machine to start developing. This code then gets executed on Google’s servers. These Google Apps Script projects can then be published as a Google Workspace add-on that others can use or shared within your organization.
Even though Google Apps Script is basically just JavaScript, there are a few key differences from a Node.js project. For example, in a Node.js environment you could use the https module to send an HTTP request to another external service (or you could grab a package like axios or node-fetch that can do the same thing). In Google Apps Script, however, you cannot use the https module because it is not a Node.js project per se and does not provide you with the ability to install external NPM packages. Instead, there is a limited set of standard libraries that comes built-in within a Google Apps Script project.
1. Start a new Google Apps Script project
- Head to Google Forms and create a new form.
- Click the triple-dots icon at the top-right corner of the form and choose “Script Editor”.
- You should now see the Google Apps Script editor. Great! Let’s change the project name to something more descriptive (e.g. “Forward to API”).
2. Add triggers to the script for initialization
Google Apps Script allows you to install triggers to the current form. The ones we are interested in right now are onOpen, which runs when a user that has edit access opens the form, and onInstall, which runs when a user installs the add-on in the Google Forms form. There are other events that you might be interested in listed here.
We will also need to provide a way for users to set the outgoing URL for each response. The easiest would be to hardcode it in the code, but we can make our add-on a little bit more configurable; let’s also create a sidebar that contains the configuration interface for the users to change the settings for our add-on, in this case the destination URL for the responses.
Now, in the Google Apps Script code editor, paste the following code:
/**
 * Adds a custom menu to the active form to show the add-on sidebar.
 */
function onOpen(e) {
  FormApp.getUi()
    .createAddonMenu()
    .addItem('Configure', 'showSidebar')
    .addToUi();
}

/**
 * Runs when the add-on is installed.
 */
function onInstall(e) {
  onOpen(e);
}

/**
 * Opens a sidebar in the form containing the add-on's user interface for
 * configuring the notifications this add-on will produce.
 */
function showSidebar() {
  var sidebarPage = HtmlService.createHtmlOutputFromFile('sidebar')
    .setTitle('Your add-on configuration');
  FormApp.getUi().showSidebar(sidebarPage);
}

// Save settings

// Load settings
First, we would like to have a menu item on the form to access the add-on. This is done through the createAddonMenu().addItem function within the onOpen trigger. We also have the onInstall trigger that does the same thing as what onOpen is doing. With these, both installing the add-on for the first time and opening the form creates an add-on menu item called “Configure”.
createAddonMenu().addItem accepts two arguments, a label (Configure) and a function name to be executed when the item is selected (showSidebar). In the code above, it will run the showSidebar function. showSidebar initializes the add-on’s view by loading and running the HTML file we specified in createHtmlOutputFromFile. Since we are passing sidebar to the function, it will automatically assume the filename sidebar.html and load the file from our project.
3. Adding the configuration sidebar
In the previous step, we specified our menu item to show the sidebar. Now, let’s go ahead and create a new file called sidebar.html.
- On the Files panel, click the
+icon and chooseHTMLin the dropdown menu. - Name the file
sidebar.htmlwhen prompted. This is important as we have specified the namesidebarto thecreateHtmlOutputFromFilefunction withinshowSidebar. - Open the HTML file and paste the following HTML content:
<!DOCTYPE html>
<html>
  <head>
    <base target="_top">
    <style>
      body {
        font-family: sans-serif;
        font-size: 14px;
      }

      input {
        border: 1px solid #3f3f3f;
        padding: 0.25rem;
        width: 100%;
      }

      #error {
        margin-top: 0.5rem;
      }

      .input-field {
        margin-bottom: 1rem;
      }
    </style>
  </head>
  <body>
    <form>
      <div class="input-field">
        <label for="url">URL to send responses to:</label>
        <input id="url" type="text" name="url" placeholder="e.g. https://some-api.com/accept/responses"/>
      </div>
      <div class="block" id="button-bar">
        <button class="action" id="save-settings">Save</button>
        <p id="response"></p>
      </div>
    </form>

    <script src="//ajax.googleapis.com/ajax/libs/jquery/3.6.0/jquery.min.js">
    </script>
    <script>
    // Our JavaScript code
    </script>
  </body>
</html>
Test your sidebar
- Go back to your Google Forms form and refresh. You should now get an add-on menu on your form, with your add-on listed in the dropdown.
- Choose your add-on and click “Configure”. This is the add-on menu item that we declared in step 1.
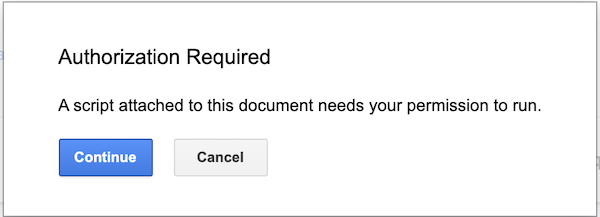
- You should now be prompted to authorize the script. Follow the instructions to allow the script permission to run on your Google Forms forms.
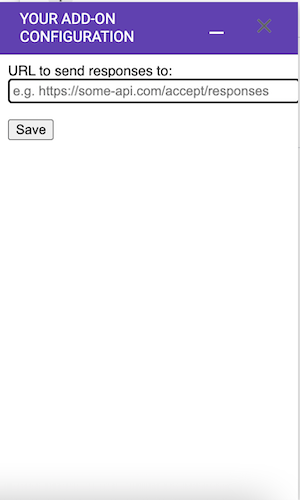
- Once you’re done, go to the add-on menu, choose your add-on, and choose “Configure” again. You should now see a sidebar on the right side of the form with a text field to fill in the destination URL and a submit button to save the settings.
4. Saving your configuration
Now we need to be able to save the URL we want to send the responses to and create a form trigger out of that. Let’s go ahead and add that:
Add the following script in the <script> block under the // Our JavaScript code comment.
// sidebar.html
$(function() {
  // Load settings from the server
  loadSettingsAndPopulateForm();

  // Listen to 'submit' event
  $('form').submit(saveSettingsToServer);
});

function loadSettingsAndPopulateForm() {
  google.script.run
      .withSuccessHandler(
        function(settings) {
          $('#url').val(settings.url)
        })
      .withFailureHandler(
        function(msg) {
          $('#response').text('Failed to fetch settings. ERROR: ' + msg);
        })
      .fetchSettings();
}

function saveSettingsToServer(event) {
  event.preventDefault();
  var button = $(this).find('button');
  button.attr('disabled', 'disabled');
  var settings = {
    'url': $('#url').val(),
  };

  // Save the settings on the server
  google.script.run
      .withSuccessHandler(
        function(msg, button) {
          button.removeAttr('disabled');
          $('#response').text('Saved settings successfully');
        })
      .withFailureHandler(
        function(msg, button) {
          button.removeAttr('disabled');
          $('#response').text('Failed to save settings. ERROR: ' + msg);
        })
      .withUserObject(button)
      .saveSettings(settings);
}
// Code.gs
/**
* Used by the client-side via `google.script.run` to save setings from the form.
*/
function saveSettings(settings) {
PropertiesService.getDocumentProperties().setProperties(settings);
// adjustFormSubmitTrigger();
}
/**
* Used by the client-side via `google.script.run` to load saved setings.
*/
function fetchSettings() {
return PropertiesService.getDocumentProperties().getProperties();
}Now, let’s go through the code:
The $(function() {}) block is run at document load. Two things happen here:
- The
loadSettingsAndPopulateFormfunction runs thefetchSettingsfunction from the backend. Then it populates the text input field#urlwith the saved settings. - It installs an event listener on the configuration form submit to save the settings to the server. This listener, the
saveSettingsToServerfunction, gathers all the values from the input fields, and runs thesaveSettingsfunction on the backend, with the input field values as the arguments.
google.script.run
google.script.run is the glue between frontend (the *.html files) and the backend (the *.gs) files. Once you declare a function (e.g. doStuff) on backend, you can use the function through google.script.run.doStuff from the frontend. withSuccessHandler and withFailureHandler are where you supply the callbacks for successful calls and failed calls to the backend respectively.
To see more, read the documentation.
5. Installing the form submit event handler
Now that we’re able to pinpoint the address we want send the form data to, we can start instructing Google Forms to send the data our way when someone submits the form. In order to do that, we:
- Code the form submit trigger to submit the data on the form response.
- If there’s no existing form submit trigger and the URL is set, install the form submit trigger.
- If there is an existing form submit trigger and the URL is unset, remove the trigger.
Let’s write the form submit trigger first. Paste this code at the end of Code.gs:
function sendResponse(e) {
  var data = {
    "form": {
      "id": e.source.getId(),
      "title": e.source.getTitle() ? e.source.getTitle() : "Untitled Form",
      "is_private": e.source.requiresLogin(),
      "is_published": e.source.isAcceptingResponses(),
    },
    "response": {
      "id": e.response.getId(),
      "email": e.response.getRespondentEmail(),
      "timestamp": e.response.getTimestamp(),
      "data": e.response.getItemResponses().map(function(y) {
        return {
          h: y.getItem().getTitle(),
          k: y.getResponse()
        }
      }, this).reduce(function(r, y) {
        r[y.h] = y.k;
        return r
      }, {}),
    }
  };

  var options = {
    method: "post",
    payload: JSON.stringify(data),
    contentType: "application/json; charset=utf-8",
  };

  var settings = PropertiesService.getDocumentProperties();
  UrlFetchApp.fetch(settings.getProperty('url'), options);
};
Let’s break it down. First, we compile the data that we want to send to our application. Form triggers accept a variable in their parameter, which we named e here. e is an Event Object, and it provides us access to the form’s information (via e.source) as well as the responses to the form (via e.response). We gather all this in an object (called data in this case) and submit it to our app via the UrlFetchApp.
UrlFetchApp is a standard library in Google Apps Script. It allows us to make HTTP requests to other applications. Here, we are doing a POST HTTP request to the URL that we set (obtained via PropertiesService.getDocumentProperties.getProperty('url')).
Adjusting the form trigger
Right now, sendResponse is not hooked to any function. Let’s hook it to the form trigger with this code:
function adjustFormSubmitTrigger() {
  var form = FormApp.getActiveForm();
  var triggers = ScriptApp.getUserTriggers(form);
  var settings = PropertiesService.getDocumentProperties();
  var url = settings.getProperty('url')
  var triggerNeeded = url && url.length > 0;

  // Create a new trigger if required; delete existing trigger
  //   if it is not needed.
  var existingTrigger = null;
  for (var i = 0; i < triggers.length; i++) {
    if (triggers[i].getEventType() == ScriptApp.EventType.ON_FORM_SUBMIT) {
      existingTrigger = triggers[i];
      break;
    }
  }
  if (triggerNeeded && !existingTrigger) {
    var trigger = ScriptApp.newTrigger('sendResponse')
      .forForm(form)
      .onFormSubmit()
      .create();
  } else if (!triggerNeeded && existingTrigger) {
    ScriptApp.deleteTrigger(existingTrigger);
  }
}
Don’t forget to also uncomment // adjustFormSubmitTrigger in the saveSettings function.
This function is pretty straightforward. It checks if there is a URL saved in the settings and installs the form submit trigger if needed. If there is no URL saved or if it’s an empty string, then any existing form submit trigger will be deleted. Changing the URL will not do anything to the existing form submit trigger, since sendResponse will always pull the latest URL from the settings.
6. Test the triggers
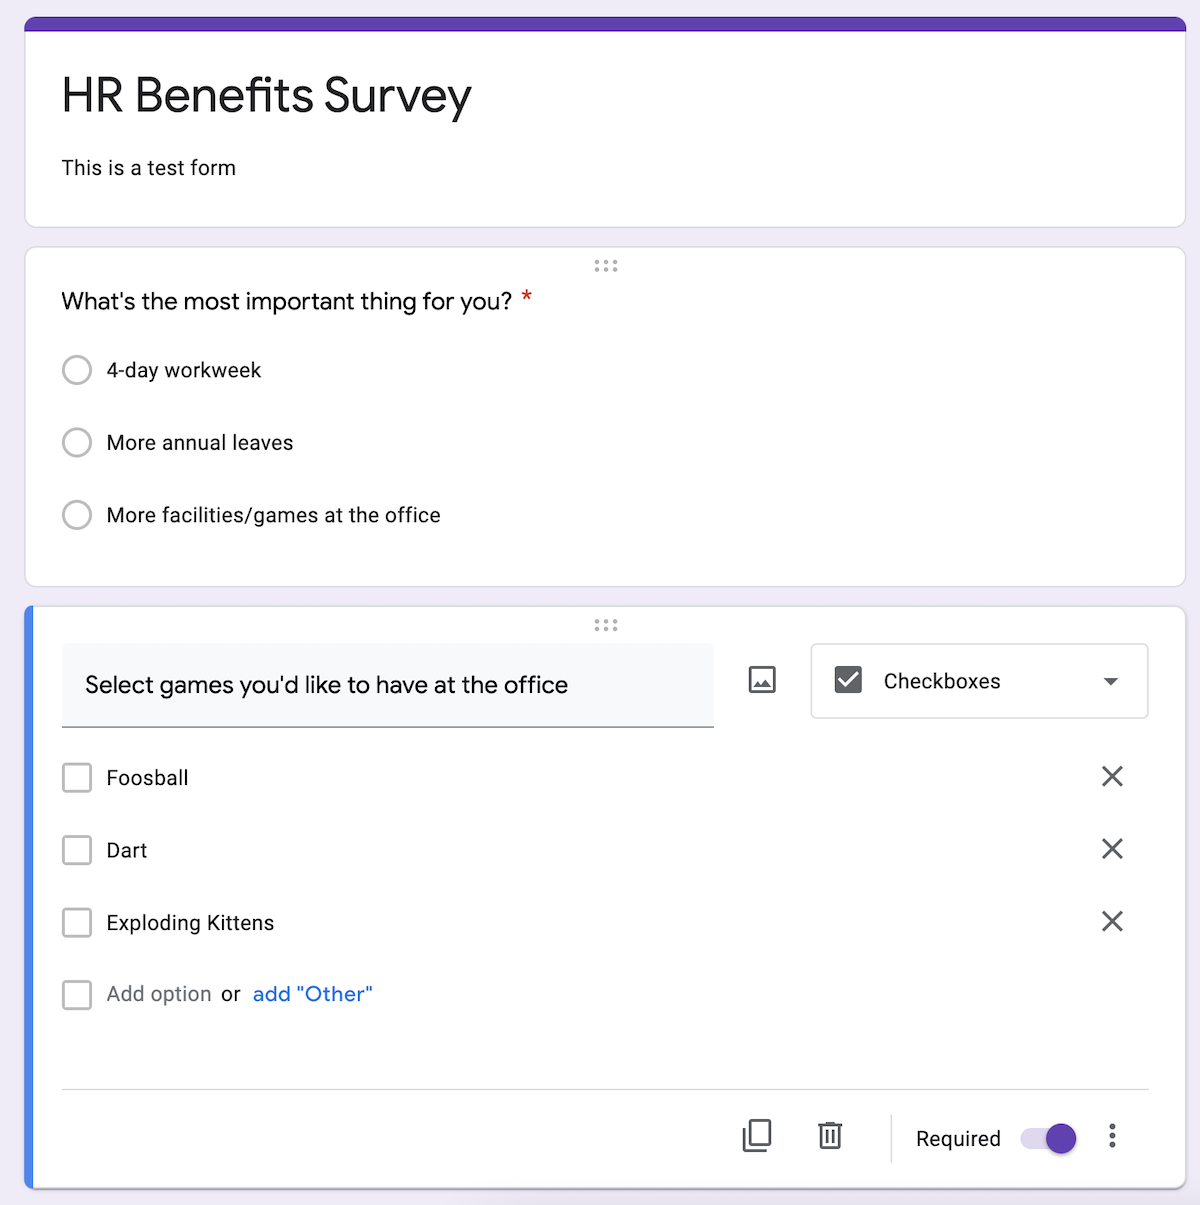
Now we can test the submission. Let’s configure our add-on with a valid URL to our app, add a couple of questions to our form, then hit Preview in the top navigation bar to test our form submit trigger.
Once we’ve filled the form, hit Submit. You should now see your form response gets sent to your destination URL as a POST request.

Here’s what I get from a simple Express app I developed to receive the response:
Example app listening at http://localhost:4000{
"form": {
"id": "1zm_anJLsYnnmI-MlRqLcEhK8Eemd90rg_oJmsThiONw",
"title": "HR Benefits Survey",
"is_private": true,
"is_published": true
},
"response": {
"id": "2_ABaOnufmy5dDzYsUl3-G5vlkQaOPoW-Jf5Wskk9SZHhXvpgnTzx6LGVq9YGDqivvo6TXpko",
"email": "",
"timestamp": "2021-11-07T08:56:08.299Z",
"data": {
"What's the most important thing for you?": "4-day workweek",
"Select games you'd like to have at the office": [
"Foosball",
"Dart"
]
}
}
}Conclusion
That’s it! We can now send Google Forms responses to our app for better data processing and visualization.
google-apps-script javascript integration google-forms
Comments