Integrating Laravel With a React Frontend

By Daniel Gomm
May 7, 2021
 Photo by Scott Webb on Unsplash
Frontend frameworks can be useful, and provide a lot of advantages over server-side rendering of views. It’s not uncommon now for websites to be purely presentational frontend applications. Thankfully Laravel provides some helpers for including a dedicated frontend, including a fantastic npm package, laravel-mix, which heavily simplifies the use of webpack.
In this article I’ll go over how to set up a new Laravel application to work with React as its frontend. While this article may focus on React, the main issues are the same regardless of framework. You’ll need to:
- Add your JavaScript application to the project’s file system and set up a build process for the frontend sources
- Write some additional code to bootstrap your frontend application once the page has loaded
- Carefully set up URL conventions to distinguish between frontend and backend routes.
Scaffolding The Frontend
In a standard Laravel 8 application (created using composer create-project laravel/laravel <NAME>), the frontend JS application is stored in the /resources/js folder. Laravel provides a helper package called laravel/ui, which can be used to scaffold the frontend with many popular frameworks, including React. To scaffold an empty React application, you can run the following:
composer require laravel/ui
php artisan ui react
This will add a new folder resources/js/components/ with a single file called Example.js in it, which contains a basic stateless functional component called Example. It’ll also add a new line to resources/js/app.js that requires the Example component. Finally, webpack.mix.js will be updated to include adding React in the build. I’ll go over what this file does in the next section.
Compiling Assets With Laravel Mix
Laravel Mix is an npm package that comes bundled with every Laravel application. It’s not Laravel specific though; you can add it to any application where you want a simple build process. It defines helpers for popular frameworks, React included. The mix.react() helper automatically handles adding in Babel to support using JSX syntax.
For Laravel, the frontend build process is configured in webpack.mix.js. By default, it includes some scaffolding code that gives you a general idea of how it can be used:
const mix = require("laravel-mix");
mix
  .js("resources/js/app.js", "public/js")
  .react()
  .sass("resources/sass/app.scss", "public/css");
To run this build process, use the npm run dev command. This will use laravel-mix to compile everything specified in webpack.mix.js. The output directory for the build is also specified there. You can also start a basic development server by running php artisan serve.
This works just fine out of the box, but one thing worth noting is that by default, it’ll package all the code, including your dependencies, in the same file: public/js/app.js. This will cause the entire dependency tree to be reloaded if you make even a single line change to your code. You can use the mix.extract() helper to put the modules into a separate file, public/js/vendor.js. This allows the browser to cache your dependencies, which won’t change too much, separately from your application, which will change much more often. Here’s how this looks in webpack.mix.js:
mix
  .js("resources/js/app.js", "public/js")
  .react()
  .extract(["react"])
  .sass("resources/sass/app.scss", "public/css");
Then, to actually include your built JavaScript sources, go to views/welcome.blade.php and add them in the header, in this order:
<head>
  . . .
  <!-- Include Frontend Application (webpack mix) -->
  <script defer src="/js/manifest.js"></script>
  <script defer src="/js/vendor.js"></script>
  <script defer src="/js/app.js"></script>
</head>
The order is important because each successive script depends on the content of the previous one being defined.
Notice that all the script tags have the defer attribute added to them. This forces the browser to wait until the DOM has fully loaded in order to execute the scripts. If you don’t add the defer attribute, you’ll end up with a blank screen when you try to load the application. This happens because the browser will, by default, run your scripts as soon as they’re loaded. And, when they’re in the head section, they get loaded before the body. So, if the script loads before the body, the root element of the React application won’t be in the DOM yet, which in turn causes the application to fail to load.
Handling Frontend Routing
The next roadblock to tackle for setting up the frontend is routing. If you’re planning to have the frontend do its own routing, you’ll need to make sure that the backend routes don’t clash with the frontend ones. You’ll also need to make sure that, for all routes that the backend doesn’t recognize, it falls back to rendering the layout page that bootstraps the frontend, and not a 404 page. If you fail to do the latter, nested frontend routes won’t work if you navigate to them directly, or refresh the page after navigating from the root URL.
One way to ensure the routes don’t clash is to add a prefix like /app/ for web routes. API routes already have the /api/ prefix set up by default, and shouldn’t pose any issues. Then, since all frontend routes won’t be recognized by Laravel, we’ll want to add a fallback route. The fallback route ensures that welcome.blade.php, which contains our root React component Example, gets rendered instead of a 404 error page for all frontend routes. We can do this by using Laravel’s Route::fallback() function in /routes/web.php:
Route::fallback(function() {
    return view(welcome);
});
Make sure you add this at the very bottom of /routes/web.php, so that it’s the last route registered by your application. This is recommended by the Laravel docs and is also good practice since this route should be the last possible route to match any given URL.
CSRF Tokens
One other thing that’s important to mention is that by default Laravel has built-in features for generating and verifying CSRF tokens. This is set up in the VerifyCsrfToken middleware class that comes bundled with a fresh application. It provides nice and easy helpers for Blade pages like @csrf to ease adding this to your forms as a hidden input. However, if you’re making forms outside of Blade in React, you might receive an error page that says 419 Page Expired when you try to submit a form or send a request:

This error happens for both vanilla HTML forms, and when sending a POST request via JavaScript, depending on the library being used. For example, I’ve encountered this issue when using jQuery, but not axios.
You can handle this in a few different ways. The easiest way is to simply add an exception for this route in your VerifyCsrfToken class:
class VerifyCsrfToken extends Middleware
{
    /**
     * The URIs that should be excluded from CSRF verification.
     *
     * @var array
     */
    protected $except = [
        "/my-route"
    ];
}
However, this removes CSRF protection entirely and in most cases, you’ll want the CSRF protection in your forms. This can be done by setting either X-XSRF-TOKEN or X-CSRF-TOKEN request headers, and also by adding a _token property to the request parameters containing the CSRF token. It’s important to note that these similarly named values are not the same thing. The XSRF token is just an encrypted version of the actual CSRF token. Laravel 8 always sets the XSRF-TOKEN cookie in the response headers by default:
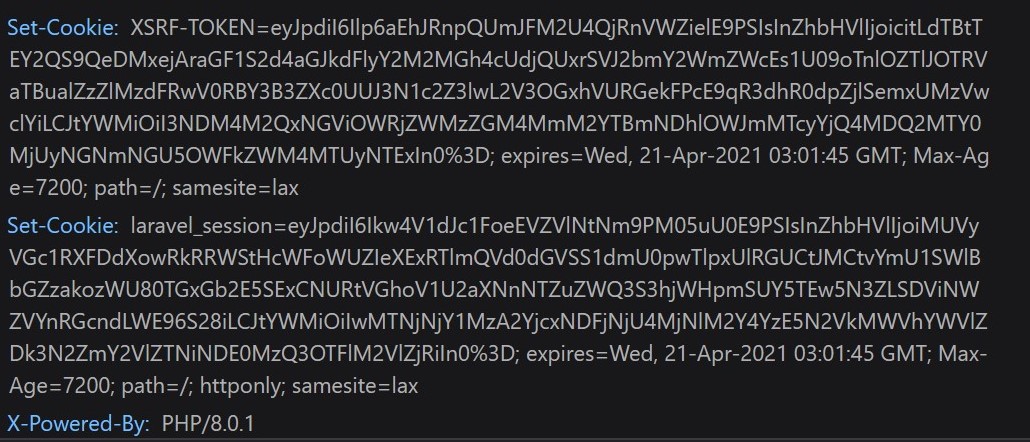
This means that XSRF-TOKEN is defined in document.cookie when the page loads. By default, axios (which is included with your new Laravel application) automatically looks for this value in the cookie, and adds it to the request headers.
Conclusion
And that’s it! I’ve found Laravel works pretty well with a dedicated frontend once you get the initial setup out of the way. Have any questions? Feel free to leave a comment!
Comments