Creating a video player with time markers — step by step

By Piotr Hankiewicz
March 17, 2016
Introduction
Today we will show you how to create a video player with time markers using JavaScript and HTML5 only. Libraries that we will use are proven to be stable enough for production projects. What we want to achieve? The final result is visible below:

To simplify (or to make it harder for some of you :)) this tutorial we won’t use any package management tools. The demo is available on Github here: https://github.com/peter-hank/video-with-markers
Requirements
We will need some libraries (all of these are free to use in commercial projects):
- Video.js — https://github.com/videojs/video.js,
- Videojs-markers plugin — https://github.com/spchuang/videojs-markers.
- jQuery — http://code.jquery.com/jquery-2.0.3.min.js
- Sample video file — http://download.blender.org/peach/bigbuckbunny_movies/BigBuckBunny_320x180.mp4
Step 1 — creating a project skeleton
Let’s create a new folder for our project and call it video-with-markers. Inside let’s create a new file called “index.html”, three folders: “css”, “js” and “var”.
We also need to copy libraries files and put it into a proper directory:
- copy https://raw.githubusercontent.com/spchuang/videojs-markers/master/dist/videojs-markers.min.js -> “js” directory,
- copy http://vjs.zencdn.net/5.0/video.min.js -> “js” directory,
- copy https://raw.githubusercontent.com/spchuang/videojs-markers/master/dist/videojs.markers.min.css -> “css” directory,
- copy http://vjs.zencdn.net/5.0/video-js.min.css -> “css” directory.
- copy http://download.blender.org/peach/bigbuckbunny_movies/BigBuckBunny_320x180.mp4 -> “var” directory.
Let’s open the index.html file and fill it with some basic structure, that will include libraries files too.
<!doctype html>
<html>
 <head>
  <meta charset="utf-8"/>
  <meta http-equiv="x-ua-compatible" content="ie=edge"/>
  <title>Video with markers</title>
  <meta name="description" content=""/>
  <meta name="viewport" content="width=device-width, initial-scale=1"/>
  <link rel="stylesheet" href="css/video-js.min.css"/>
  <link rel="stylesheet" href="css/videojs.markers.min.css"/>
  <script src="js/jquery-2.0.3.min.js"></script>
  <script src="js/video.min.js"></script>
  <script src="js/videojs-markers.min.js"></script>
 </head>
 <body>
 </body>
</html>
Step 2 — activating player and creating markers
TIP: all the further code should be put inside the body tag.
First, we need to create a video tag:
<video autoplay="" class="video-js vjs-default-skin" controls="" data-setup='{"width": 640, "height": 360}' height="360" id="example_video_1" preload="auto" width="640">
    <source src="var/BigBuckBunny_320x180.mp4" type="video/mp4"/>
 </video>
We need to set an element “id” attribute and both classes “video-js vjs-default-skin” to let player CSS apply. Other attributes are not required and are here just for demo purpose. “Data-setup” attribute is an attribute that configures multiple player options. More details can be found in the documentation here: http://docs.videojs.com/docs/guides/options.html.
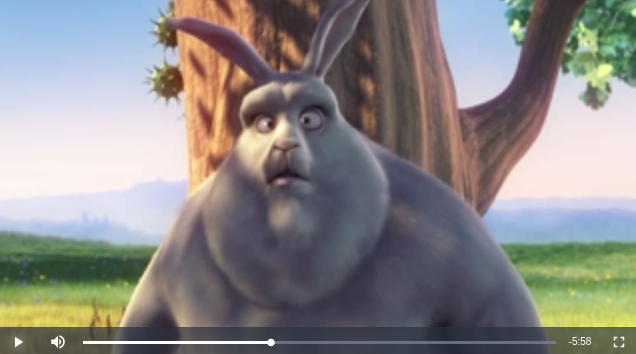
At this point after launching index.html in a browser we should see a video player like this:
The only thing left is initializing markers. We can do this by adding some JavaScript code under the video player element:
// load video object
 var video = videojs('example_video_1');

 //load markers
 video.markers({
    markers: [
        {time: 9.5, text: "this"},
        {time: 16,  text: "is"},
        {time: 23.6,text: "so"},
        {time: 28,  text: "cool"}
    ];
 });
In this part we load an object of the Video.js player to video variable and then load a list of markers. Each marker object includes time in seconds when it should be shown and marker text.
Now, markers should be visible like on my this image and markers text will be visible after pointing at it:
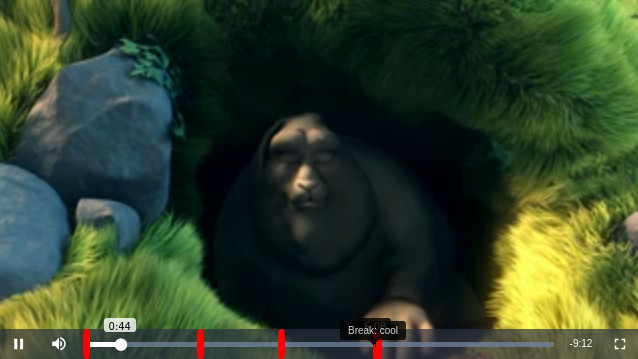
It needs some additional CSS styling to achieve a result like on the first image but it’s not much work.
The end
Almost the end. There are many more Video.js plugins ready to use, for example:
- videojs-HDtoggle — button which toggles between HD and non-HD source,
- videojs-playlist — plays videos continuously or by selecting them,
- videojs-watermark — displays a watermark on top of the video.
With not much effort most of video player functionalities can be finalized. There is always some tweaking, but at least you can have a base for creating your project. And remember, if you will find bugs, report it! And if you have implemented something cool, share it!
Thanks for reading.
Comments