Simplifying mobile development with Ionic Framework

By Kamil Ciemniewski
November 6, 2014
My high school math teacher used to say that mathematicians are the laziest people on Earth. Why? Because they always look for clever ways to simplify their work.
If you stop and think about it, all that technology is, is just simplification. It’s taking the infinitely complex world and turning it into something sterile and simple. It’s all about producing simple models with a limited number of elements and processes.
Today I’d like to walk you through creation of a mobile app that could be used on iOS, Android or Windows Phone. We’ll use a very cool set of technologies that allow us to switch from using multiple languages and frameworks (Objective-C for iOS, Java for Android and C# for Windows Phone) to just using HTML, CSS and JavaScript.
Let’s start turning complex into simple!
PhoneGap and Ionic Framework
Creating the project
In order to be able to start playing along, you need to get yourself a set of toys. Assuming that you’ve got NodeJS and Npm installed already, all you have to do is:
$ npm install -g cordova ionicNow you should be able to create the project’s scaffold. We’ll be creating a simple app that will list all the latest cartoons from the xkcd blog. Let’s call it Cartoonic.
Ionic comes with a handy tool called ‘ionic’. It allows you to create a new project as well as perform some automated project-structure-management tasks. The project creation task accepts a ‘skeleton’ name that drives an initial layout of the app. Possible options are: ‘blank’, ‘tabs’ and ‘sidemenu’.
We’ll be creating an app from scratch so:
$ ionic start Cartoonic blankThe framework gives you an option of whether you want to use Sass or just plain old Css. To turn Sass on for the project run:
$ cd Cartoonic && ionic setup sassAll went well, but now let’s see if it works well. For this, Ionic gives you an ability to test your app in the browser, as if it were a screen of your mobile device. To run the app in the browser now:
$ ionic serve
Working with the app layout
We need to let all users know what a cool name we’ve chosen for our app. The default one provided by the scaffold wouldn’t work well. Also we’d like the color of the header to be blue instead of the default white.
In order to do so you can take a look at the CSS documentation for different aspects of the UI:
https://ionicframework.com/docs/components/#header
--- a/www/index.html
+++ b/www/index.html
@@ -21,8 +21,8 @@
     <ion-pane>
-      <ion-header-bar class="bar-stable">
-        <h1 class="title">Ionic Blank Starter</h1>
+      <ion-header-bar class="bar-positive">
+        <h1 class="title">Cartoonic</h1>
       </ion-header-bar>
       <ion-content>
       </ion-content>
So far so good, now let’s play with the list of cartoons:
--- a/scss/ionic.app.scss
+++ b/scss/ionic.app.scss
+.cartoon {
+  text-align: center;
+  box-shadow: 1px 1px 2px rgba(0, 0, 0, 0.2);
+  width: 96%;
+  margin-left: 2%;
+  margin-top: 2%;
+  margin-bottom: 2%;
+
+  img {
+    width: 90%;
+  }
+}

--- a/www/index.html
+++ b/www/index.html
+        <ion-list>
+          <ion-item class="item-divider">Where Do Birds Go</ion-item>
+          <ion-item class="cartoon">
+            <img src="http://imgs.xkcd.com/comics/where_do_birds_go.png" alt="">
+          </ion-item>
+          <ion-item class="item-divider">Lightsaber</ion-item>
+          <ion-item class="cartoon">
+            <img src="http://imgs.xkcd.com/comics/lightsaber.png" alt="">
+          </ion-item>
+        </ion-list>
       </ion-content>
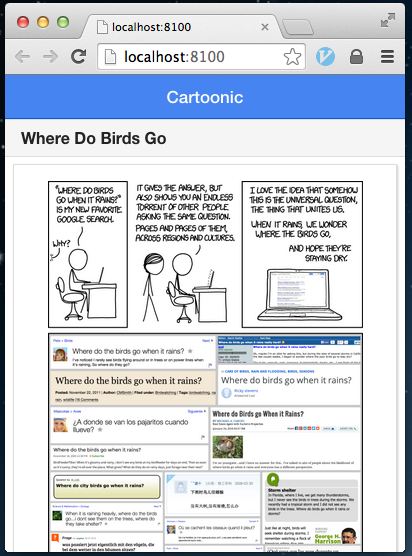
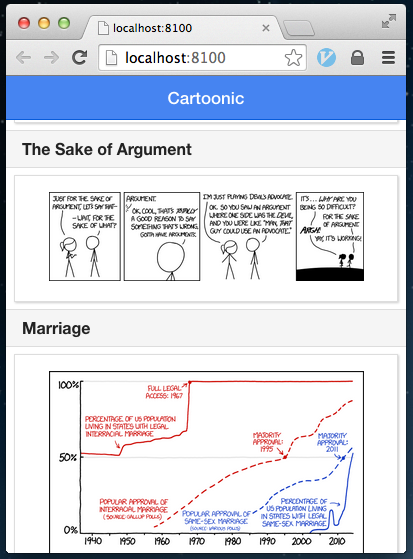
Alright, we’ve got the list that’s looking quite nice. The data behind is static, but for now we just wanted to make sure the look&feel is good.
Using AngularJS to manage the app
Ionic is built around the fantastic AngularJS framework. That’s our means of developing the logic behind. We need to make the list of cartoons use real data from the Xckd blog RSS feed. We also need to enable tapping on images to see the picture in the browser (so it can be zoomed in).
Let’s start with making the UI use dynamically bound data that we can operate on with JavaScript. In order to do so, we need to add a controller for our view. We also need to specify the data binding between the markup we’ve created previously and the variable in the controller that we intend to use as our data store.
--- a/www/index.html
+++ b/www/index.html
     <script src="js/app.js"></script>
+    <script src="js/controllers.js"></script>
   </head>
-  <body ng-app="starter">
+  <body ng-app="starter" ng-controller="CartoonsCtrl">

(...)

       <ion-content>
         <ion-list>
-          <ion-item class="item-divider">Where Do Birds Go</ion-item>
-          <ion-item class="cartoon">
-            <img src="http://imgs.xkcd.com/comics/where_do_birds_go.png" alt="">
-          </ion-item>
-          <ion-item class="item-divider">Lightsaber</ion-item>
-          <ion-item class="cartoon">
-            <img src="http://imgs.xkcd.com/comics/lightsaber.png" alt="">
+          <ion-item class="item-divider" ng-repeat-start="cartoon in cartoons">{{ cartoon.title }}</ion-item>
+          <ion-item class="cartoon" ng-repeat-end>
+            <img ng-src="{{ cartoon.href }}" alt="">
           </ion-item>
         </ion-list>
       </ion-content>

--- a/www/js/app.js
+++ b/www/js/app.js
-angular.module('starter', ['ionic'])
+angular.module('starter', ['ionic', 'starter.controllers'])

--- /dev/null
+++ b/www/js/controllers.js
+angular.module('starter.controllers', [])
+
+.controller('CartoonsCtrl', function($scope) {
+  $scope.cartoons = [
+    {
+      href: "http://imgs.xkcd.com/comics/where_do_birds_go.png",
+      id: 1434,
+      title: "Where Do Birds Go"
+    },
+    {
+      href: "http://imgs.xkcd.com/comics/lightsaber.png",
+      id: 1433,
+      title: "Lightsaber"
+    }
+  ];
+});
You can notice that “ng-controller” directive has been added to the body element. It points at the newly created controller, which we’re loading with a script tag and making available to the rest of the app by including its module (starter.controllers) in the ‘starter’ module’s dependencies list.
Let’s implement opening the picture upon the tap:
--- a/www/index.html
+++ b/www/index.html
       <ion-content>
         <ion-list>
           <ion-item class="item-divider" ng-repeat-start="cartoon in cartoons">{{ cartoon.title }}</ion-item>
-          <ion-item class="cartoon" ng-repeat-end>
+          <ion-item class="cartoon" ng-repeat-end ng-click="openCartoon(cartoon)">
             <img ng-src="{{ cartoon.href }}" alt="">
           </ion-item>
         </ion-list>

--- a/www/js/controllers.js
+++ b/www/js/controllers.js
@@ -13,4 +13,8 @@ angular.module('starter.controllers', [])
       title: "Lightsaber"
     }
   ];
+
+  $scope.openCartoon = function(cartoon) {
+    window.open(cartoon.href, '_blank', 'location=no');
+  };
 });
That was simple wasn’t it? We’ve just added the ng-click directive making the click/tap event bound to the openCartoon function from the scope. This function in turn is using window.open passing ‘_blank’ as target. Et voilà!
Now, let’s implement loading images from the real feed:
--- a/www/index.html
+++ b/www/index.html
     <script src="cordova.js"></script>
+    <script type="text/javascript" src="https://www.google.com/jsapi"></script>
+    <script type="text/javascript">
+      google.load("feeds", "1");
+    </script>

     <!-- your app's js -->
     <script src="js/app.js"></script>
     <script src="js/controllers.js"></script>
+    <script src="js/services.js"></script>
   </head>
   <body ng-app="starter" ng-controller="CartoonsCtrl">

--- a/www/js/app.js
+++ b/www/js/app.js
-angular.module('starter', ['ionic', 'starter.controllers'])
+angular.module('starter', ['ionic', 'starter.controllers', 'starter.services'])

--- a/www/js/controllers.js
+++ b/www/js/controllers.js
-angular.module('starter.controllers', [])
+angular.module('starter.controllers', ['starter.services'])

-.controller('CartoonsCtrl', function($scope) {
-  $scope.cartoons = [
-    {
-      href: "http://imgs.xkcd.com/comics/where_do_birds_go.png",
-      id: 1434,
-      title: "Where Do Birds Go"
-    },
-    {
-      href: "http://imgs.xkcd.com/comics/lightsaber.png",
-      id: 1433,
-      title: "Lightsaber"
-    }
-  ];
+.controller('CartoonsCtrl', function($scope, cartoons) {
+  $scope.cartoons = [];

   $scope.openCartoon = function(cartoon) {
     window.open(cartoon.href, '_blank', 'location=no');
   };
+
+  $scope.$watch(function() {
+    return cartoons.list;
+  }, function(list) {
+    $scope.cartoons = list;
+  });
 });

--- /dev/null
+++ b/www/js/services.js
@@ -0,0 +1,26 @@
+angular.module('starter.services', [])
+
+.factory('cartoons', function($rootScope) {
+  var self = {
+    list: [],
+    url: "http://xkcd.com/rss.xml",
+
+    fetch: function() {
+      var feed = new google.feeds.Feed(self.url);
+      feed.load(function(result) {
+        $rootScope.$apply(function() {
+          if(result.status.code == 200) {
+            self.list = result.feed.entries.map(function(entry) {
+              return {
+                href: entry.content.match(/src="[^"]*/g)[0].substring(5, 100),
+                title: entry.title
+              }
+            });
+          }
+        });
+      });
+    }
+  };
+  self.fetch();
+  return self;
+});
Okay, a couple of comments here. You may wonder why have we loaded Google APIs? That’s because if we were to try to load the xml that comes from the blog’s feed, we would inevitably fail because of the “Same Origin Policy”. Basically, the Ajax request would not complete successfully and there’s nothing we can do locally about it.
Luckily, Google has created a service we can use as a middleman between our in-browser JavaScript code and blog’s web server. Long story made short: when you load the feed with Google’s Feed API - the data’s there and it’s also already parsed.
We’re also adding a custom service here. The service fetches the entries upon its initialization. And because the controller’s depending on this service - we’re guaranteed to get the data as soon as the controller is initialized. The controller is also using the $watch function to make sure it has the most recent copy of the entries list.
References:
android angular css html ios javascript mobile
Comments