Create a sales functionality within Spree 2.3 using Spree fancy

By Bianca Rodrigues
November 14, 2014
Introduction
I recently started working with Spree and wanted to learn how to implement some basic features. I focused on one of the most common needs of any e-commerce business—adding a sale functionality to products. To get a basic understanding of what was involved, I headed straight to the Spree Developer Guides. As I was going through the directions, I realized it was intended for the older Spree version 2.1. This led to me running into a few issues as I went through it using Spree’s latest version 2.3.4. I wanted to share with you what I learned, and some tips to avoid the same mistakes I made.
Set-up
I’ll assume you have the prerequisites it lists including Rails, Bundler, ImageMagick and the Spree gem. These are the versions I’m running on my Mac OS X:
- Ruby: 2.1.2p95
- Rails: 4.1.4
- Bundler: 1.5.3
- ImageMagick: 6.8.9-1
- Spree: 2.3.4
What is Bundler? Bundler provides a consistent environment for Ruby projects by tracking and installing the exact gems and versions that are needed. You can read more about the benefits of using Bundler on their website. If you’re new to Ruby on Rails and/or Spree, you’ll quickly realize how useful Bundler is when updating your gems.
After you’ve successfully installed the necessary tools for your project, it’s time to create our first Rails app, which will then be used as a foundation for our simple Spree project called mystore
Let’s create our app
Run the following commands:
$ rails new mystore
$ cd mystore
$ gem install spree_cmd
*Note: you may get a warning that you need to run bundle install before trying to start your application since spree_gateway.git isn’t checked out yet. Go ahead and follow those directions, I’ll wait.
Spree-ify our app
We can add the e-commerce platform to our Rails app by running the following command:
spree install --auto-acceptIf all goes well, you should get a message that says, “Spree has been installed successfully. You’re all ready to go! Enjoy!”. Now the fun part—let’s go ahead and start our server to see what our demo app actually looks like. Run rails s to start the server and open up a new browser page pointing to the URL localhost:3000.
*Note—when you navigate to localhost:3000, watch your terminal—you’ll see a lot of processes running in the background as the page loads simultaneously in your browser window. It can be pretty overwhelming, but as long as you get a “Completed 200 OK” message in your terminal, you should be good to go! See it below:

Our demo app actually comes with an admin interface ready to use. Head to your browser window and navigate to http://localhost:3000/admin. The login Spree instructs you to use is spree@example.com and password spree123.
Once you login to the admin screen, this is what you should see:
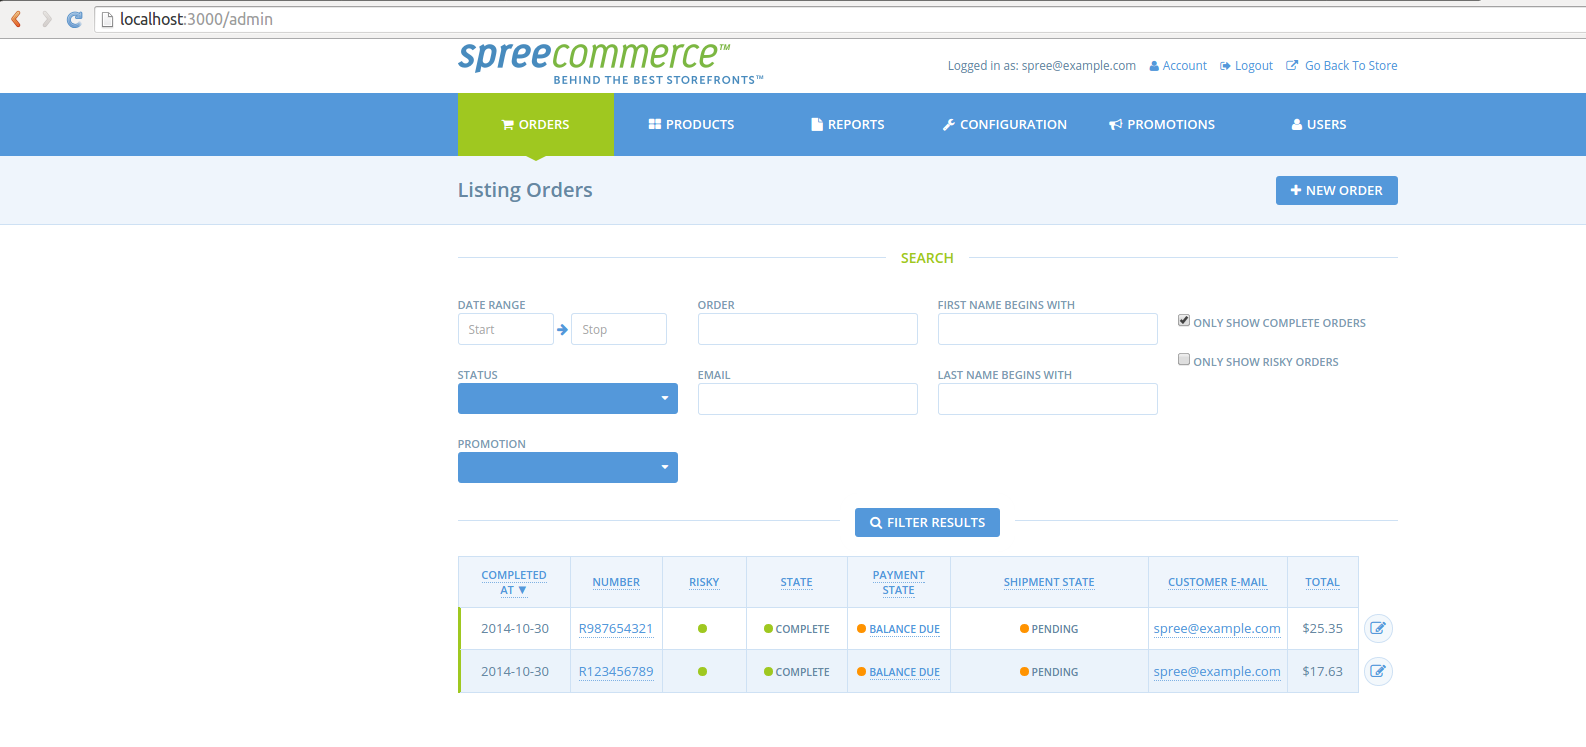
Once you begin to use Spree, you’ll soon find that the most heavily used areas of the admin panel include Orders, Products, Configuration and Promotions. We’ll be going into some of these soon.
Extensions in 3.5 steps
The next part of the Spree documentation suggests adding the spree_fancy extension to our store to update the look and feel of the website, so let’s go ahead and follow the next few steps:
Step 1: Update the Gemfile
We can find our Gemfile by going back to the terminal, and within the mystore directory, type ls to see a list of all the files and subdirectories within the Spree app. You will see the Gemfile there—open it using your favorite text editor. Add the following line to the last line of your Gemfile, and save it:
gem 'spree_fancy', :git => 'git://github.com/spree/spree_fancy.git', :branch => '2-1-stable'Notice the branch it mentions is 2-1-stable. Since you just installed Spree, you are most likely using the latest version, 2-3-stable. I changed my branch in the above gem to ‘2-3-stable’ to reflect the Spree version I’m currently using. After completing this step, run bundle install to install the gem using Bundler.
Now we need to copy over the migrations and assets from the spree_fancy extension by running this command in your terminal within your mystore application:
$ bundle exec rails g spree_fancy:installStep 1.5: We’ve hit an error!
At this point, you’ve probably hit a LoadError, and we can no longer see our beautiful Spree demo app, instead getting an error page which says “Sprockets::Rails::Helper::AssetFilteredError in Spree::Home#index” at the top. How do we fix this?
Within your mystore application directory, navigate to config/intializers/assets.rb file and edit the last line of code by uncommenting it and typing:
Rails.application.config.assets.precompile += %w ( bx_loader.gif )Now restart your server and you will see your new theme!
Step 2: Create a sales extension
Now let’s see how to create an extension instead of using an existing one. According to the Spree tutorial, we first need to generate an extension—remember to run this command from a directory outside of your Spree application:
$ spree extension simple_salesOnce you do that, cd into your spree_simple_sales directory. Next, run bundle install to update your Spree extension.
Now you can create a migration that adds a sale_price column to variants using the following command:
bundle exec rails g migration add_sale_price_to_spree_variants sale_price:decimalOnce your migration is complete, navigate in your terminal to db/migrate/XXXXXXXXXXXX_add_sale_price_to_spree_variants.rb and add in the changes as shown in the Spree tutorial:
class AddSalePriceToSpreeVariants < ActiveRecord::Migration
  def change
    add_column :spree_variants, :sale_price, :decimal, :precision => 8, :scale => 2
  end
end
Now let’s switch back to our mystore application so that we can add our extension before continuing any development. Within mystore, add the following to your Gemfile:
gem 'spree_simple_sales', :path => '../spree_simple_sales'You will have to adjust the path (’../spree_simple_sales’) depending on where you created your sales extension.
Now it’s time to bundle install again, so go ahead and run that. Now we need to copy our migration by running this command in our terminal:
$ rails g spree_simple_sales:install
Step 3: Adding a controller Action to HomeController
Once the migration has been copied, we need to extend the functionality of Spree::HomeController and add an action that selects “on sale” products. Before doing that, we need to make sure to change our .gemspec file within the spree_simple_sales directory (remember: this is outside of our application directory).
Open up the spree_simple_sales.gemspec file in your text editor
Add the following line to the list of dependencies:
s.add_dependency ‘spree_frontend’Run bundle.
Run $ mkdir -p app/controllers/spree to create the directory structure for our controller decorator. This is where we will create a new file called home_controller_decorator.rb and add the following content to it:
module Spree
  HomeController.class_eval do
    def sale
      @products = Product.joins(:variants_including_master).where('spree_variants.sale_price is not null').uniq
    end
  end
end
As Spree explains it, this script will select just the products that have a variant with a sale_price set.
Next step—add a route to this sales action in our config/routes.rb file. Make sure your routes.rb file looks like this:
Spree::Core::Engine.routes.draw do
  get "/sale" => "home#sale"
end
Let’s set a sale price for the variant
Normally, to change a variant attribute, we could do it through the admin interface, but we haven’t created this functionality yet. This means we need to open up our rails console:
*Note—you should be in the mystore directory
Run $ rails console
The next steps are taken directly from the Spree documentation:
“Now, follow the steps I take in selecting a product and updating its master variant to have a sale price. Note, you may not be editing the exact same product as I am, but this is not important. We just need one “on sale” product to display on the sales page.”
> product = Spree::Product.first
=> #<Spree::Product id: 107377505, name: "Spree Bag", description: "Lorem ipsum dolor sit amet, consectetuer adipiscing...", available_on: "2013-02-13 18:30:16", deleted_at: nil, permalink: "spree-bag", meta_description: nil, meta_keywords: nil, tax_category_id: 25484906, shipping_category_id: nil, count_on_hand: 10, created_at: "2013-02-13 18:30:16", updated_at: "2013-02-13 18:30:16", on_demand: false>

> variant = product.master
=> #<Spree::Variant id: 833839126, sku: "SPR-00012", weight: nil, height: nil, width: nil, depth: nil, deleted_at: nil, is_master: true, product_id: 107377505, count_on_hand: 10, cost_price: #<BigDecimal:7f8dda5eebf0,'0.21E2',9(36)>, position: nil, lock_version: 0, on_demand: false, cost_currency: nil, sale_price: nil>

> variant.sale_price = 8.00
=> 8.0

> variant.save
=> true
Hit Ctrl-D to exit the console.
Now we need to create the page that renders the product that is on sale. Let’s create a view to display these “on sale” products.
Create the required views directory by running:
$ mkdir -p app/views/spree/home
Create the a file in your new directory called sale.html.erb and add the following to it:
<div data-hook="homepage_products">
  <%= render 'spree/shared/products', :products => @products %>
</div>
Now start your rails server again and navigate to localhost:3000/sale to see the product you listed on sale earlier! Exciting stuff, isn’t it? The next step is to actually reflect the sale price instead of the original price by fixing our sales price extension using Spree Decorator.
Decorate your variant
Create the required directory for your new decorator within your mystore application:
$ mkdir -p app/models/spree
Within your new directory, create a file called variant_decorator.rb and add:
module Spree
  Variant.class_eval do
    alias_method :orig_price_in, :price_in
    def price_in(currency)
      return orig_price_in(currency) unless sale_price.present?
      Spree::Price.new(:variant_id => self.id, :amount => self.sale_price, :currency => currency)
    end
  end
end
The original method of price_in now has an alias of price_in unless there is a sale_price present, in which case the sale price is returned on the product’s master variant.
In order to ensure that our modification to the core Spree functionality works, we need to write a couple of unit tests for variant_decorator.rb. We need a full Rails application present to test it against, so we can create a barebones test_app to run our tests against.
Run the following command from the root directory of your EXTENSION:
$ bundle exec rake test_app
It will begin the process by saying “Generating dummy Rails application…”—great! you’re on the right path.
Once you finish creating your dummy Rails app, run the rspec command and you should see the following output:
No examples found.
Finished in 0.00005 seconds
0 examples, 0 failures
Now it’s time to start adding some tests by replicating your extension’s directory structure in the spec directory:
$ mkdir -p spec/models/spree
In your new directory, create a file called variant_decorator_spec.rb and add this test:
require 'spec_helper'

describe Spree::Variant do
  describe "#price_in" do
    it "returns the sale price if it is present" do
      variant = create(:variant, :sale_price => 8.00)
      expected = Spree::Price.new(:variant_id => variant.id, :currency => "USD", :amount => variant.sale_price)

      result = variant.price_in("USD")

      result.variant_id.should == expected.variant_id
      result.amount.to_f.should == expected.amount.to_f
      result.currency.should == expected.currency
    end

    it "returns the normal price if it is not on sale" do
      variant = create(:variant, :price => 15.00)
      expected = Spree::Price.new(:variant_id => variant.id, :currency => "USD", :amount => variant.price)

      result = variant.price_in("USD")

      result.variant_id.should == expected.variant_id
      result.amount.to_f.should == expected.amount.to_f
      result.currency.should == expected.currency
    end
  end
end
Deface overrides
Next we need to add a field to our product admin page, so we don’t have to always go through the rails console to update a product’s sale_price. If we directly override the view that Spree provides, whenever Spree updates the view in a new release, the updated view will be lost, so we’d have to add our customizations back in to stay up to date.
A better way to override views is to use Deface, which is a Rails library to directly edit the underlying view file. All view customizations will be in ONE location: app/overrides which will make sure your app is always using the latest implementation of the view provided by Spree.
- Go to mystore/app/views/spree and create an admin/products directory and create the file _form.html.erb.
- Copy the full file NOT from Spree’s GitHub but from your Spree backend. You can think of your Spree backend as the area to edit your admin (among other things)—the spree_backend gem contains the most updated _form.html.erb—if you use the one listed in the documentation, you will get some Method Errors on your product page.
In order to find the _form.html.erb file in your spree_backend gem, navigate to your app, and within that, run the command:
bundle show spree_backend
The result is the location of your spree_backend. Now cd into that location, and navigate to app/views/spree/admin/products—this is where you will find the correct _form.html.erb. Copy the contents of this file into the newly created _form.html.erb file within your application’s directory structure you just created: mystore/app/views/spree/admin/products.
Now we want to actually add a field container after the price field container for sale price so we need to create another override by creating a new file in your application’s app/overrides directory called add_sale_price_to_product_edit.rb and add the following content:
Deface::Override.new(:virtual_path => 'spree/admin/products/_form',
  :name => 'add_sale_price_to_product_edit',
  :insert_after => "erb[loud]:contains('text_field :price')",
  :text => "
    <%= f.field_container :sale_price do %>
      <%= f.label :sale_price, raw(Spree.t(:sale_price) + content_tag(:span, ' *')) %>
      <%= f.text_field :sale_price, :value =>
        number_to_currency(@product.sale_price, :unit => '') %>
      <%= f.error_message_on :sale_price %>
    <% end %>
  ")
The last step is to update our model in order to get an updated product edit form. Create a new file in your application’s app/models/spree directory called product_decorator.rb. Add the following content:
module Spree
  Product.class_eval do
    delegate_belongs_to :master, :sale_price
  end
end
Now you can check to see if it worked by heading to http://localhost:3000/admin/products and you should edit one of the products. Once you’re on the product edit page, you should see a new field container called SALE PRICE. Add a sale price in the empty field and click on update. Once completed, navigate to http://localhost:3000/sale to find an updated list of products on sale.
Conclusion
Congratulations, you’ve created the sales functionality! If you’re using Spree 2.3 to create a sales functionality for your application, I would love to know what your experience was like. Good luck!
Comments