Debugging Celery Tasks in Django Projects

By Greg Davidson
March 27, 2012
I recently had the opportunity to work on a Django project that was using Celery with RabbitMQ to handle long-running server-side processing tasks. Some of the tasks took several hours to complete. The tasks had originally been executed with the at command and others had been managed with cron jobs. The client had started to migrate several of the tasks to use Celery when I joined the project.
As I started to debug the Celery tasks, I quickly discovered there were many moving parts involved and it was not immediately clear which piece of the system was the cause of the problem. I was working in a local development environment that closely matched the production system. The dev environment consisted of a virtualenv created using the same method Szymon Guz wrote about in his article Django and virtualenvwrapper. Django, Celery and their related dependencies were installed with pip and I installed RabbitMQ with Homebrew. After activating my virtualenv and starting up everything up (or so I thought), I jumped in to an IPython shell and began to debug the tasks interactively. Some tasks completed successfully but they finished almost instantaneously which didn’t seem right. The client had experienced the same issue when they excecuted tasks on their development server.
Because I was joining an existing project in progress, the system administration and configuration had already been taken care of by other members of the team. Howerver, in the process of configuring my local development server to mimic the production systems, I learned a few things along the way, described below.
RabbitMQ
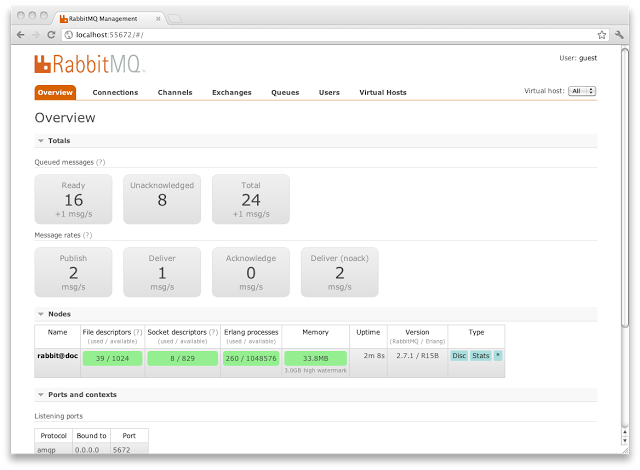
RabbitMQ is a message broker; at its most basic it sends and receives messages between sender (publisher) and receiver (consumer) applications. It’s written in Erlang which helps to make it highly parallel and reliable. The RabbitMQ web site is a great place to learn more about the project. For my purposes I needed to create a user and virtual host (vhost) and set up permissions for Celery to communicate with the RabbitMQ server. This was done with the rabbitmqctl command. I issued the following command to start up the server and let the process run in the background.
rabbitmq-server -detachedI also enabled the management plugin which provides both a web-based UI and a command line interface for managing and monitoring RabbitMQ. This is what the web-based UI looks like:
django-celery
Celery works very well with Django thanks in large part to the django-celery module. The django-celery module includes the djcelery app which can be plugged in to the Django admin site for your project. Connecting Django to Celery and RabbitMQ requires a few simple steps:
- Add djcelery to the list of INSTALLED_APPS in the settings.py file for the project.
- Add the following lines to settings.py:
import djcelery
djcelery.setup_loader()- Create the celery database tables using the syncdb management command
- Configure the broker setttings in settings.py:
BROKER_HOST = "localhost"
BROKER_PORT = 5672
BROKER_USER = "celery_user"
BROKER_PASSWORD = "celery_password"
BROKER_VHOST = "celery"
Celery
With the RabbitMQ server up and running and Django configured to connect to Celery the last few steps involved starting up the Celery worker and its related monitoring apps. The Celery daemon (celeryd) has lots of options that you can check out by running the following command:
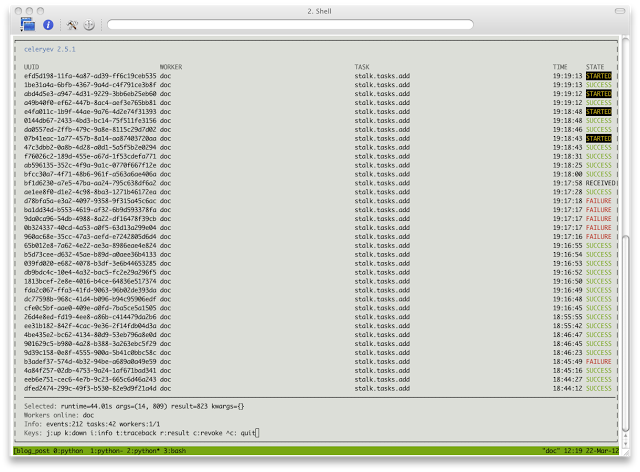
python manage.py celeryd --helpFor my purposes, I wanted Celery to broadcast events which the various monitoring applications could then subscribe to. It would also be good to print some helpful debugging info to the logs. I started up the Celery worker daemon with the following command:
python manage.py celeryd -E -loglevel=DEBUGBecause I specified the -E flag, the celeryev application could be used to monitor and manage the Celery worker inside a terminal which was very helpful:
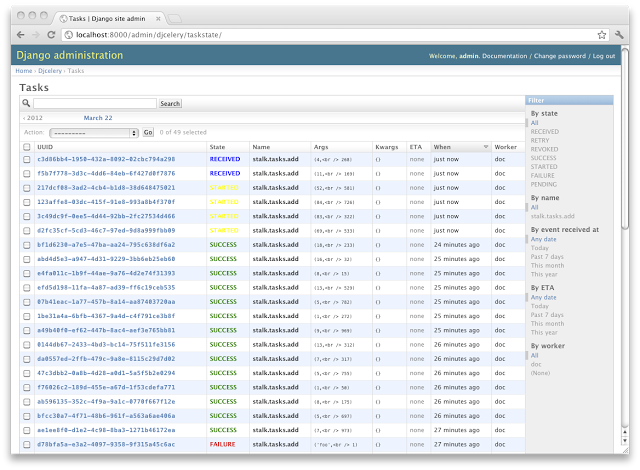
For Django to capture and save Celery task information to the database, the celerycam application needs to be running. This command line app takes a snapshot of Celery every few seconds or at an interval you specify on the command line:
python manage.py celerycamWith celerycam running, the Django admin interface is updated as Celery tasks are executed:
You can also view the detail for a particular task including any error messages from the task code:

With RabbitMQ, celeryd and celerycam ready to go, the Django development server could be started to begin testing and debugging Celery task code. To demonstrate this workflow in action, I wrote a simple Celery task that could be used to simulate how Django, Celery and RabbitMQ all work together.
from celery.decorators import task
import time
import random

# A simple task to demonstrate Celery & djcelery
@task()
def add(x, y):
    delay = random.randint(1,60)
    time.sleep(delay)
    return x + y
Tying it all Together
With everything configured, I was ready to get to work debugging some Celery tasks. I set up a dashboard of sorts in tmux to keep an eye on everything as I worked on the code for a particular task:
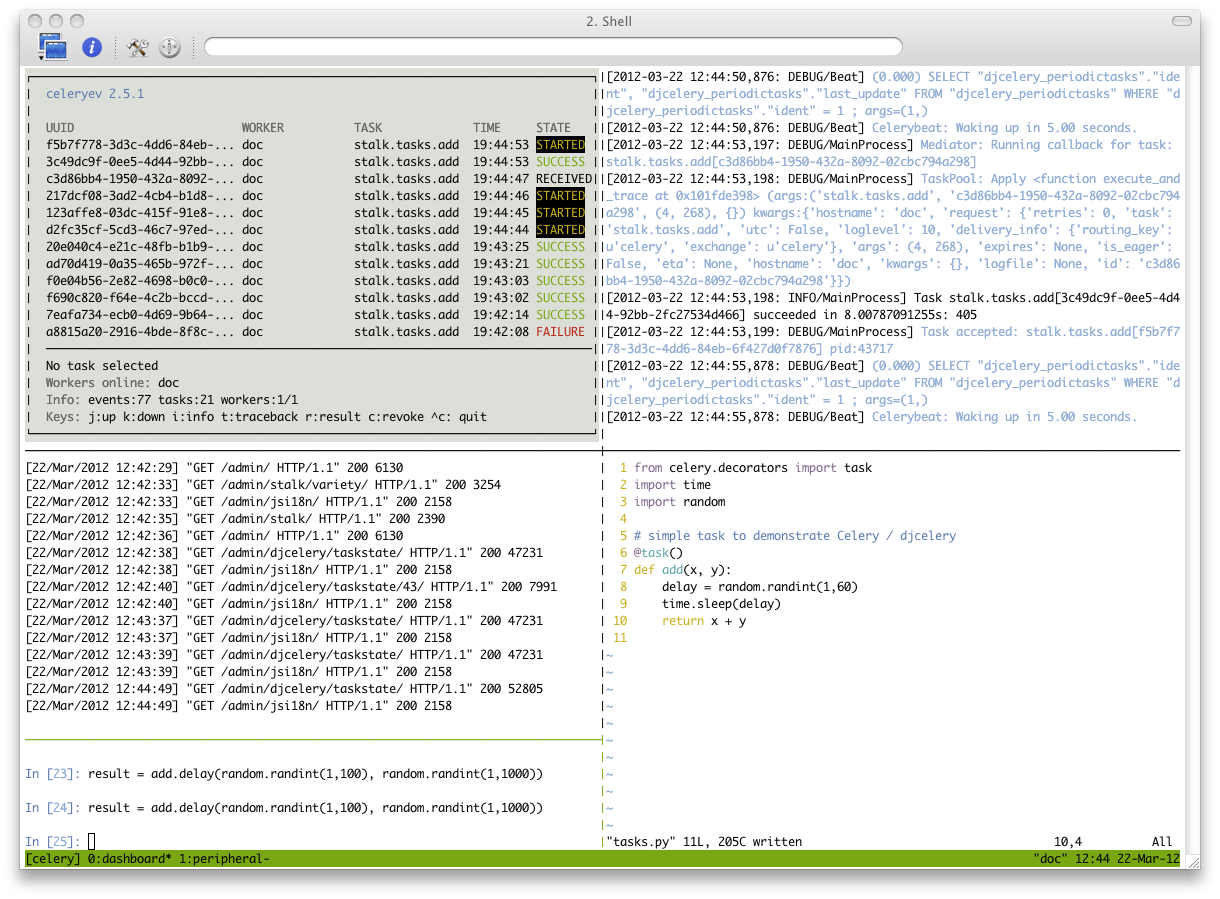
Clockwise from the bottom left you’ll see an IPython shell to debug the code interactively, the Django development server log, celeryev, Celery daemon (with debugging info) and the task code in Vim.
When I started developing task-related code I wasn’t sure why my changes were not showing up in the Celery or Djcelery logs. Although I had made some changes, the same errors persisted. When I looked into this further I found that Celery caches the code used for a particular task and re-uses it the next time said task is executed. In order for my new changes to take effect I needed to restart the Celery daemon. As of Celery version 2.5 there is an option to have Celery autoreload tasks. However, the version of Celery used in this client project did not yet support this feature. If you find yourself working with Django, Celery and RabbitMQ, I hope you’ll find this helpful.
Comments